
DeFi Guide
What is DeFi
DeFi stands for decentralised finance and is attributed to smart contracts relating to financial products or services. Examples would be Uniswap (decentralised exchange) and Aave (decentralised lending and borrowing). In Bitwave, the DeFi function allows users to track assets that have been deposited into a liquidity pool or staking contract, and categorise transactions such that those assets remain on the balance sheet and do not incur any gain/loss on deposit and withdrawal to and from the pool.
Let's take a look at a simple example:
- At the start of the month, user deposits 10 ETH into an Aave lending pool.
- At the end of the month, user withdraws 10.1 ETH from the same Aave lending pool (10 ETH original deposit, 0.1 ETH in interest earned)
- User does not consider the deposit and withdrawal of the 10 ETH to be a taxable event and wants the underlying ETH to remain on the balance sheet while deposited. The user also wants to categorise the 0.1 ETH to a revenue account called "interest earned".
The guide below will show you how users can perform the categorisation for the above using the DeFi function.
Note:
- Bitwave DeFi functionality is only automated for protocols that have been integrated. This automation includes:
- Automated categorisation of deposits and withdrawals to a particular smart contract
- Automated rebalancing of the pool to true up underlying balances to onchain values
- Automated categorisation of rebalancing transactions
- Automated creation of the DeFi wallet via the DeFi dashboard
Step 1 - Creating your DeFi Wallet
Bitwave allows users to track the movements of their DeFi/staked assets through a DeFi wallet. This means users can run the balance/register report to track balances in that wallet as of a particular date. There are 2 ways to create a DeFi wallet.
Automated Creation
Manual Wallet Creation
Create the Aave ETH lending pool wallet in the wallets dashboard. Find the DeFi wallet option and input the correct information into the required fields:
- Wallet name: we always recommend using an obvious name relating to the specific pool and including DEFI in the name. Such as "DEFI - Aave ETH Lending Pool".
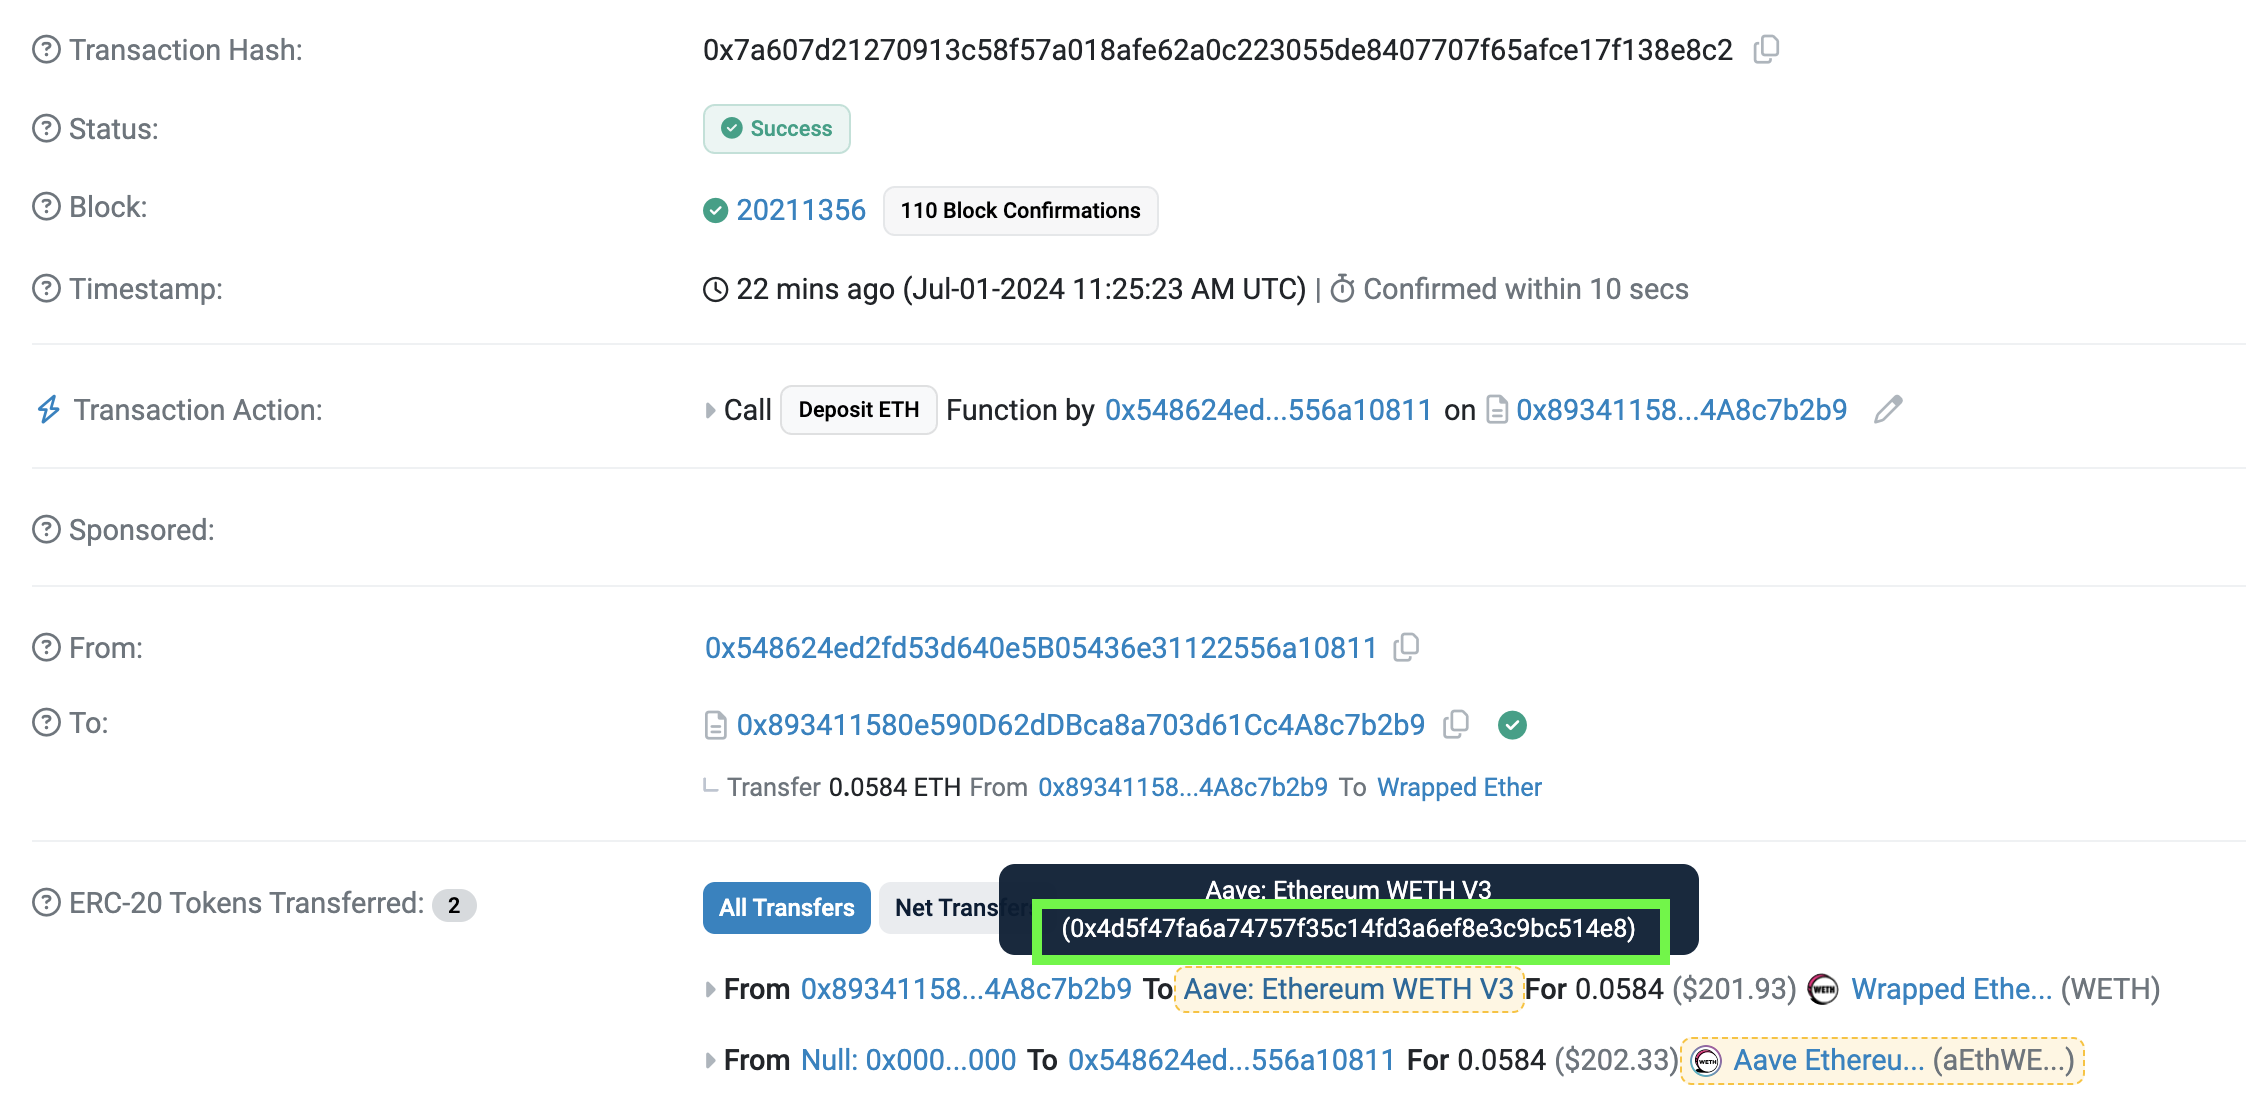
- Smart Contract: The smart contract for the pool is the address that users interact in order to deposit or withdraw to and from the pool. As an example, the address for Aave: Ethereum WETH V3 is 0x4d5F47FA6A74757f35C14fD3a6Ef8E3C9BC514E8. Example tnx: https://etherscan.io/tx/0x7a607d21270913c58f57a018afe62a0c223055de8407707f65afce17f138e8c2
- Wallet address: Simply paste your wallet address that is interacting with the smart contract.
Step 2
Now that the DeFi wallet has been created, you can begin categorising DeFi deposits and withdrawals to the specific Defi wallet. The way this works is that Bitwave will create internal transfers between your syncing wallet and the DeFi wallet. This achieves 2 things:
- Removal of gain/loss on the movement of assets to and from the DeFi protocol and treats the deposit/withdrawal as an internal transfer. Any gas fees will be booked to the default fee category and will be treated as a disposal.
- Moves assets into a wallet that can be tracked separately. Bitwave reporting will treat this wallet as any other wallet.
There is an automated and a manual path to DeFi transactions categorisation.
Automated Categorisation
- Head to the DeFi Dashboard under 'Dashboard' (top left in the Bitwave app)
- Find the DeFi wallet you want to use. The smart contract address will appear in the DeFi wallet.
- Click on....
-
Allow some time for rebalancing transactions to get created and categorised.
Manual Categorisation
Updated 7 months ago