
Contact-based Categorization Default & In-line Categorization
Set Up Contact-based Categorization Defaults (including "in-line" categorization)
Contact-based Categorization Defaults
To set up Contact-based Categorization Defaults:
-
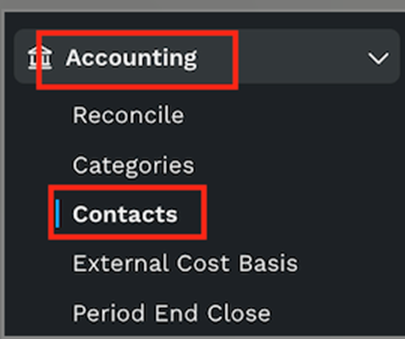
Select Accounting → Contacts from the left menu:
-
Locate the Contact you wish to set up defaults for → click Manage:

-
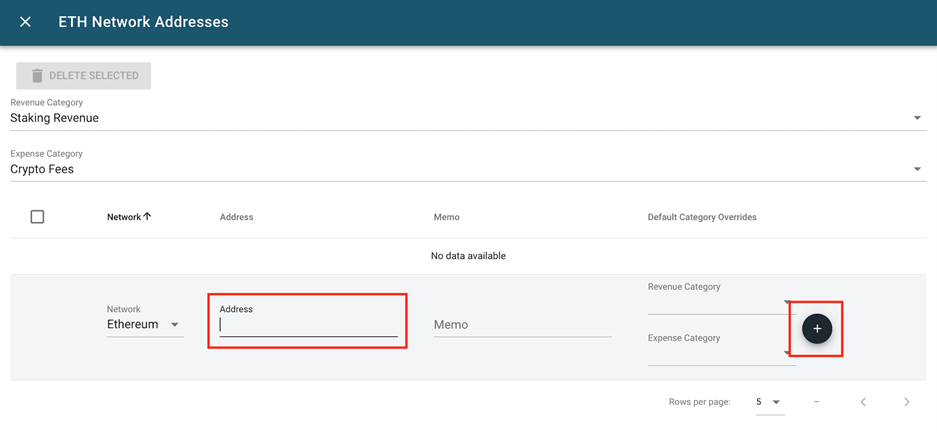
Select a Revenue and Expense category from the drop down:
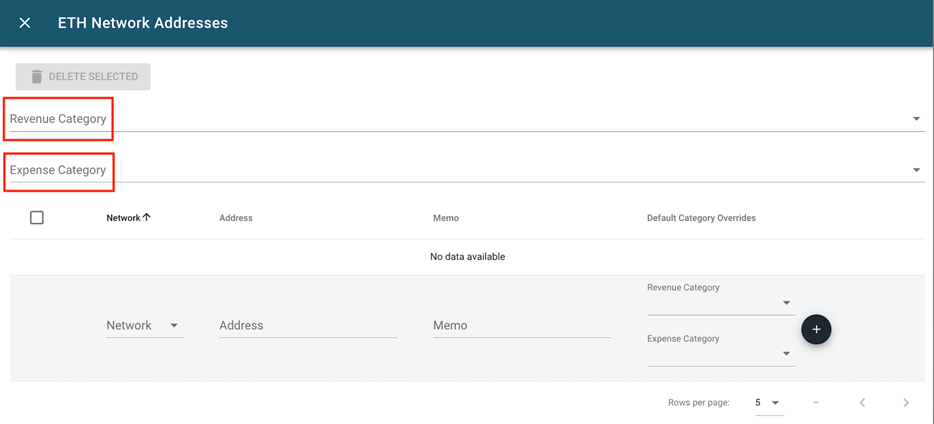
OPTIONAL: If you have an address you would like to assign to the contact, you can add it by selecting the network from the drop-down, adding the wallet address, and clicking the plus sign to confirm:
You can view addresses and categories assigned on the main Contqacts page:

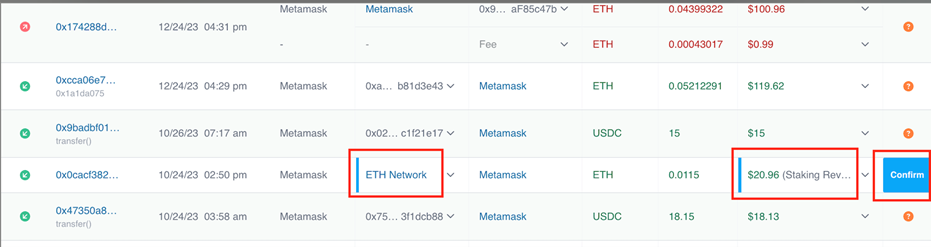
Once an address is assigned to a specific contact and category, any un-categorized transaction with that wallet address on the assigned network will now show the contact and category in the transactions ui - simply click Confirm and the transaction is categorized.
In-line Contact-based Categorization Defaults
You can also assign wallet addresses to contacts directly from the transactions ui by clicking on the walletaddress in transaction, selecting a contact from the drop-down, then click Assign to Contact, then click Done.
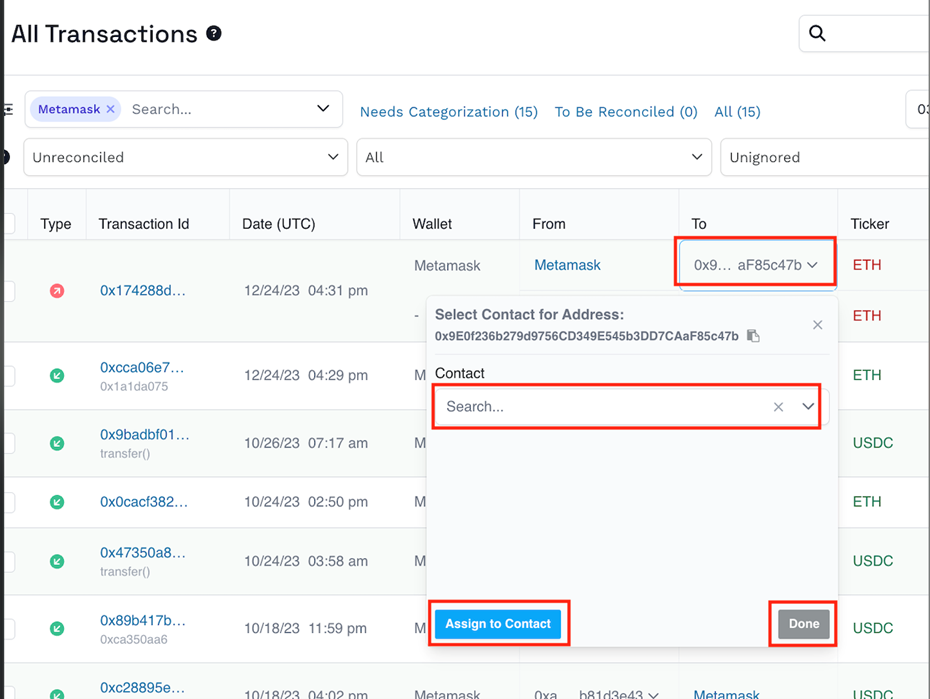
You will now see the contact and default category in the transaction.

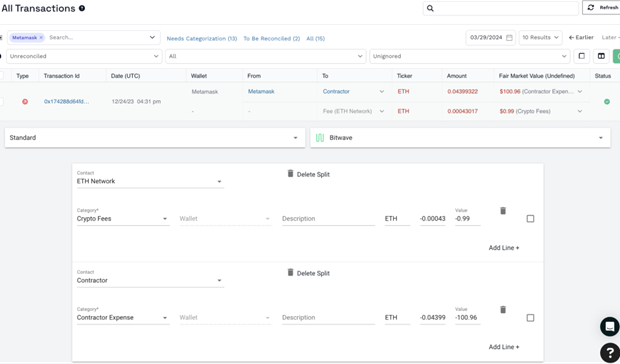
If the transaction is not fully categorized the confirm button will not be active - in the example below the
fee category is missing:

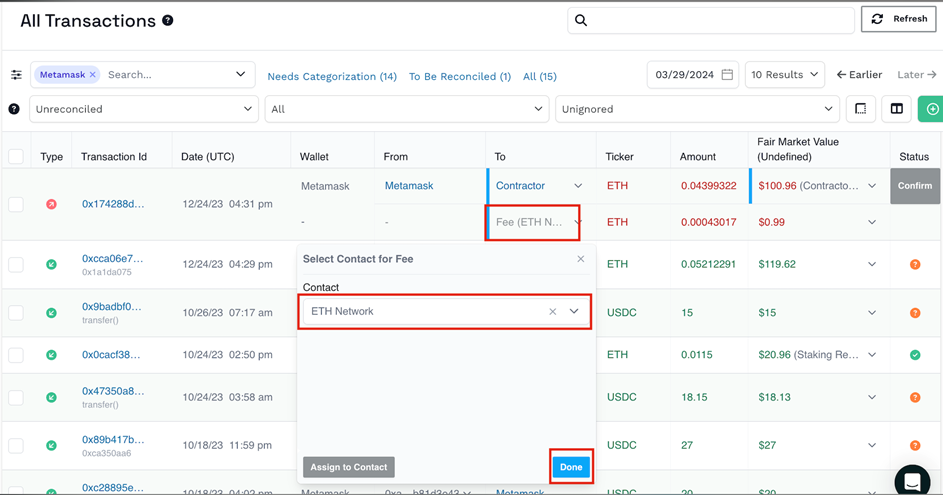
Categorize the fee by selecting the fee contact then the category here:
Open the in-line contact selection by clicking in the transactions where shows, selecting the fee contact
from the drop-down, and clicking Done:
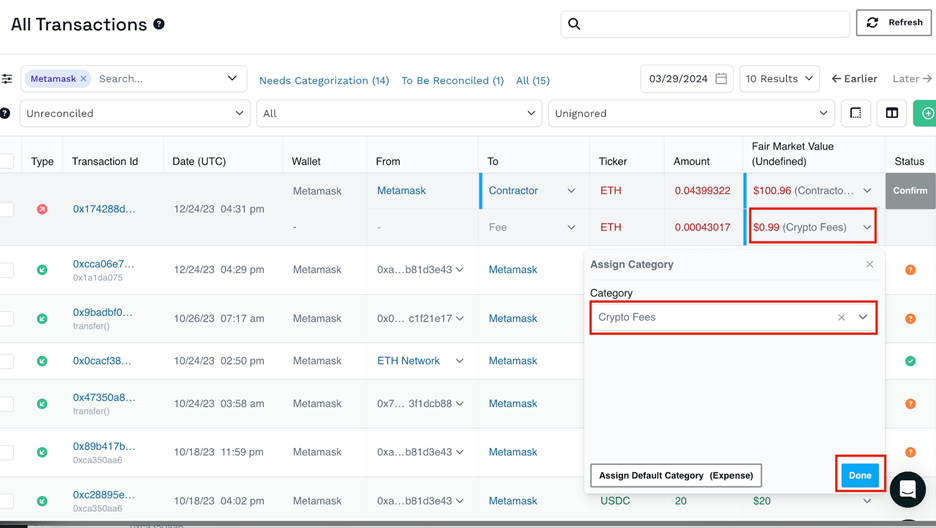
The open the in-line fee category by clicking the fee, selecting the fee category from the drop-down, and
clicking Done:
The fee is now in-line categorized and Confirm is now blue:
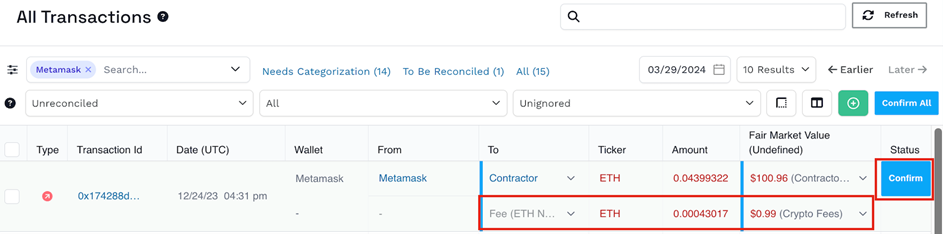
Click Confirm - the transaction is now categorized!
Updated 10 months ago