Sage Connection Guide
This document provides step-by-step instructions on how to set up the connection between Bitwave and Sage Intacct.
Prerequisites
Subscribe to Web Services
- Company → Subscriptions
- Find “Web Services” and click on it to Subscribe
- Ignore the warning about additional charges

IP Address
Add Bitwave’s IP Addresses below to Sage Intacct’s allowed list.
104.196.183.18
35.230.22.143
- Company → Company Info
- Click EDIT
- Click on the “Security” tab
- Go to the field labeled “Enforce IP address filters” and click the Edit icon

Sender ID
Add Bitwave’s Sender ID BitwaveMPP to Sage Intacct’s allowed list.
- Company → Company Info
- Click EDIT
- Click on the “Security” tab
- Go to the section labeled “Web Services authorizations” and add the Sender ID

Users
Create a Web Services Bitwave user and role.
Create a Role
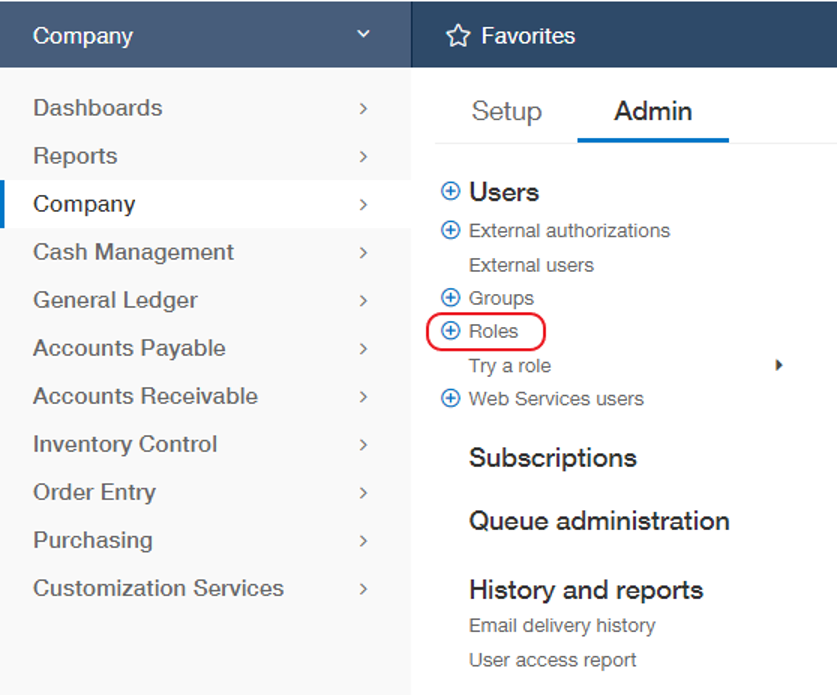
- Company → Roles
- Click ADD
- Input a “Name”
- Click SAVE
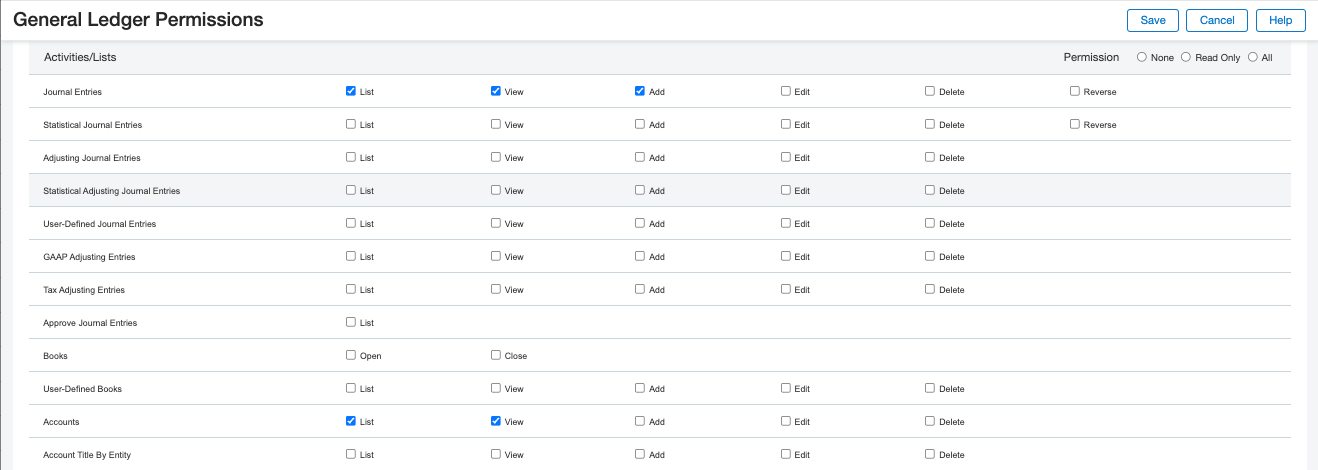
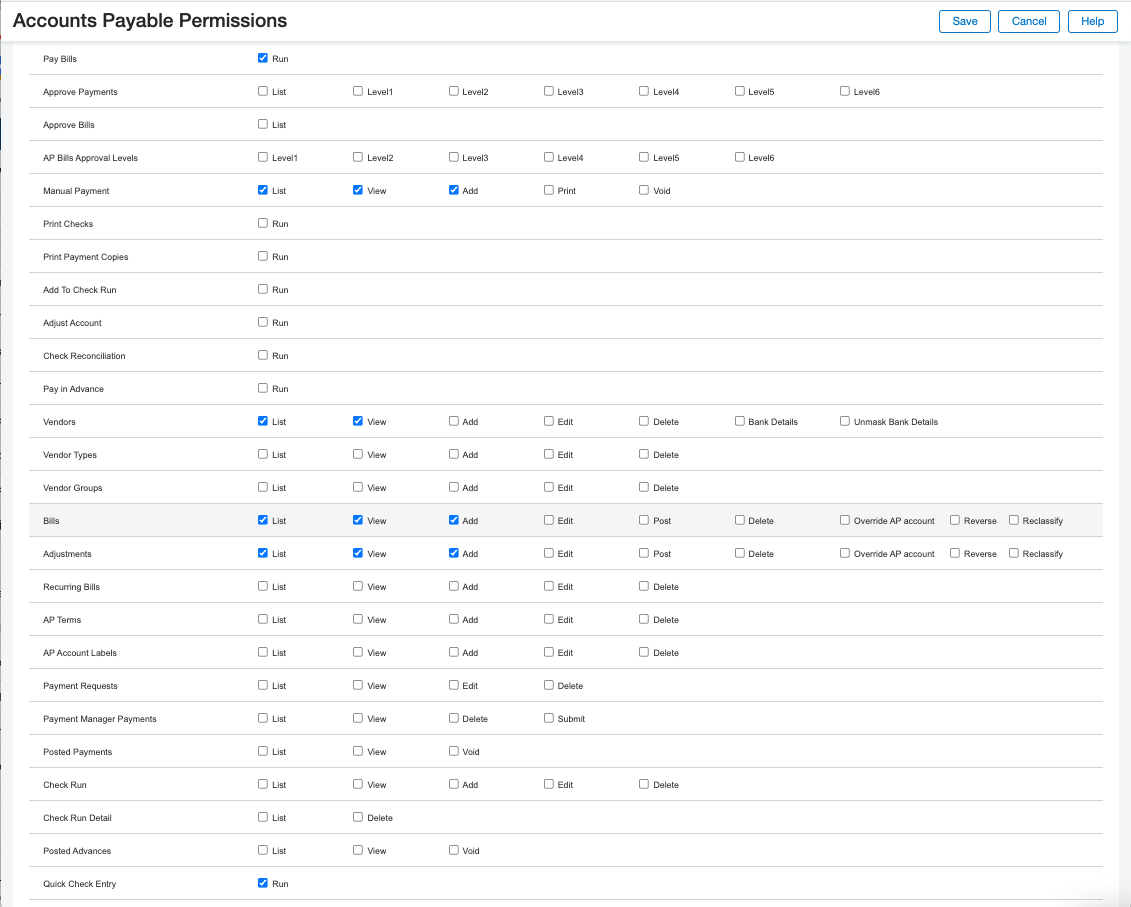
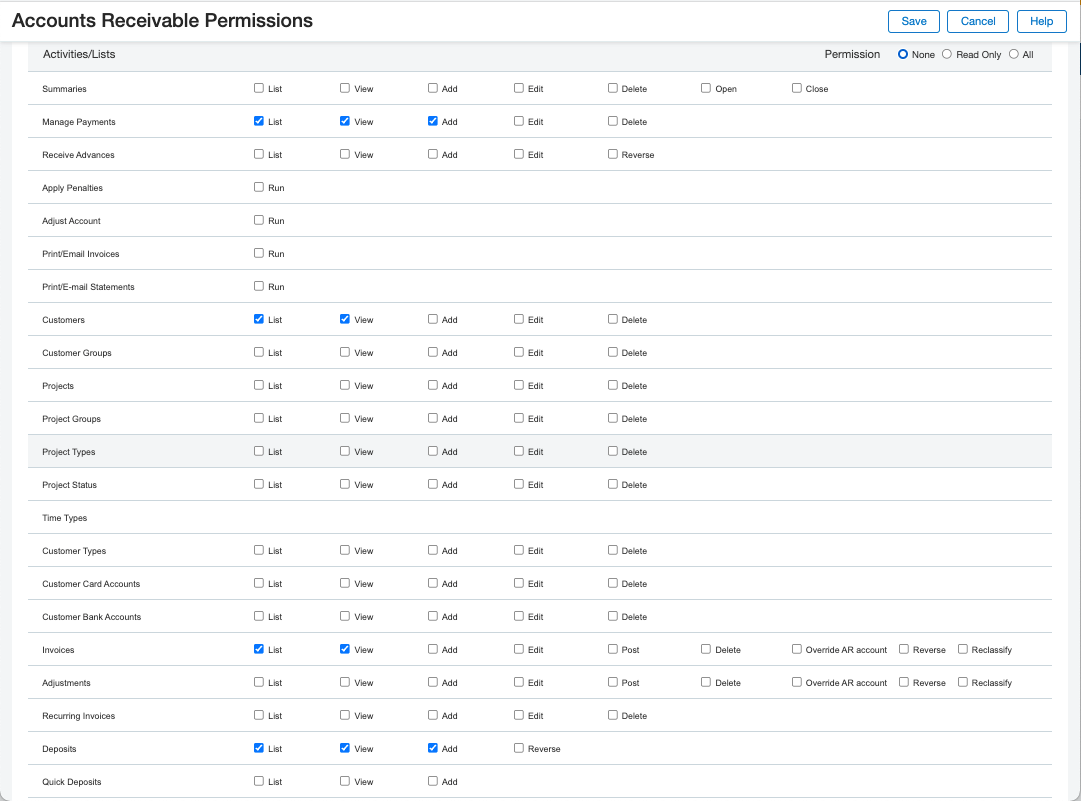
- Click on the necessary Permission for
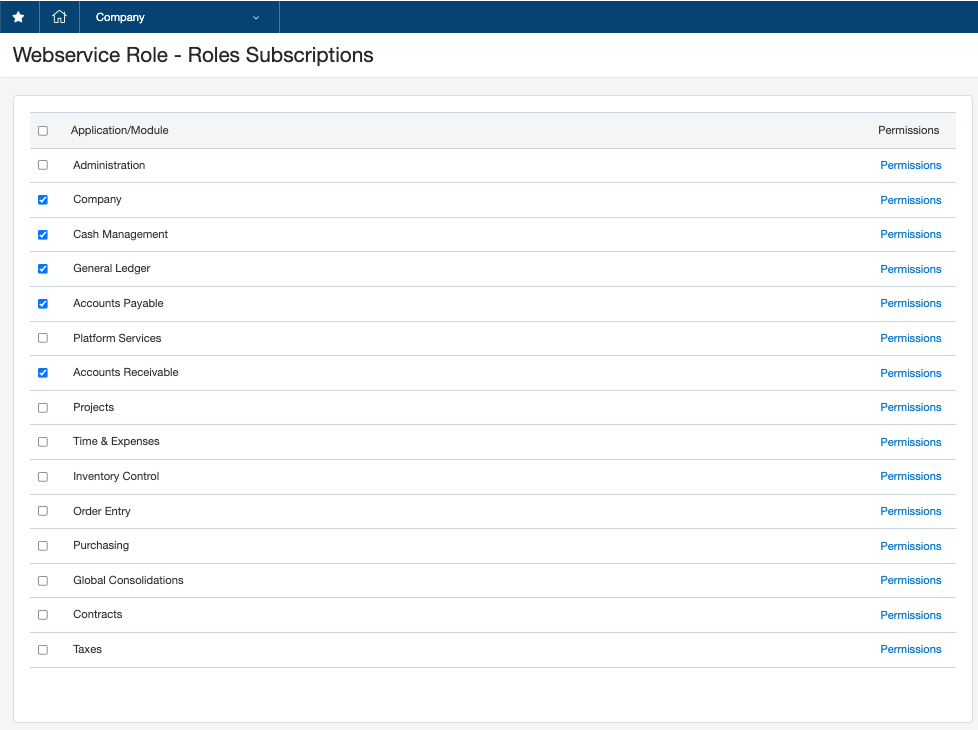
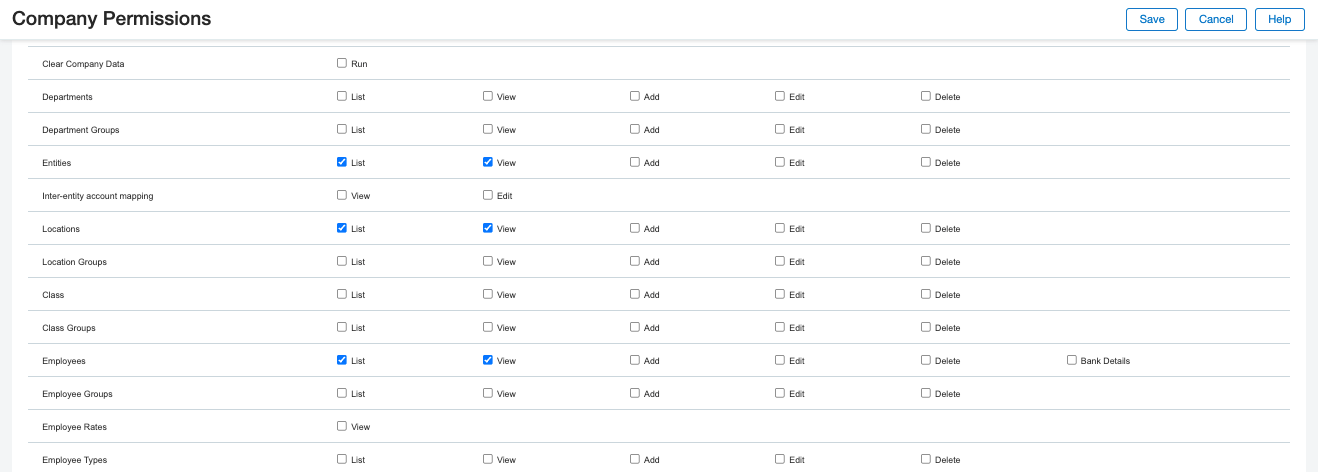
Company Permissions
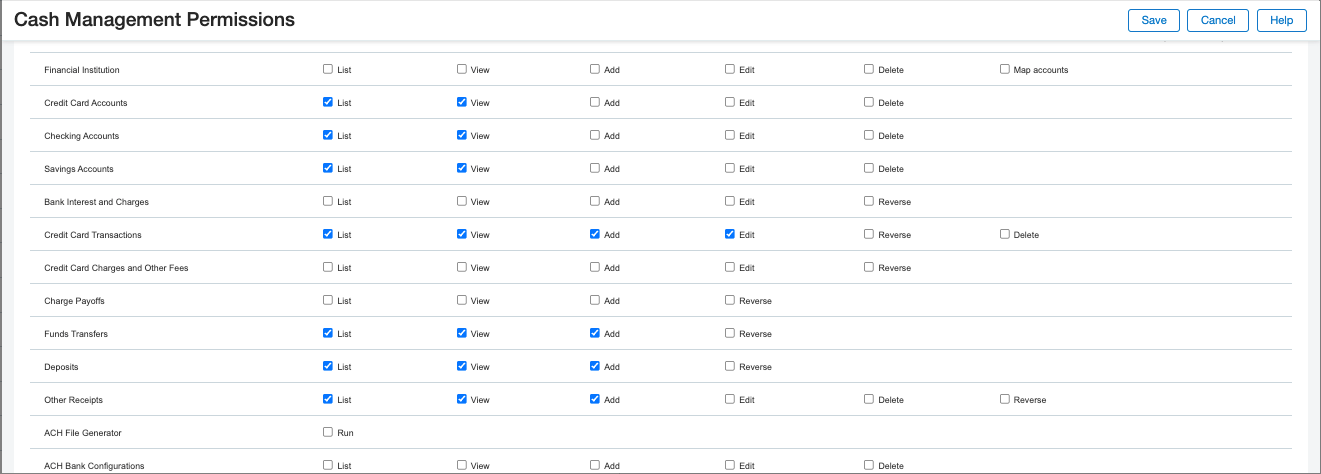
Cash Management Permissions
General Ledger Permissions
Account Payables Permissions
Account Receivable Permissions
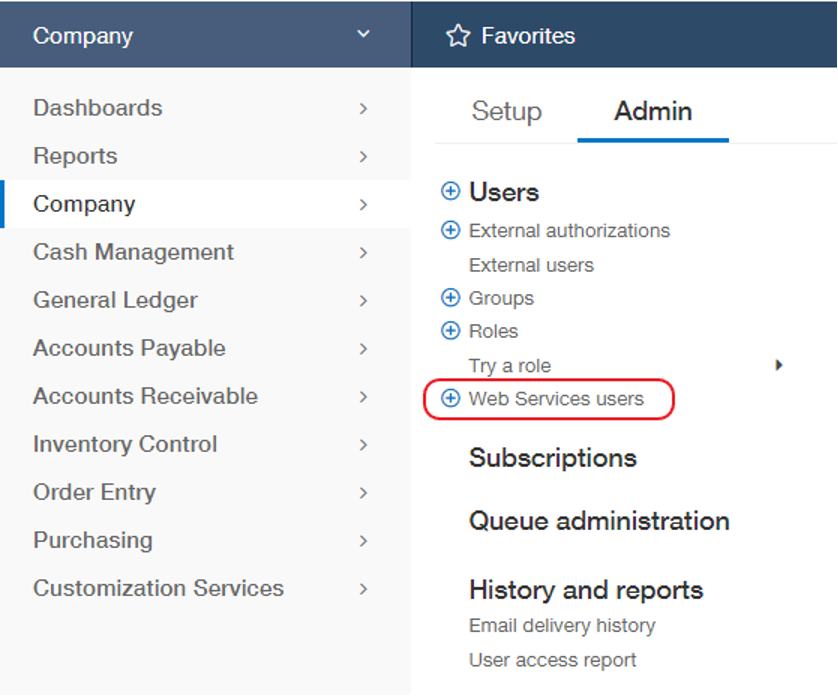
Create Web Service User
- Company → Web Service User
- Click NEW
- Input values for these fields
a. User ID e.g. Bitwave_XML
b. Last name
c. First name
d. Email address
e. Make sure the User Type = Business User - Click on the ‘Roles information’ tab and select the Role created in the prior step
- Click SAVE
- Ignore any warning that there will be a charge for creating the User
Accounts
Bitwave - Digital Assets Account
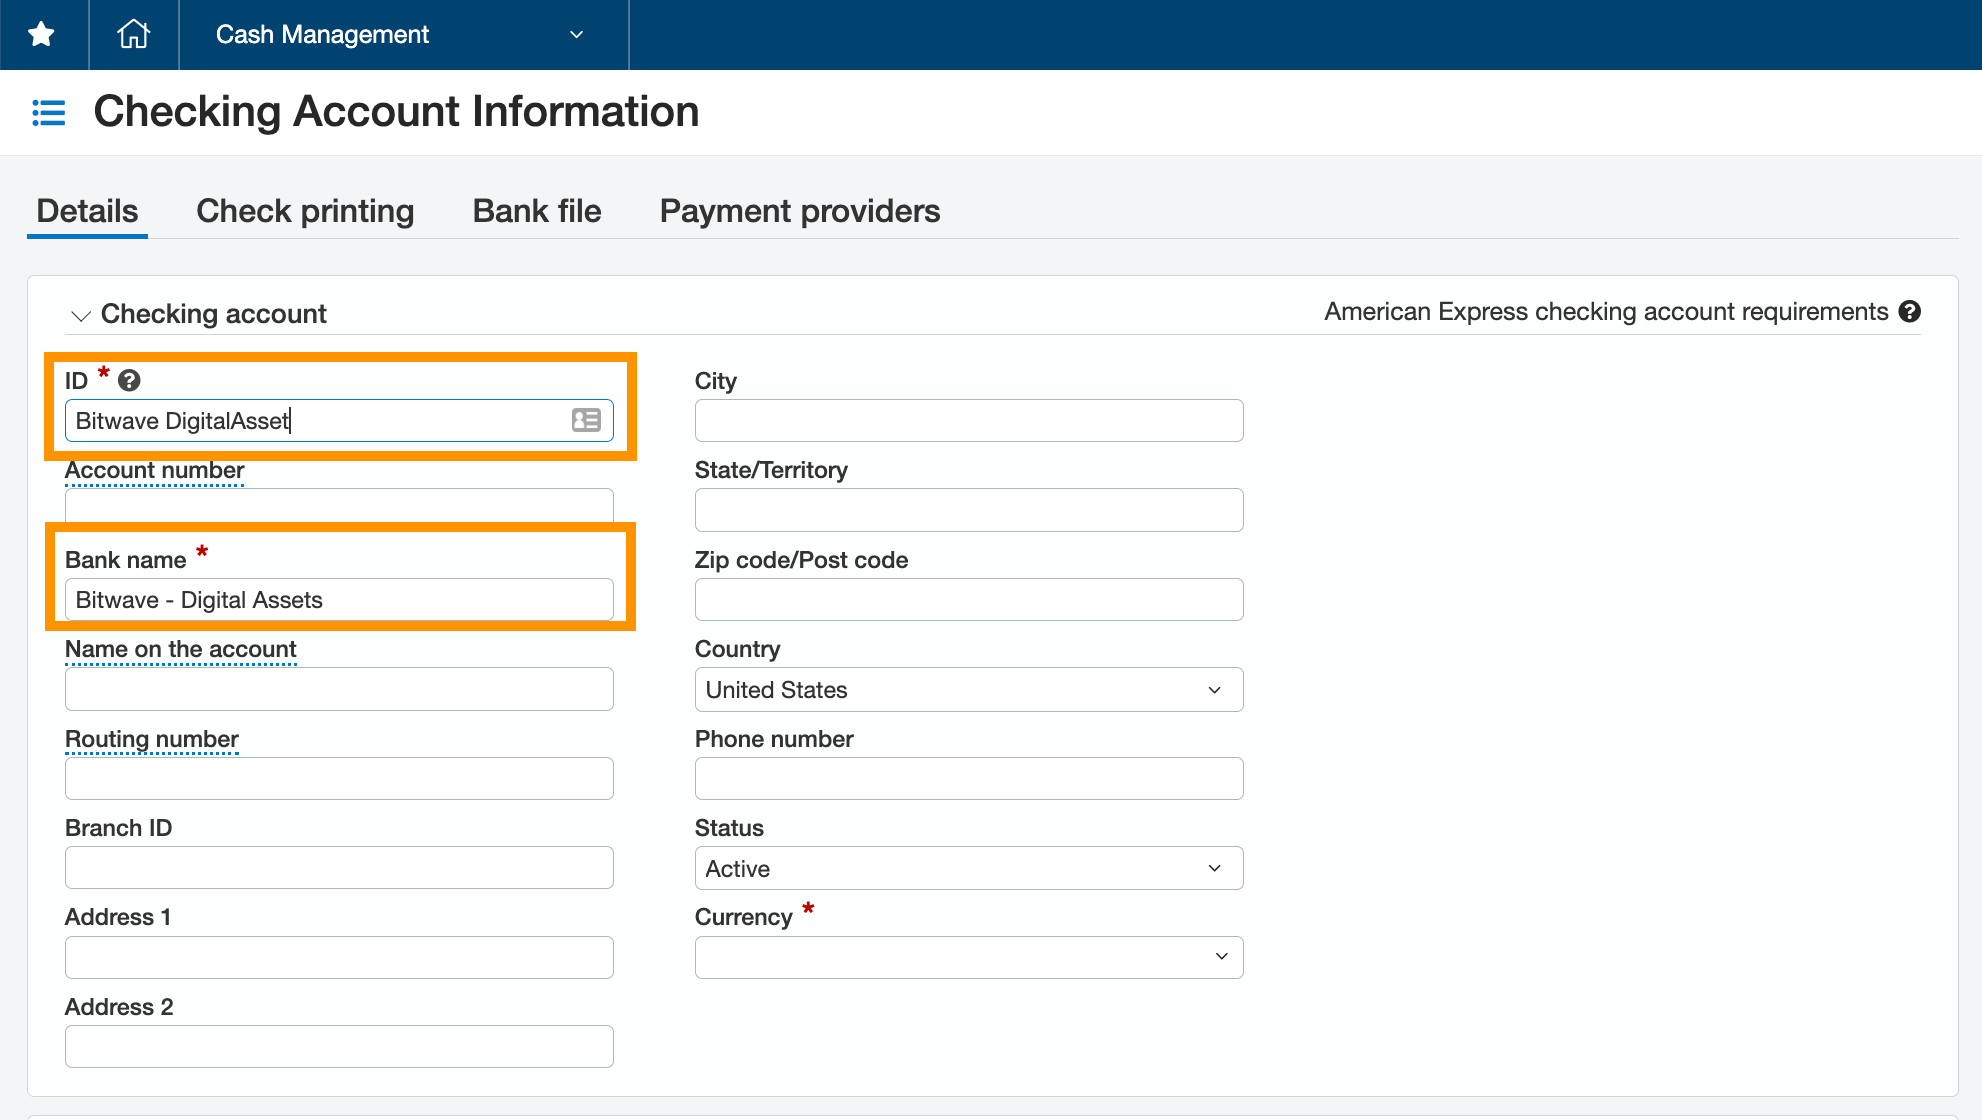
- Go to Cash Management → Checking → Add

- Enter the Account Id, Account number, and Bank name
• Account Id: Bitwave DigitalAsset
• Bank name: Bitwave - Digital Assets
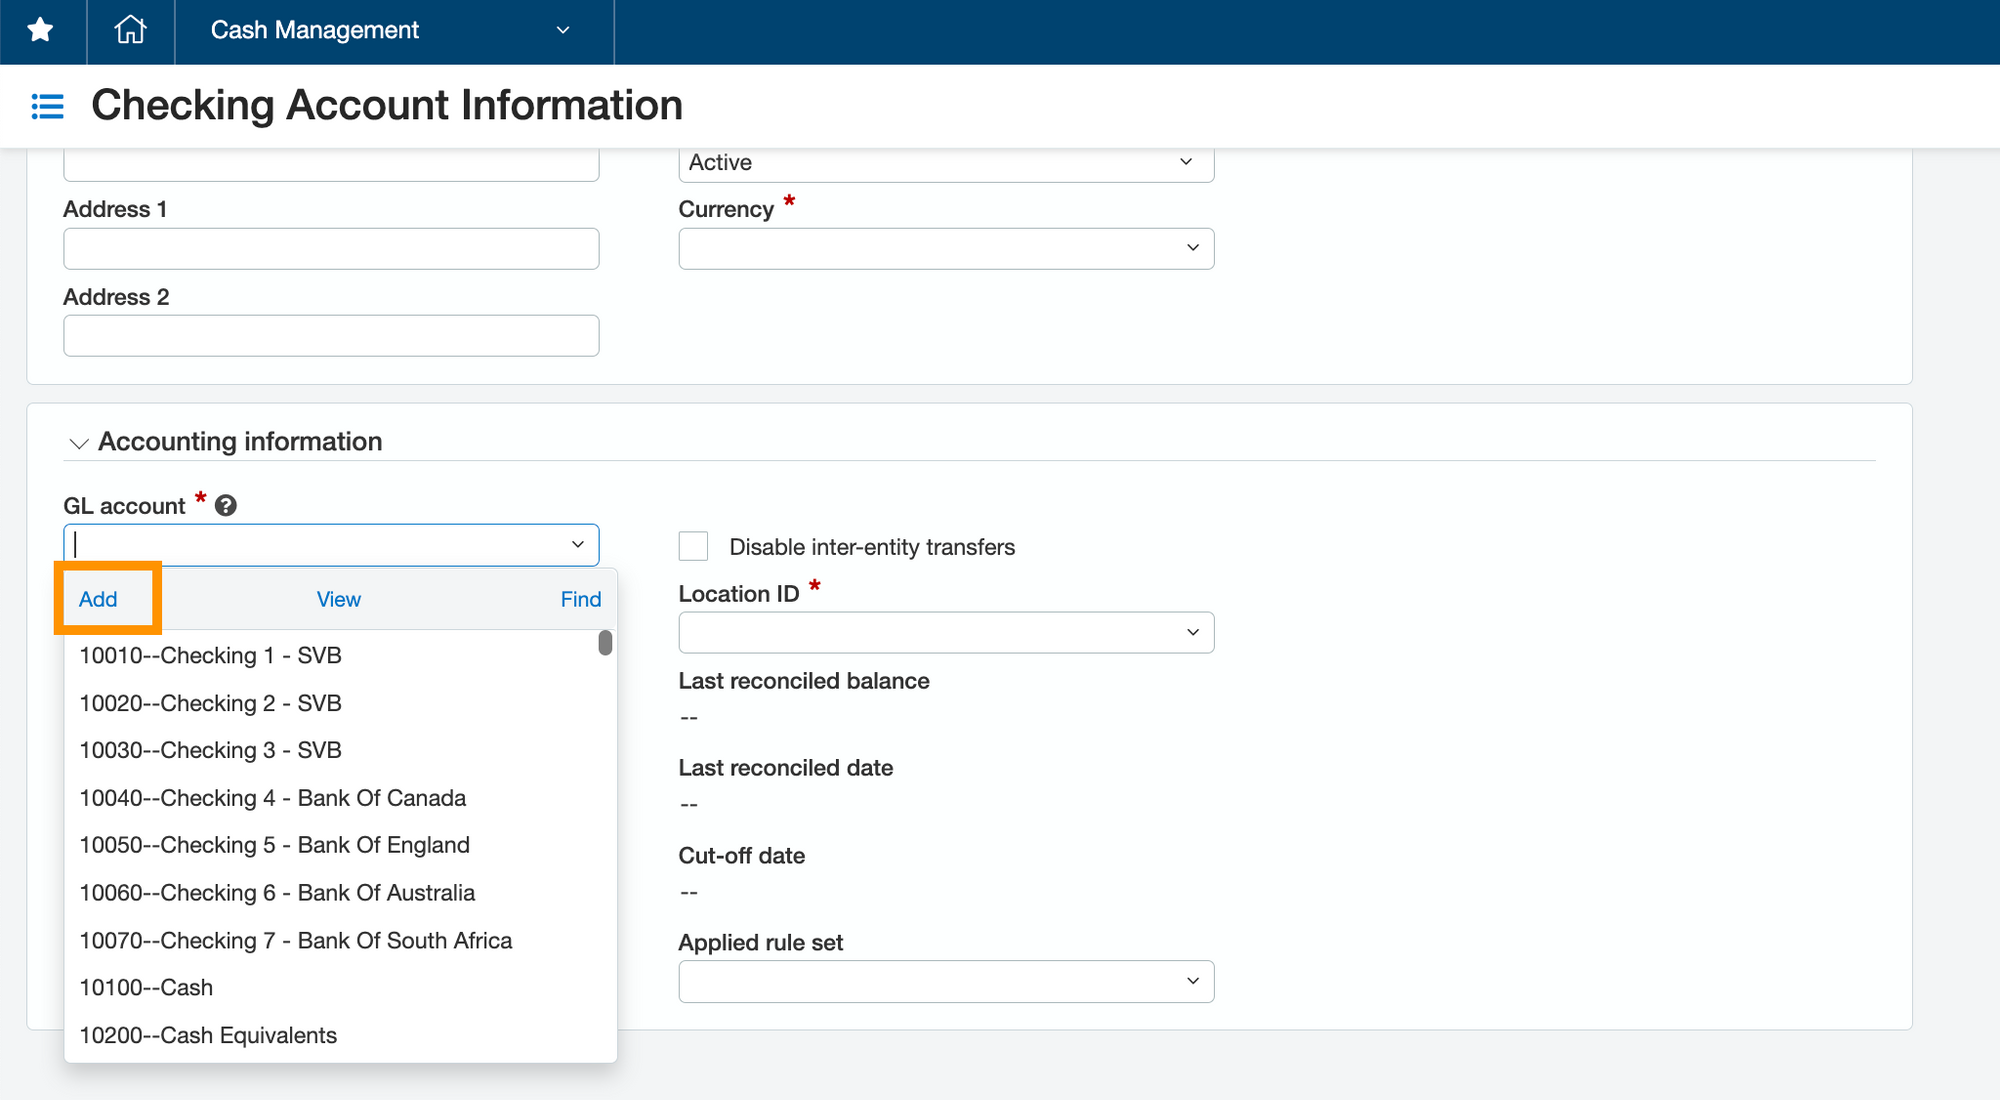
- A GL account needs to be created for this bank account. See the next section
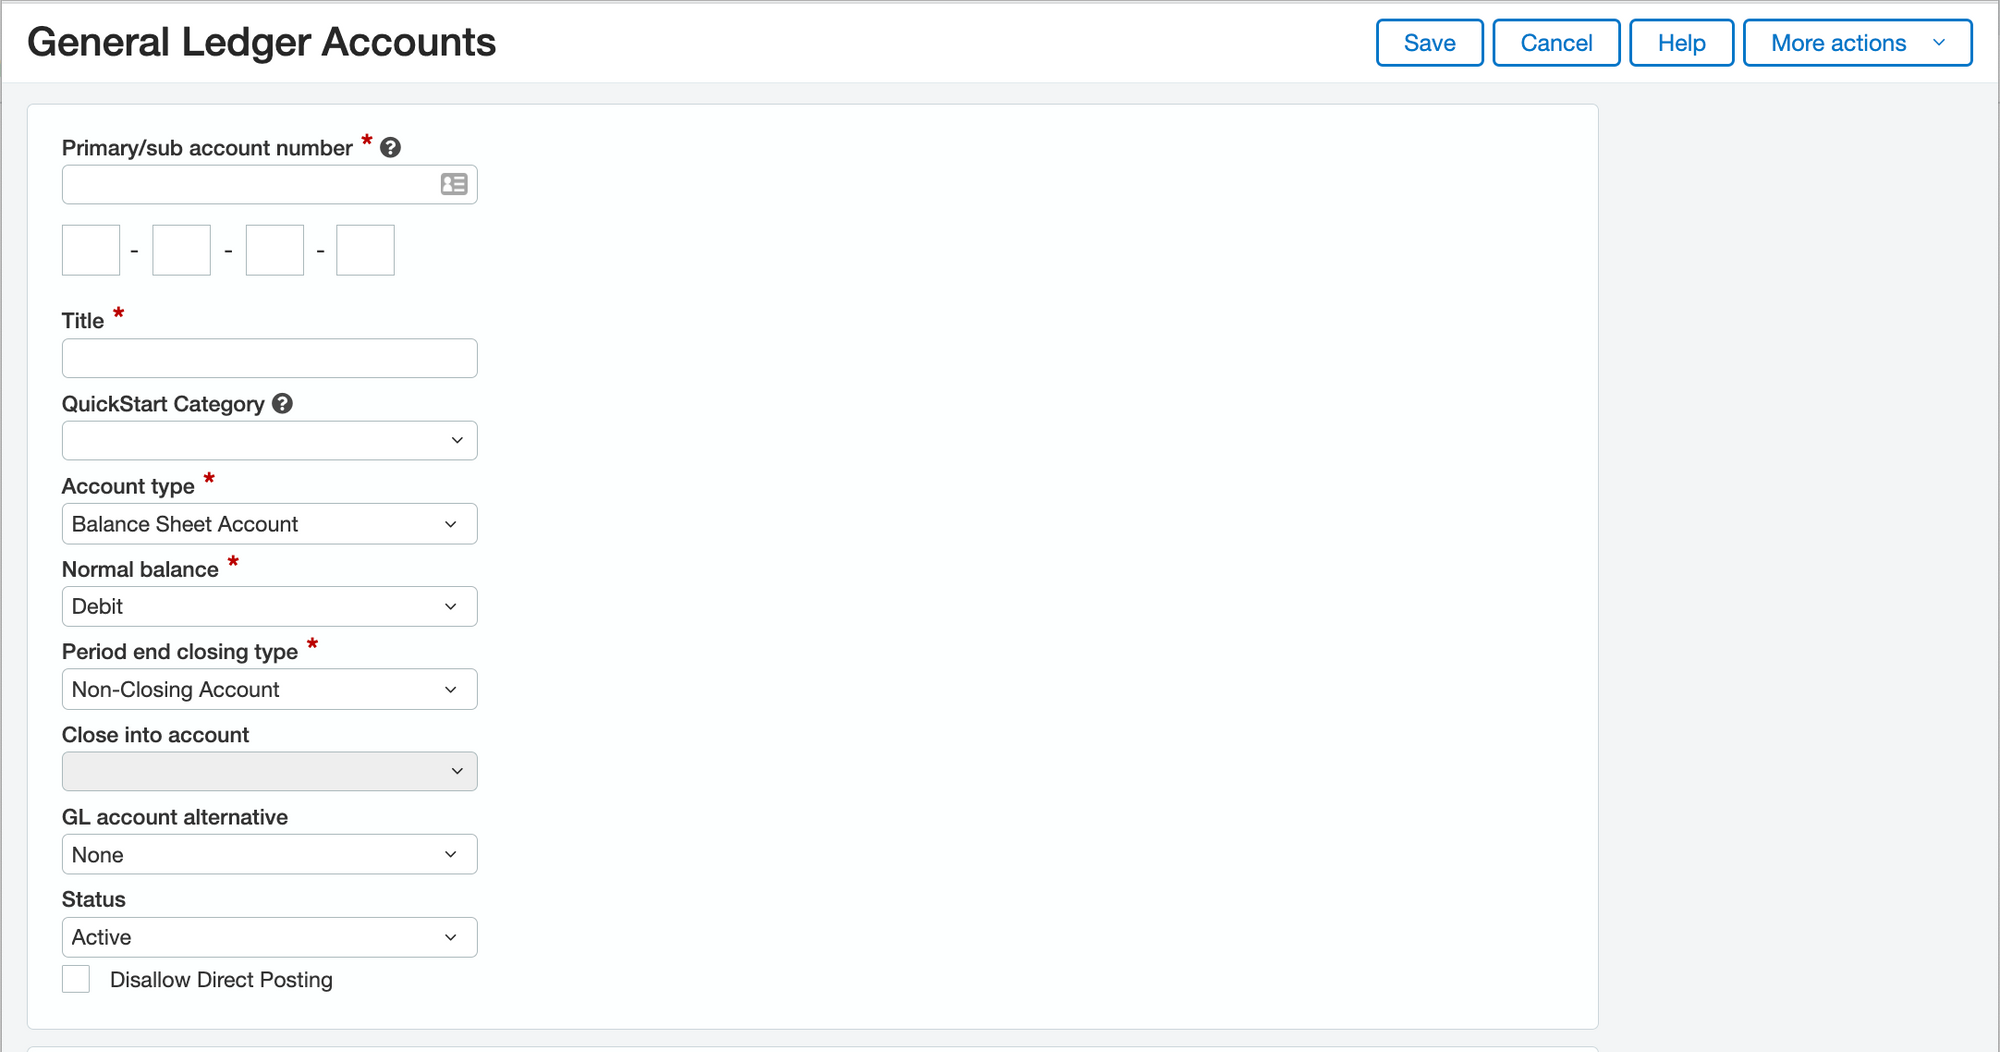
- Fill out the following fields:
• Primary/Sub Account number: Use any available GL account number
• Title: Bitwave - Digital Assets Clearing
• Account Type: Balance Sheet Account
• Normal Balance: Debit
• Period End Closing Type: Non-Closing Account
• Dimension settings: Do not select any dimension settings; these are not required
• Click Save
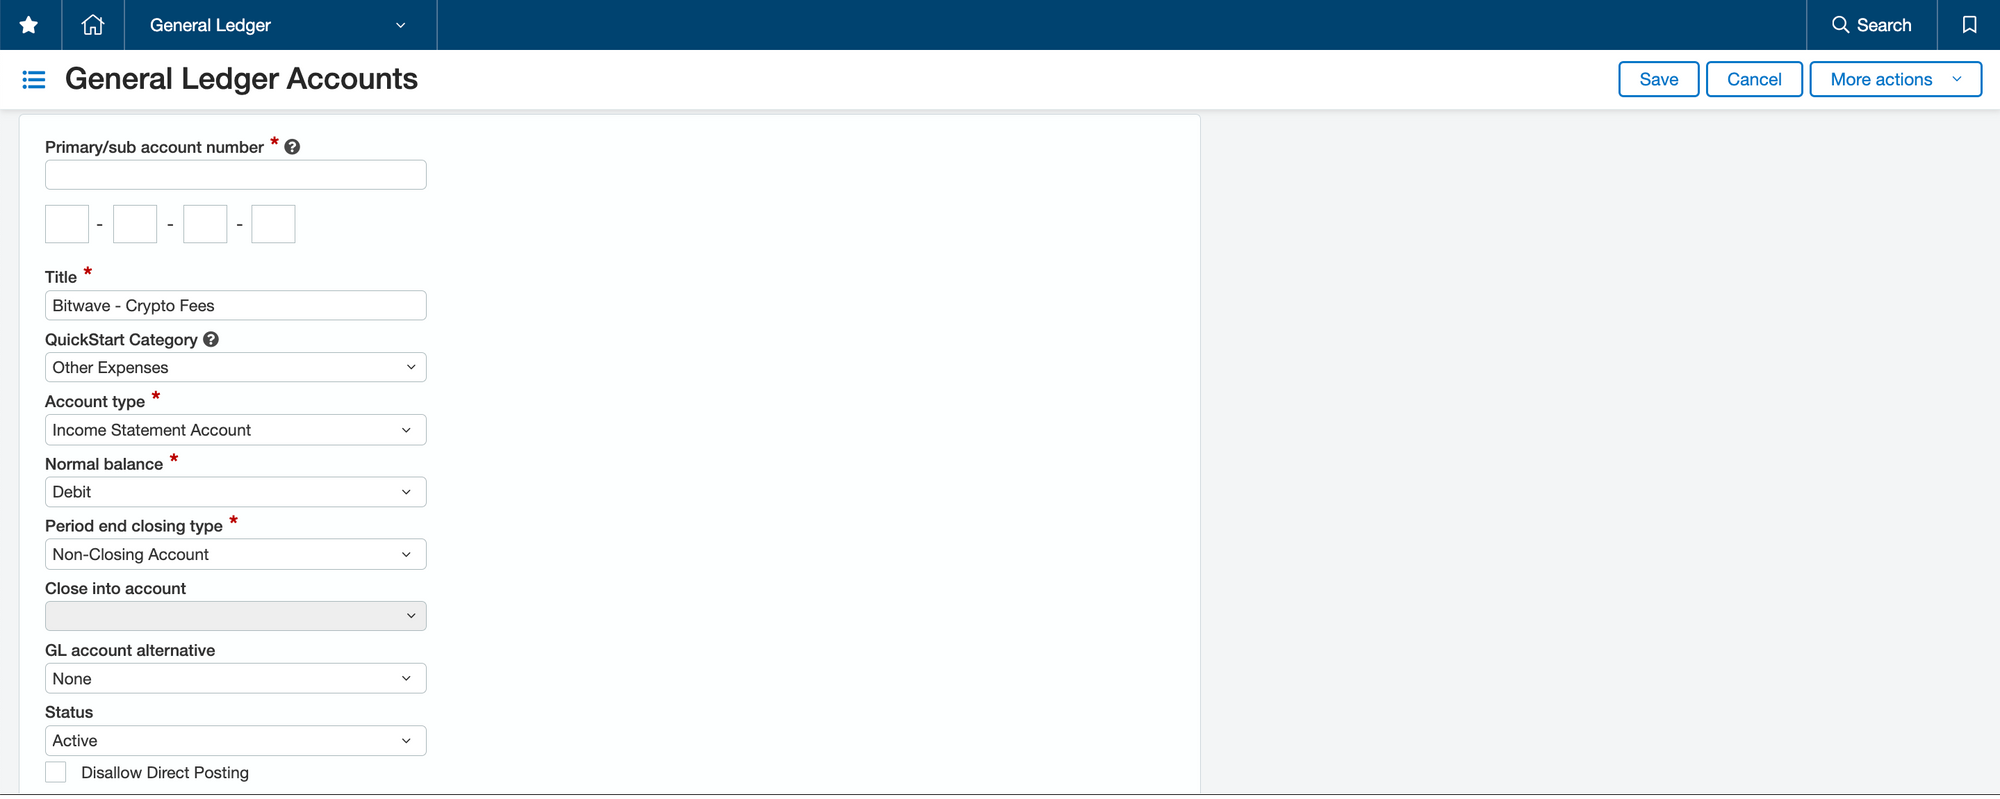
Bitwave - Crypto Fees Account
- Go to General Ledger → General Ledger Accounts → Add
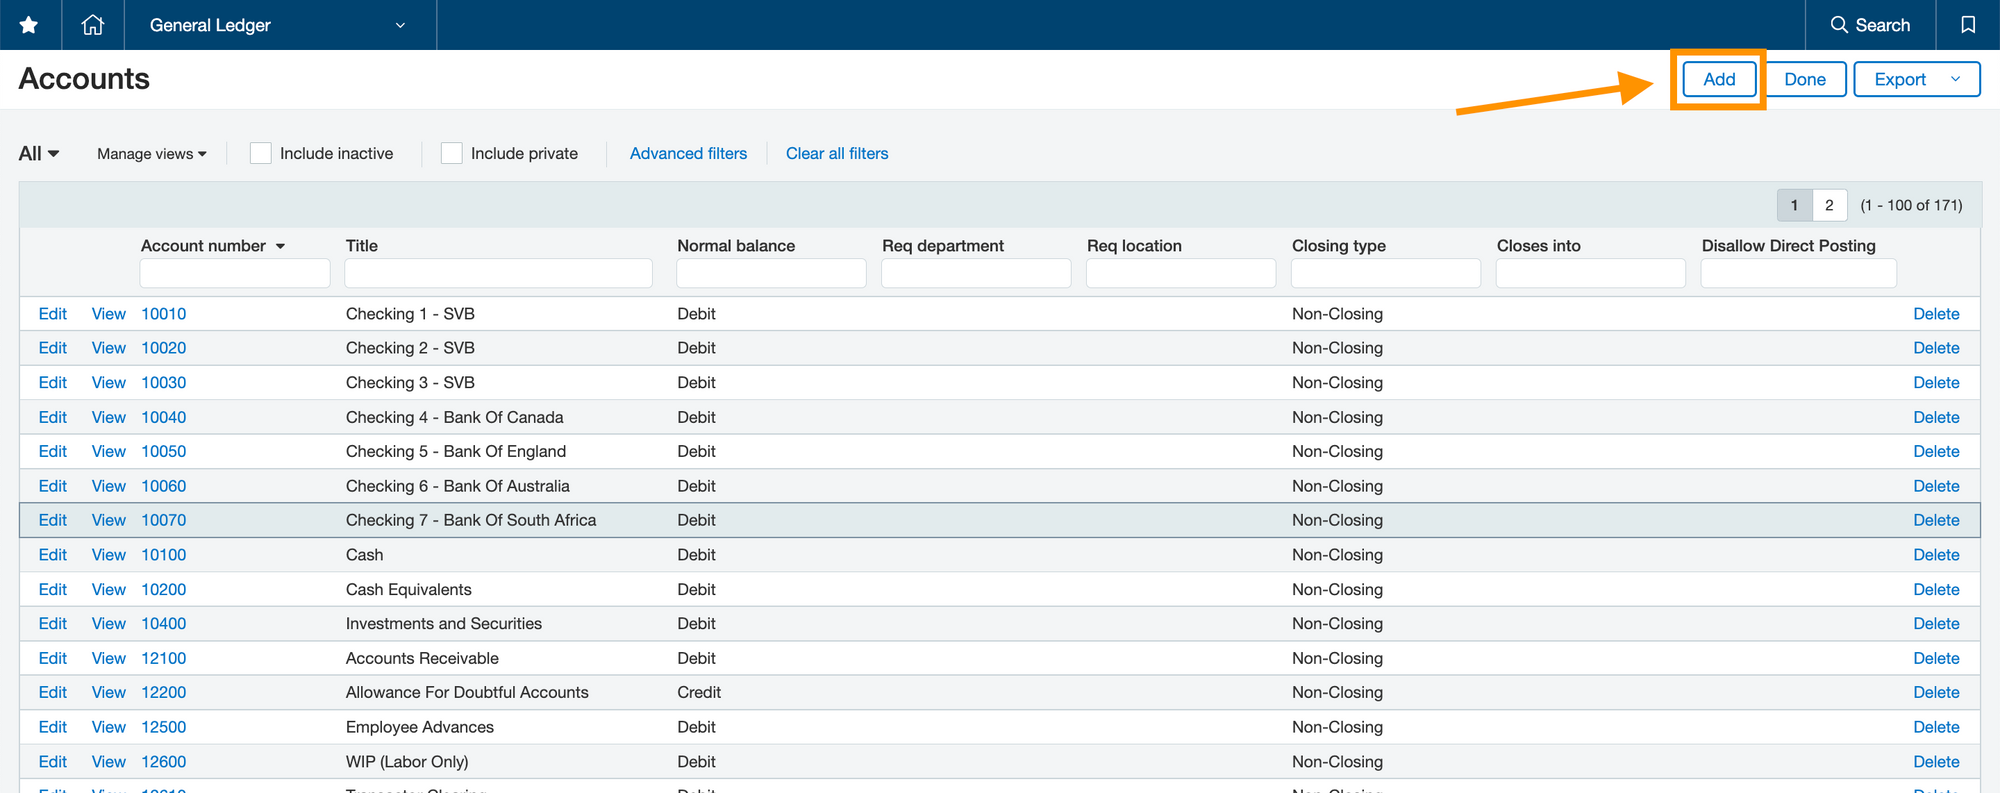
- Fill out the following fields:
• Primary/Sub Account number: Use any available GL account number
• Title: Bitwave - Crypto Fees
• Account Type: Income Statement Account
• Normal Balance: Debit
• Period End Closing Type: Non-Closing Account
• Dimension settings: Do not select any dimension settings; these are not required
Integration
Connect Sage Intacct to Bitwave
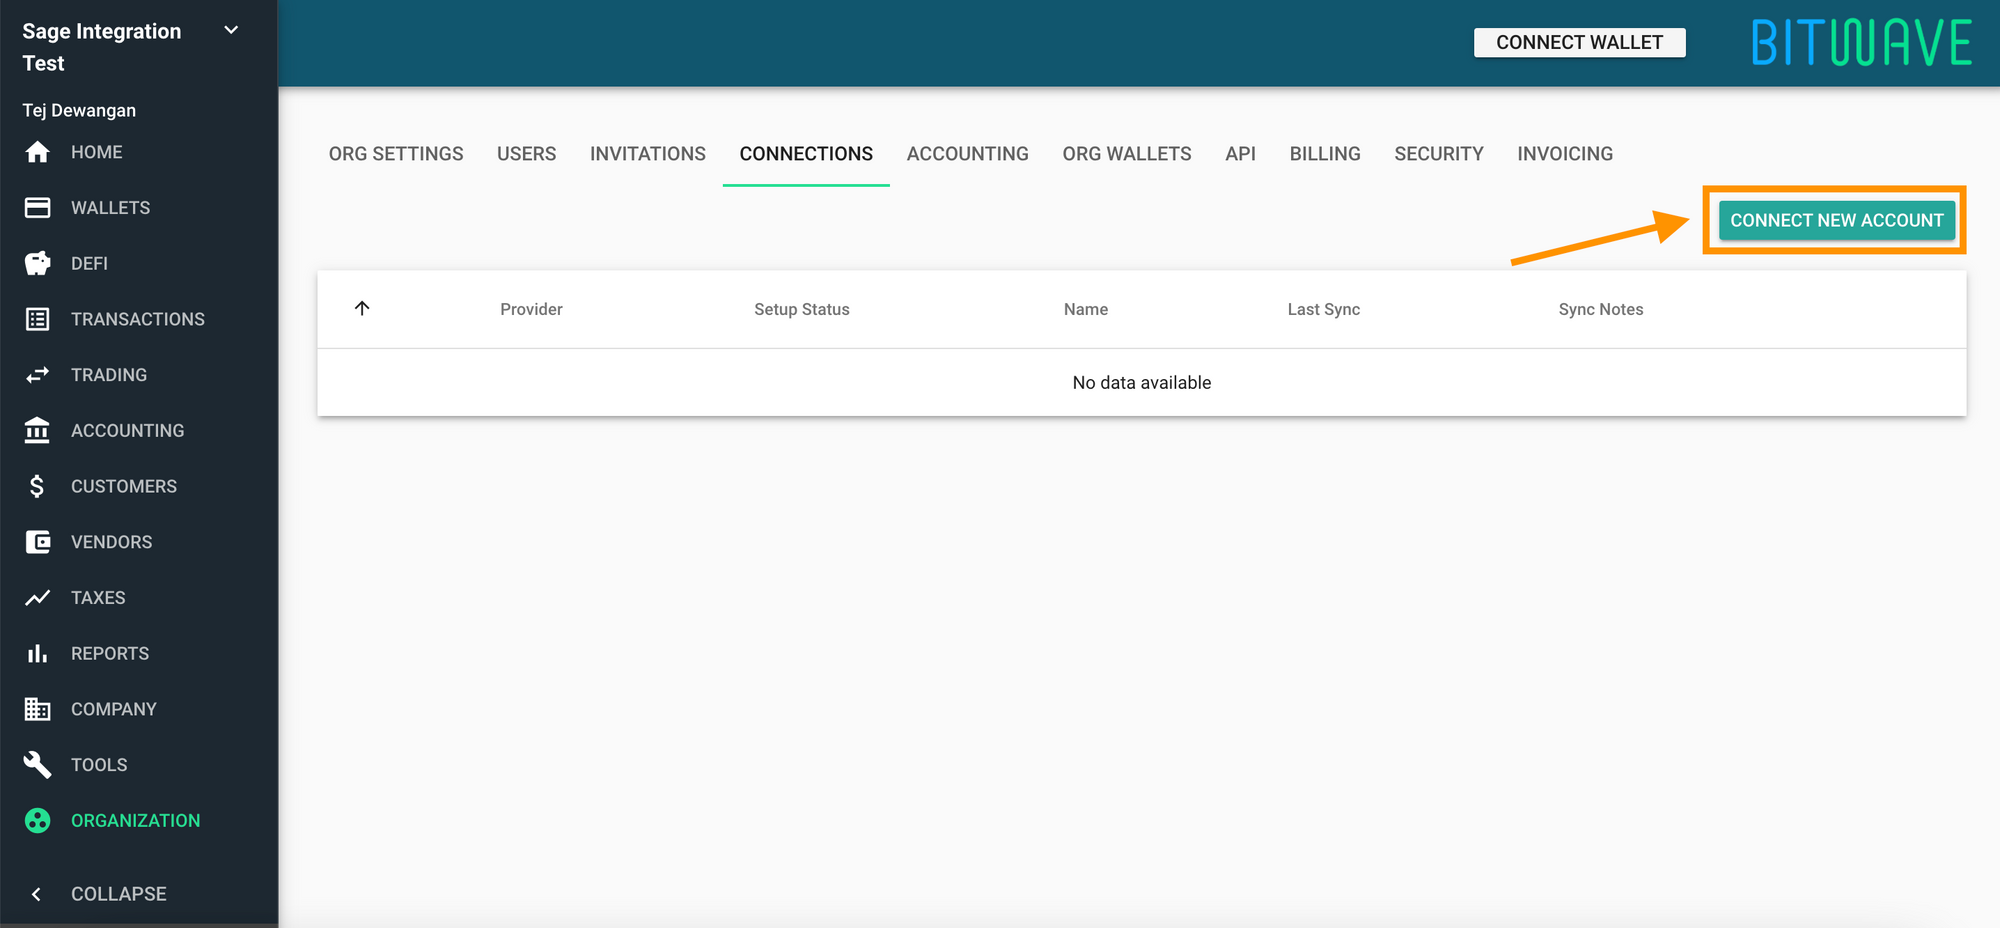
- Go to ORGANIZATION → CONNECTIONS → CREATE NEW ACCOUNTS
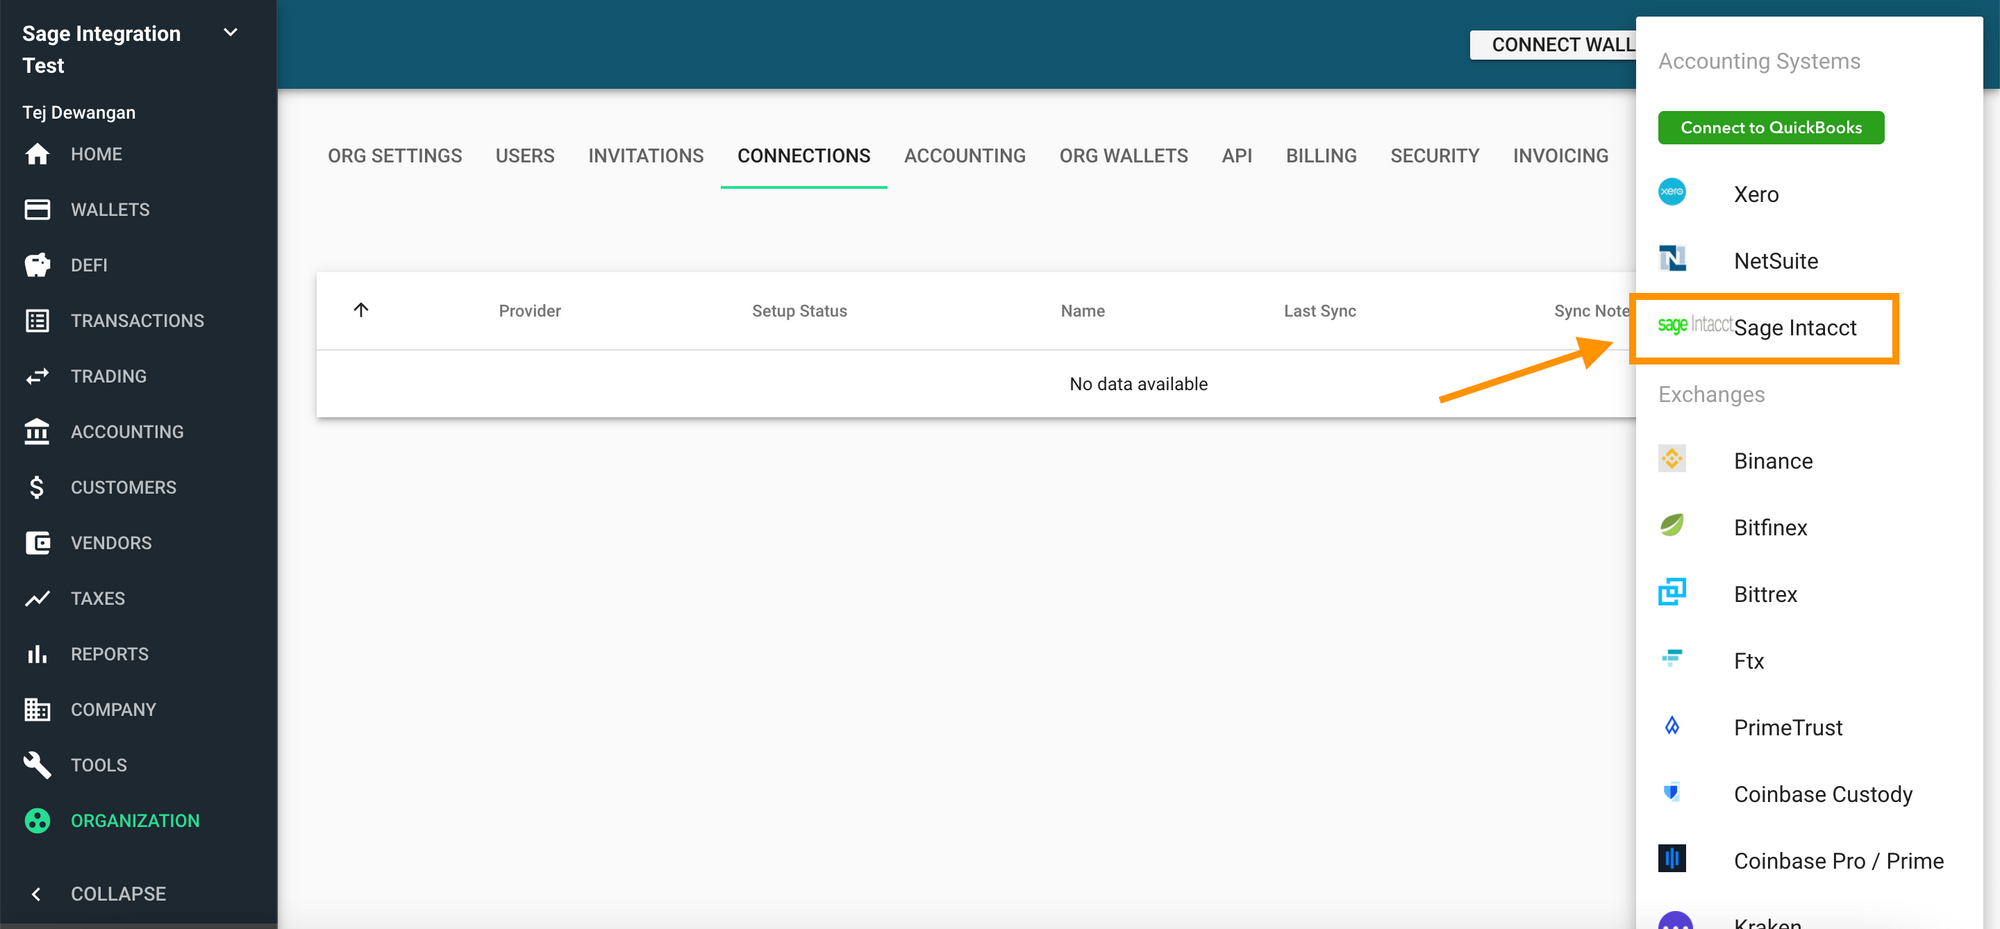
- Click Sage Intacct
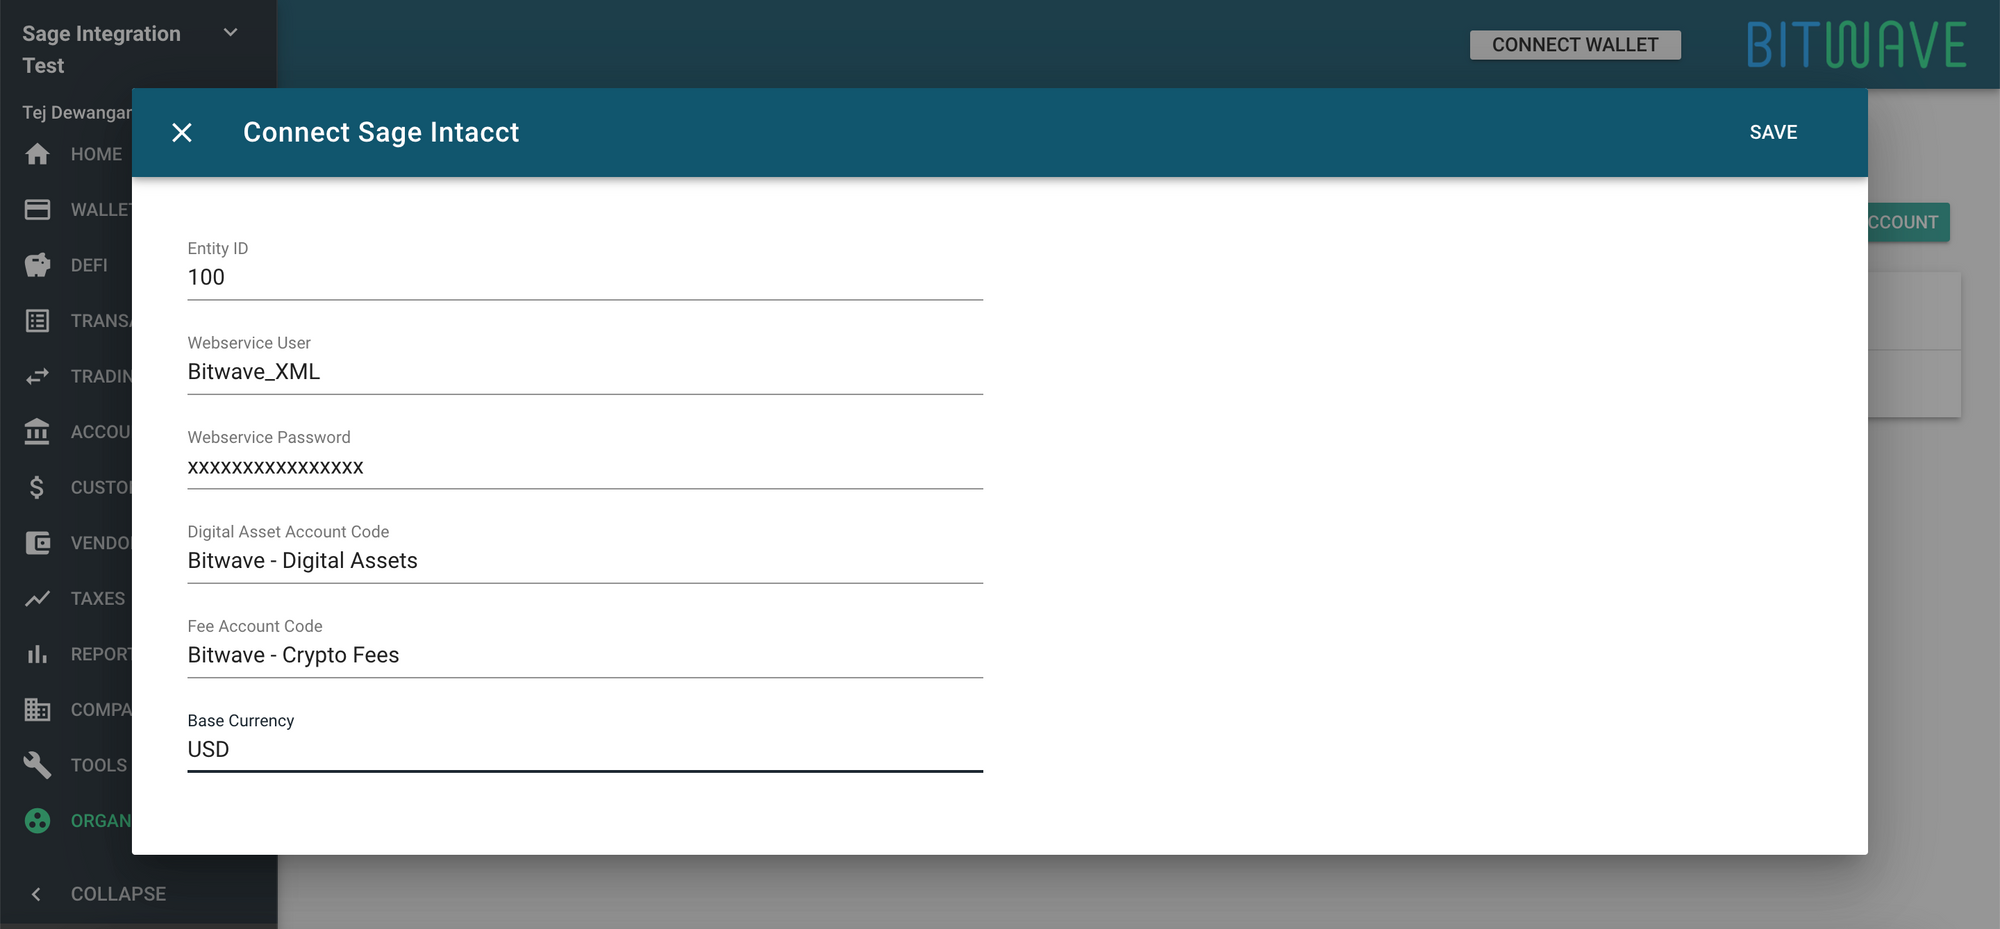
- Enter details as below
• Entity ID: Enter your entity id or leave blank for root
• Webservice User: Enter user created in prerequisites
• Webservice Password: Enter password for above user
• Digital Asset Account Code: Bitwave - Digital Assets
• Fee Account Code: Bitwave - Crypto Fees
• Base Currency: USD
- Click SAVE
Updated 4 months ago
