The Onboarding Journey

# 1: Setup & Configuration
- Step 1: Complete your Config & Setup and Wallets & Accounts tabs in the Onboarding Workbook* Step 2: Review Config/Setup and Wallets/Accounts information on kickoff call* Step 3: Login to Bitwave* Step 4: Connect General Ledger Software* Step 5: Create Categories & Contacts in Bitwave* Step 6: Set Accounting Defaults for Gas Fees, AP, & AR* Step 7: Add Wallets, Exchanges, Custodial & Manual Wallets* Step 8: Import Data into Manual Wallets* Step 9: Set Beginning Balances* Step 10: Check Wallet/Account Balances* Step 11: Set Up Inventory Views
# 2: Categorization
- Step 1: Viewing Transactions* Step 2: Transaction Screen operations* Step 3: Individual transaction categorization* Step 4: Check Pricing Data* Step 5: Set Up Categorization Rules* Step 6: Set Up Contact-based Categorization Defaults (including "in-line" categorization)* Step 7: Bulk Categorization* Step 8: System Jobs
# 3: Journal Entries & Gain/Loss
* Step 1: Push transactions (JE's) to General Ledger* Step 2: Manually record journal entry totals* Step 3: Record Impairment and Mark-to-Market Adjustments* Step 4: Record Realized Gain/Loss
# 4: Reports and Period-End Close
- Step 1: Cost Basis Summary (from Inventory Views)* Step 2: Cost Basis Rollforward (including Gain/Loss totals)* Step 3: Actions Report (from Inventory Views)* Step 4: Balance Report* Step 5: Journal Entry Reports* Step 6: Period-End Checklist* Step 7: Period-End Reconciliation
Getting Started With Your Onboarding Workbook
Filling Out Your Onboarding Workbook
As part of every new customer onboarding, we prioritize gathering essential information upfront to ensure that your Bitwave instance is configured to meet your needs.
Completing Your Onboarding Workbook:
We've created a document called the Onboarding Workbook to collect this vital information. While some questions may overlap with those asked during the sales process, we kindly request that you complete the workbook to align your preferences accurately.
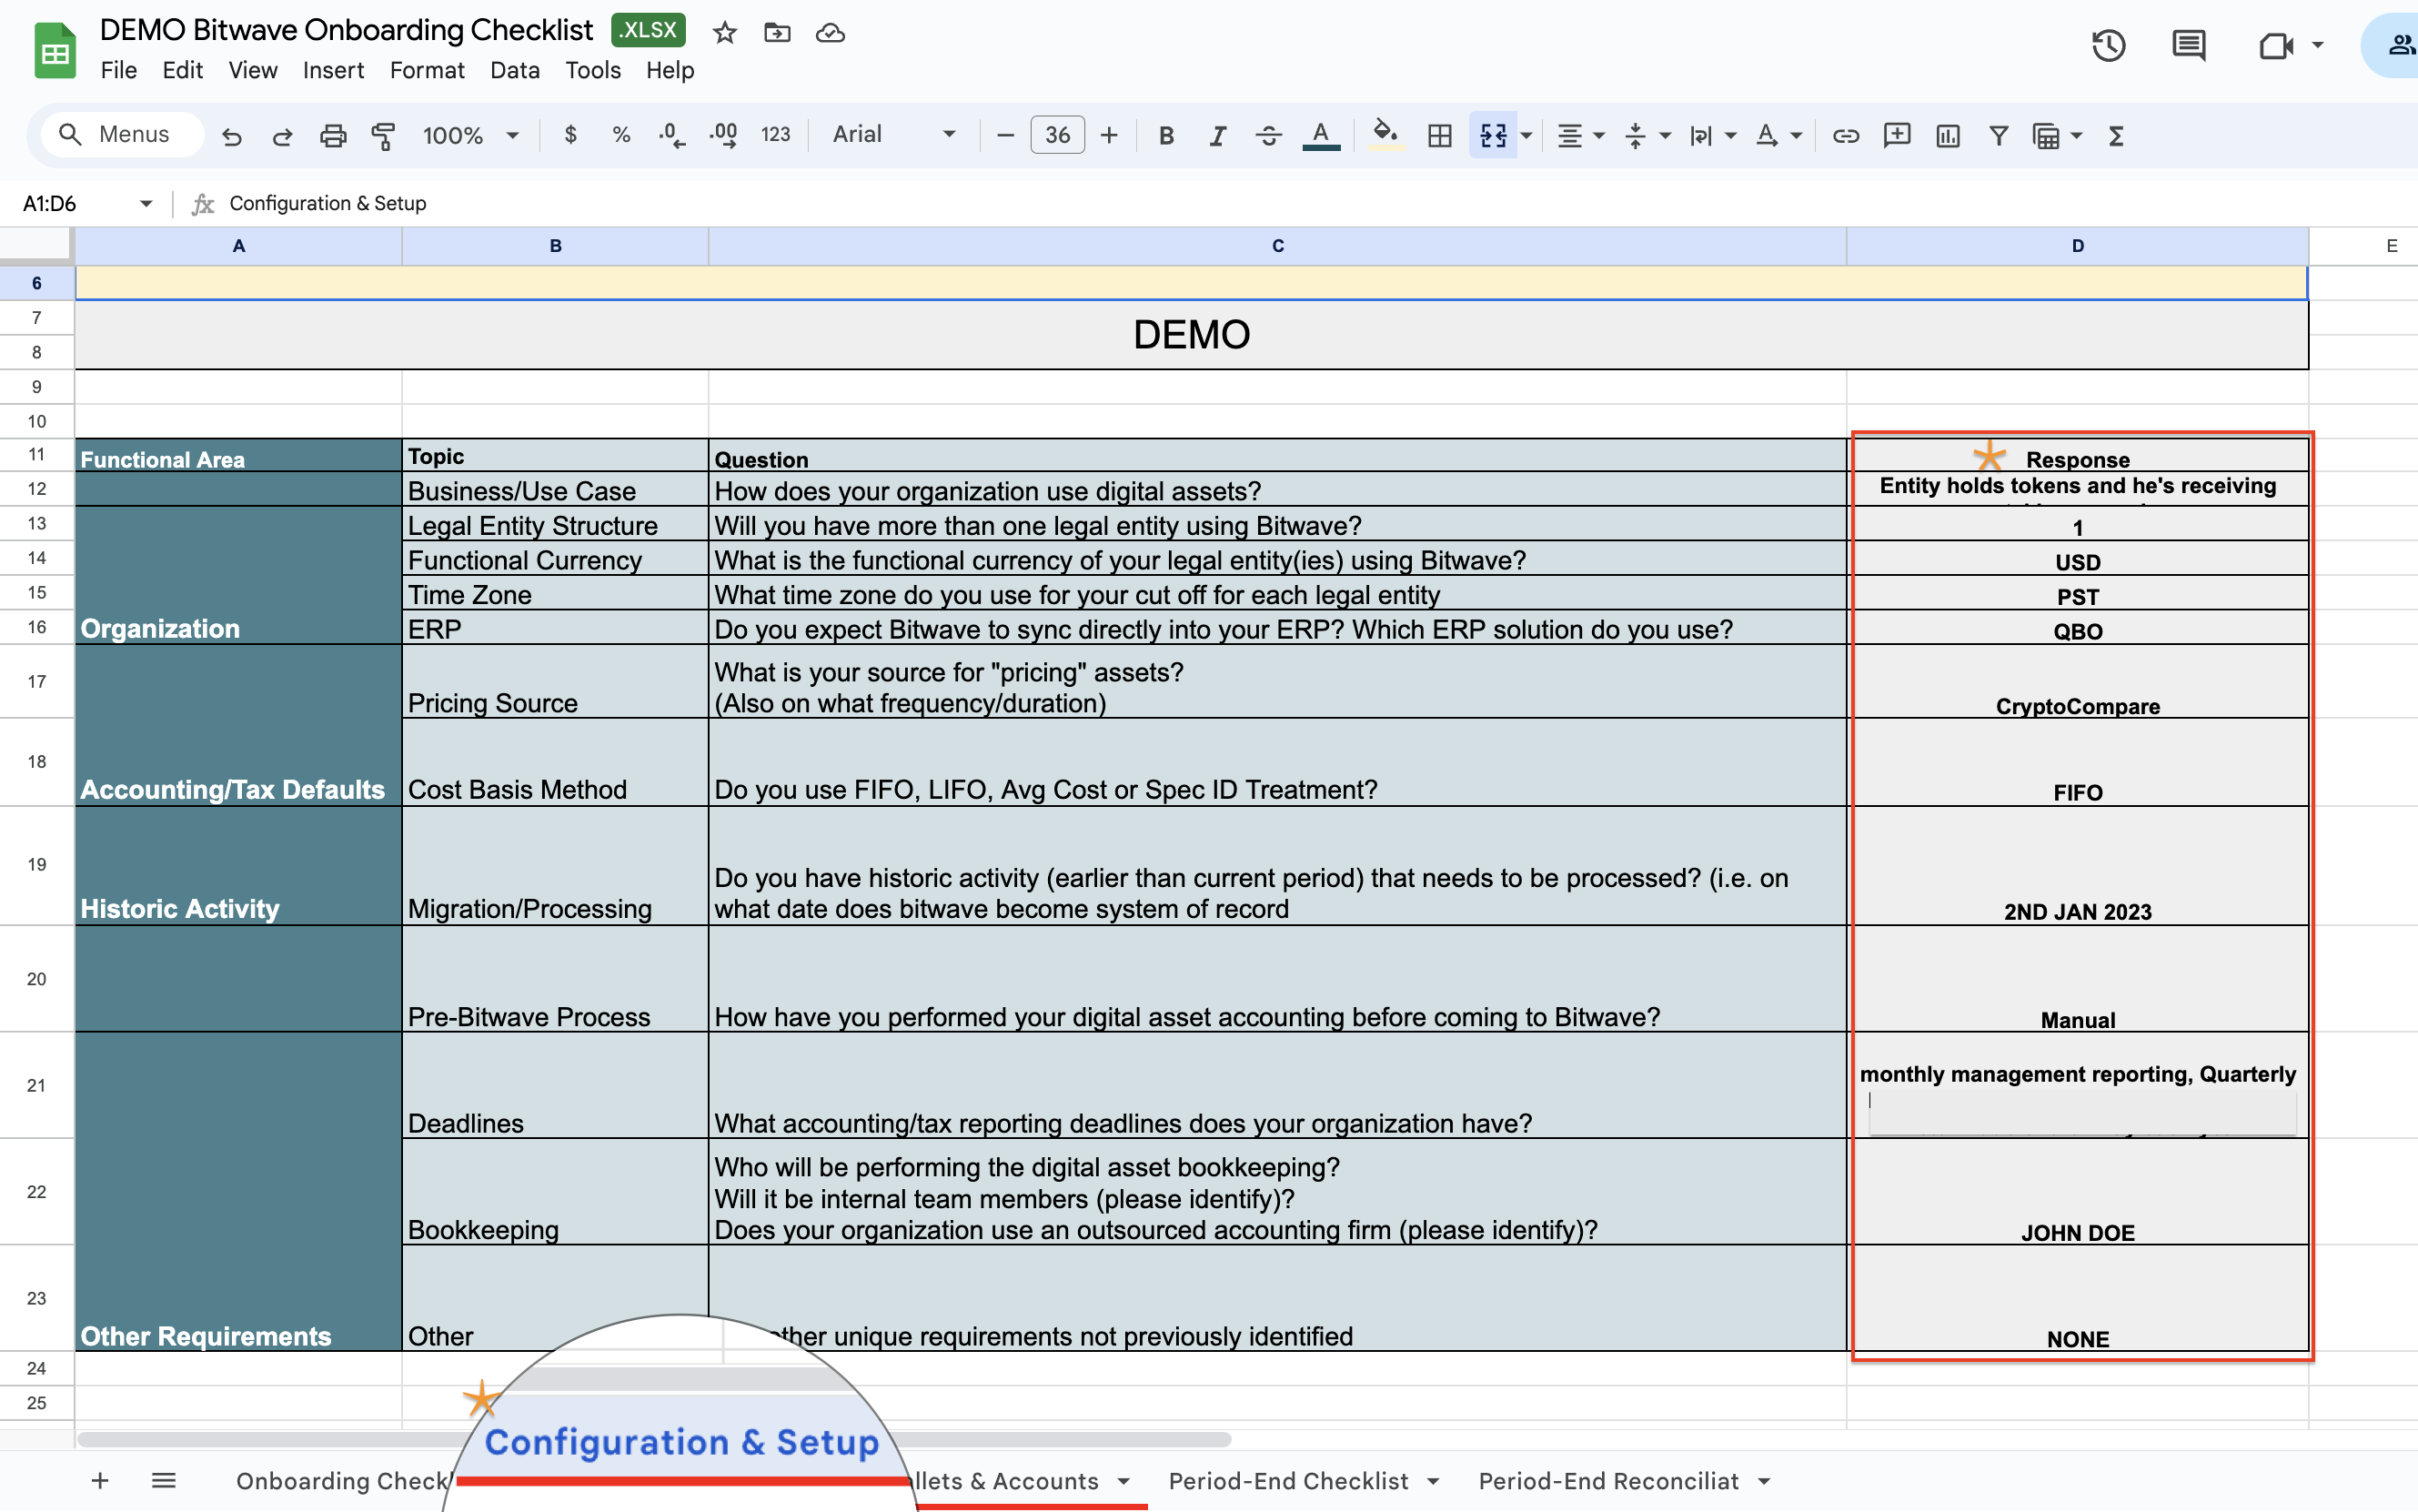
Configuration & Setup
In this tab, we require responses to questions related to your digital assets. Please fill in the "Response" column to provide the necessary details.

Wallets & Accounts
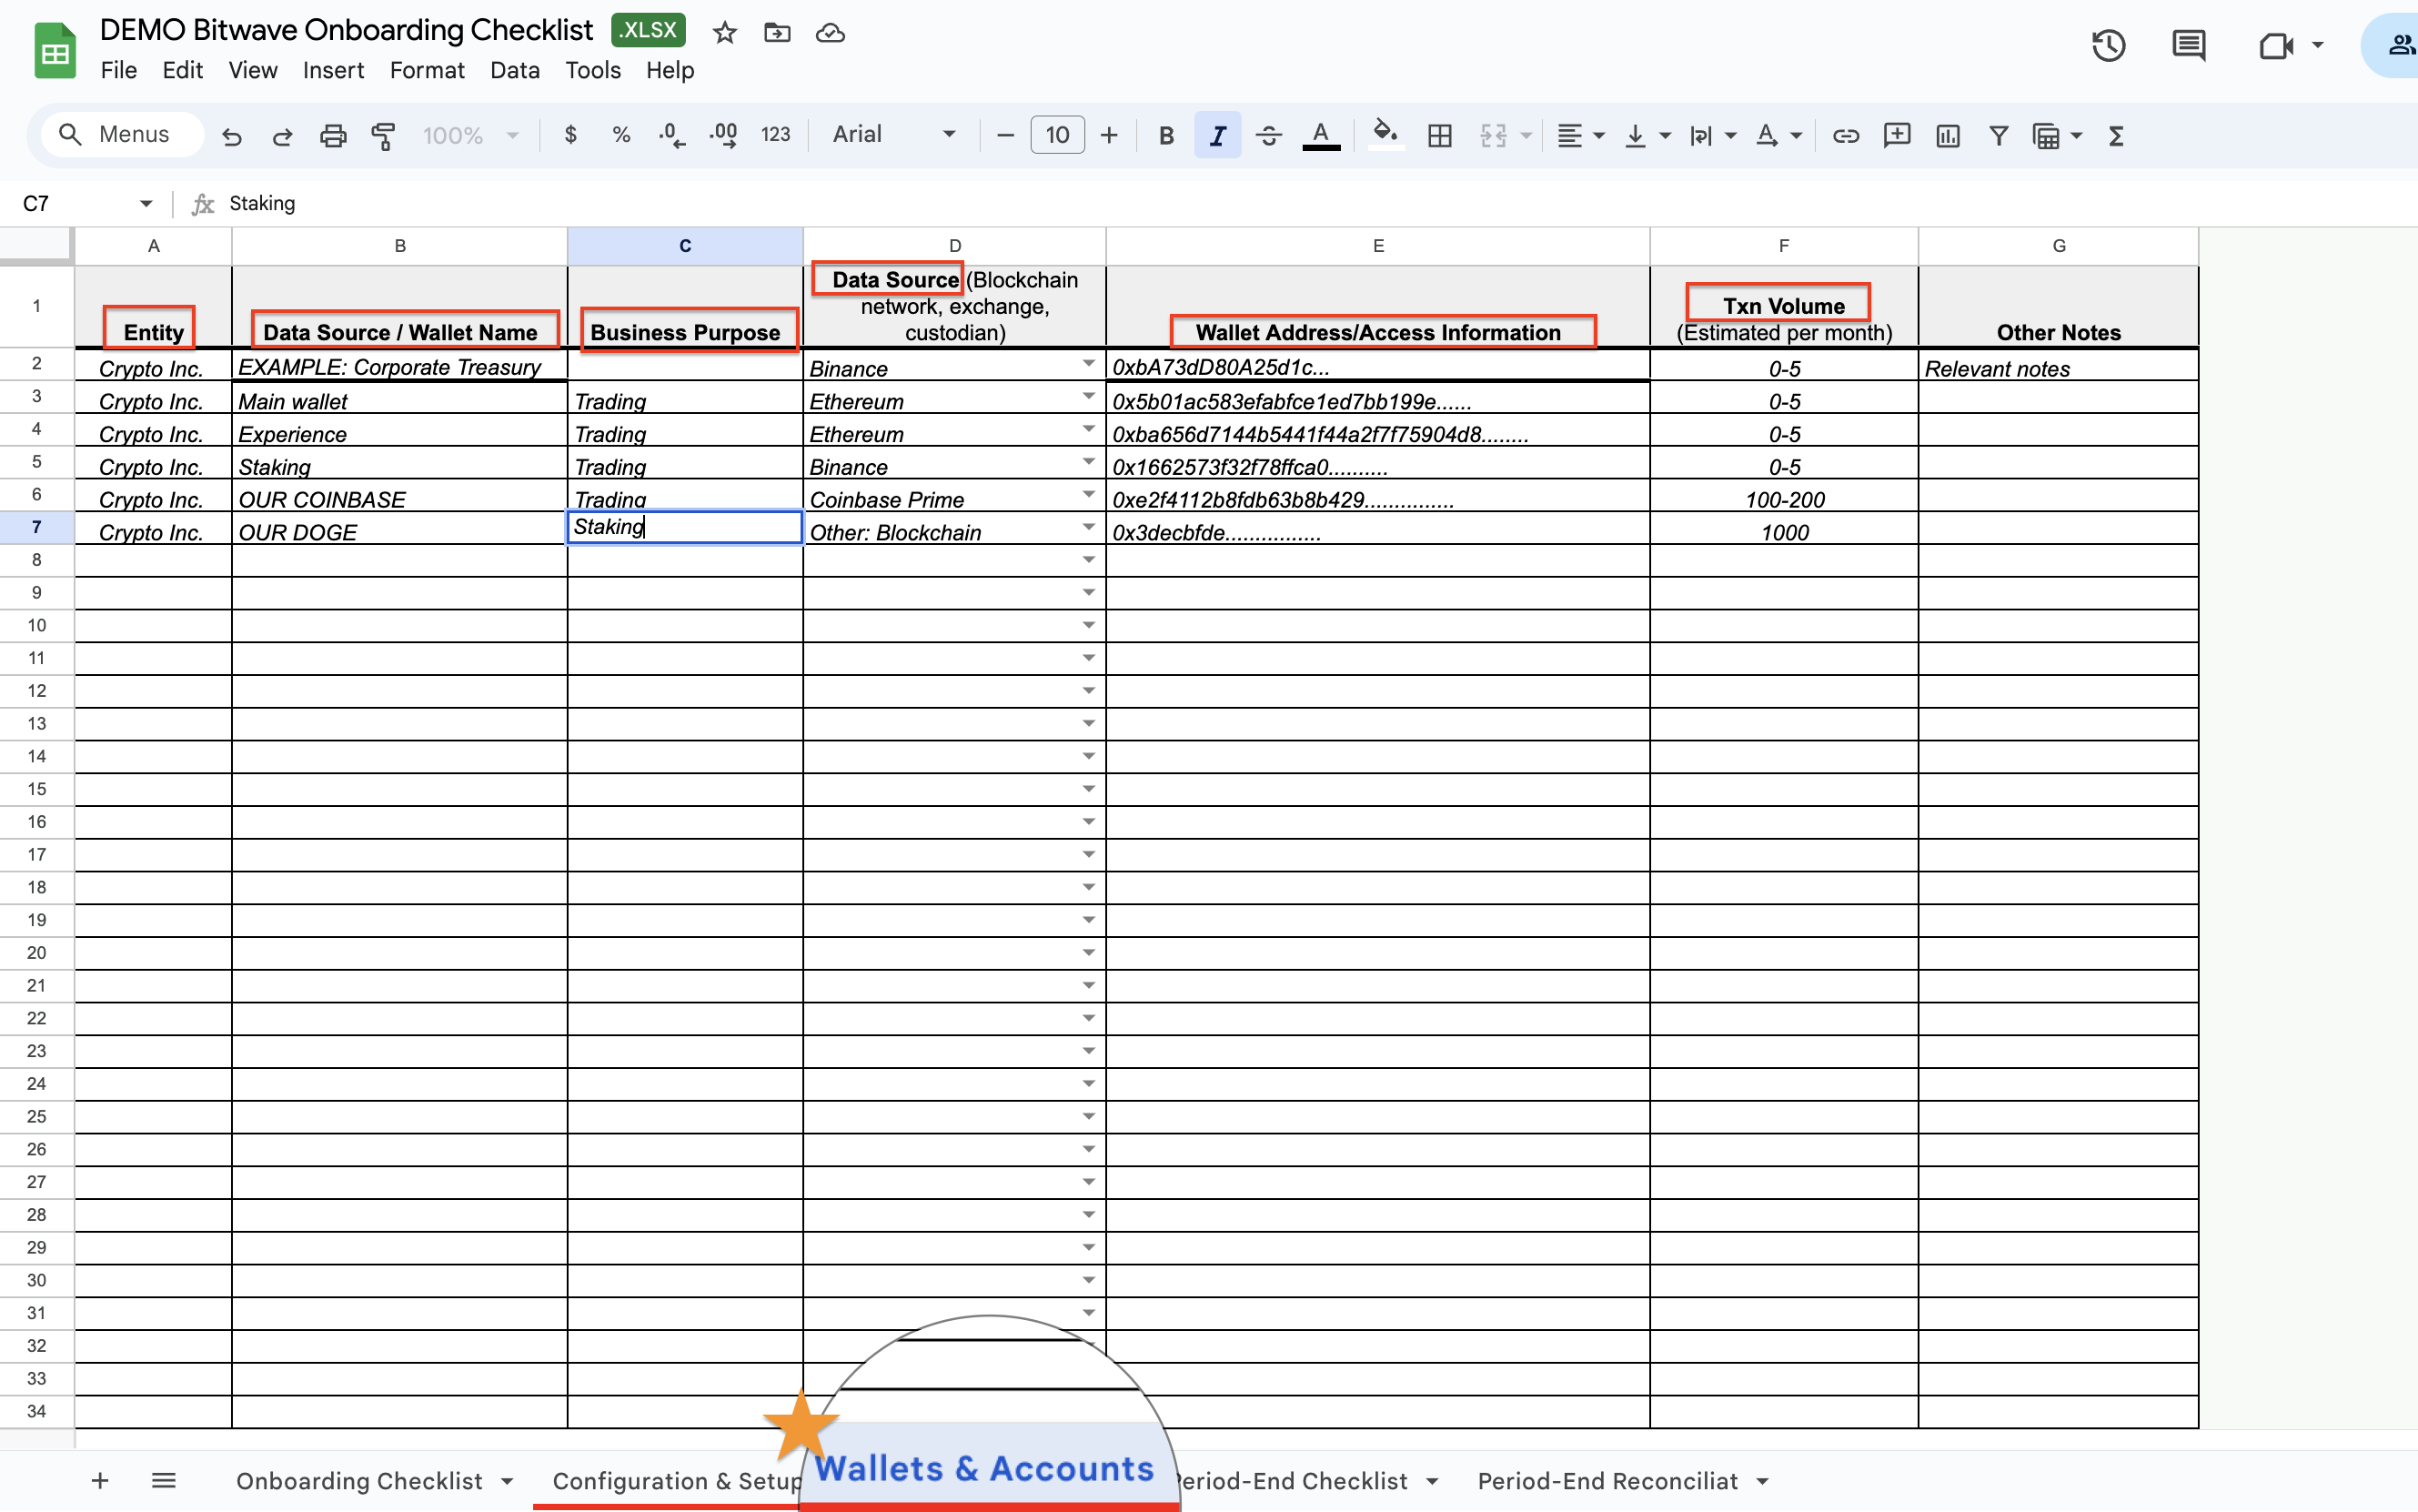
This tab is where we gather information about the wallets and accounts you'll be plugging into our software.

- Entity Column: Specify the entity for which you'd like to plug in the wallet, especially if you have multiple entities.
- Data Source or Wallet Name: Provide the name of the wallet and its data source, whether it's from a blockchain source, network, exchange, or custodian.
- Wallet Addresses/Access Information: Share the wallet addresses or access information required for integration.
- Transaction Volume (Txn Volume): Indicate the transaction volume for the wallet per month to assist with proper tracking.
- Other Notes: Feel free to include any relevant notes or special instructions regarding the wallet.
Taking Action:Please focus on completing these two tabs in your workbook:
- Configuration & Setup
- Wallets & Accounts
Once you've completed these sections, reach out to your Onboarding Specialist, and we'll proceed with the next steps of your onboarding journey.
By completing your Onboarding Workbook thoroughly, you'll help us configure Bitwave to align seamlessly with your requirements, ensuring a smooth and efficient onboarding process!
Updated 5 months ago
