
Push transactions (JE's) to General Ledger
Reconciliation
After diligently categorizing your transactions, it's time to navigate the next steps to ensure smooth financial management. Whether you're integrated with popular accounting software like QuickBooks Online (QBO), Xero, Netsuite, or managing your accounting manually, here's what comes next:
For Users Connected to QBO, Xero, Netsuite, or Other Accounting Software:
If you've synced your Bitwave account with any accounting software, such as QuickBooks Online (QBO), Xero, Netsuite, or others, the logical next step is reconciliation. Reconciliation is the process of matching transactions in your accounting software with those in your Bitwave account to ensure accuracy and consistency. By reconciling transactions, you confirm that all financial data is correctly recorded and aligned between Bitwave and your accounting software. This step ensures that your financial statements accurately reflect the financial health of your business.
- Once your categorizations have been completed, in order to reconcile and sync transactions, go to the left menu → accounting → reconcile.
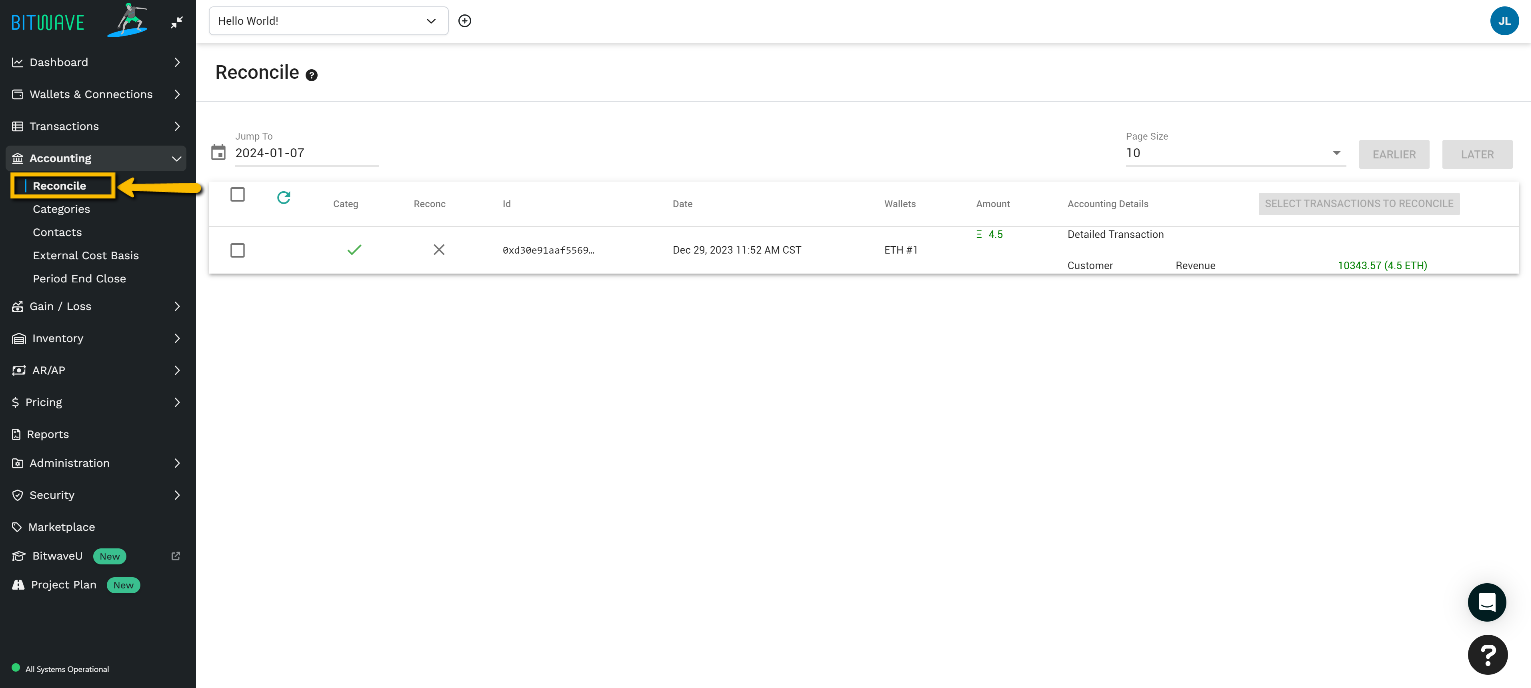
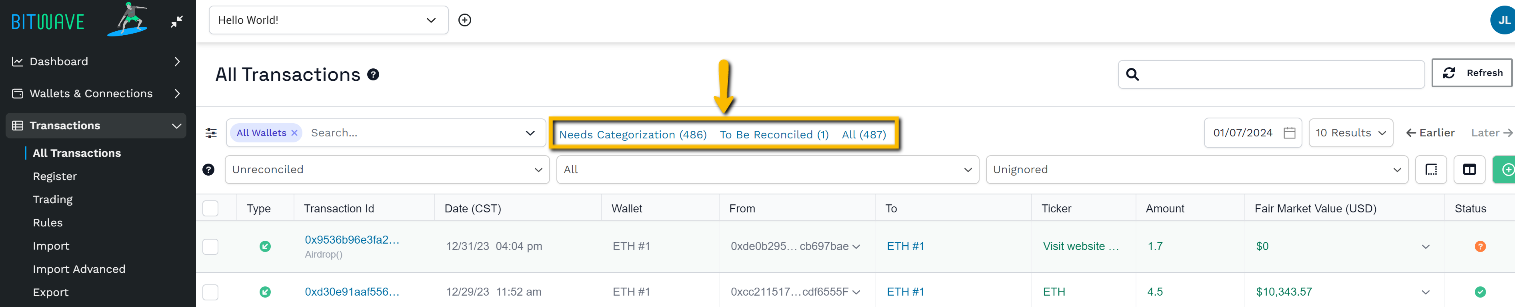
- Pro tip: Review the Transaction UI summary of transactions to make sure you have zero transactions left to categorize. If all transactions are listed under “To Be Reconciled,” you are ready to move into the reconciliation process. If you have remaining transactions left in the “Needs Categorization” summary, resolve those first before moving onto the next step.
- Review the “Accounting Details” column for the contact, general ledger mapping, and amount on the categorized transactions for reasonableness. When you are ready to sync the data into your GL (ERP) software, you can individually select each transaction by choosing the check box on the left side and selecting the green “Reconcile Selected Transaction” button on the upper right. Once reconciled and synced you are able to view the transactions in your GL (ERP) system.

- You may also select multiple transactions at once using the checkbox at the top of the column. You have the option to expand up to 100 transactions on the page.

- If you need to reconcile more than 100 transactions at once, an alternative option is to use System Jobs. Locate Administration > System Jobs.
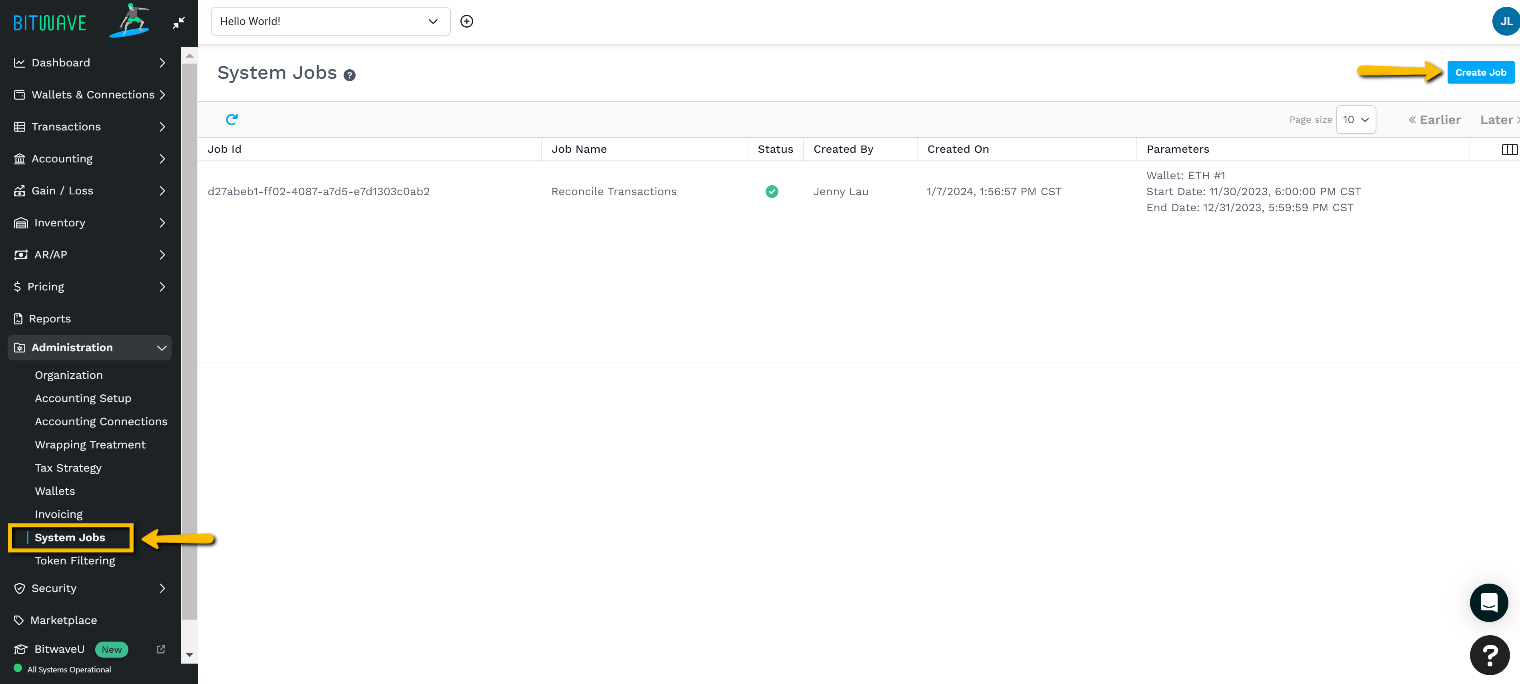
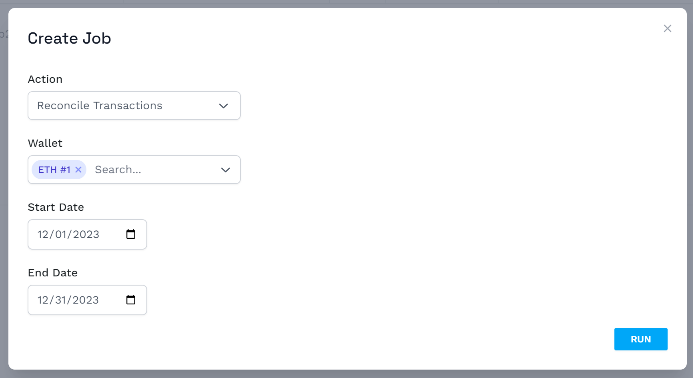
- Once you are at System Jobs, using the “Create Job” button, you can mass reconcile transactions by wallet by choosing
a. Action: Reconcile Transactions
b. Wallet: Select up to 10 wallets
c. Start Date: Select the first date you would like the range to apply to.
d. End Date: Select the last date you would like the range to apply to.
e. Select “RUN”
- Once you select RUN, the status will show a loading icon.

- Your System Job is completed when the Status column indicates a green check mark.

- Important Note: Unreconciling a transaction in Bitwave does NOT un-reconcile the corresponding transaction in your GL (ERP) system, it will simply create an out of sync situation between Bitwave and your ERP system.
Updated 10 months ago
What’s Next
For Users Not Connected to Accounting Software:
If you're not integrated with an accounting software, the next step involves updating the reconciliation worksheet for the month. The reconciliation worksheet serves as a manual record of all financial transactions for a specific period, typically a month. You'll need to review each transaction in Bitwave and manually update the reconciliation worksheet to reflect the correct balances and details. This process ensures that your financial records are accurate and up to date, laying the groundwork for informed decision-making and financial reporting.
Go to the next page to learn how to manually book journal entries!