
Netsuite Enterprise Payments Setup
Netsuite Payments Setup
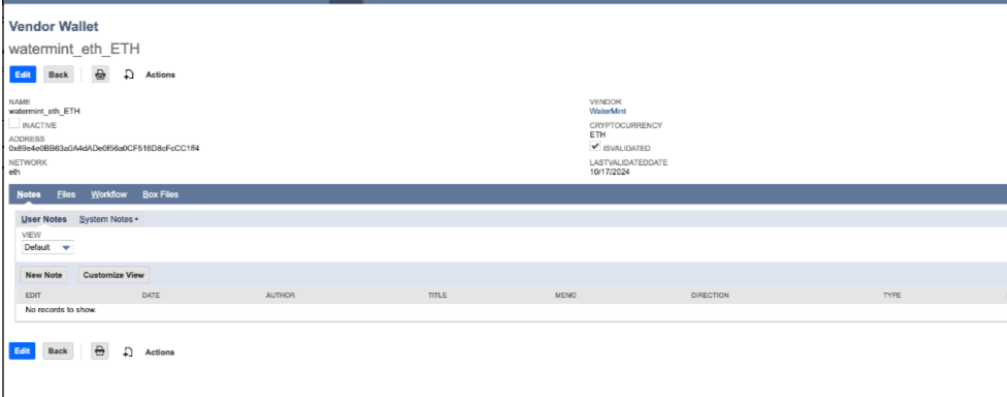
Step 1: Create a Custom Record
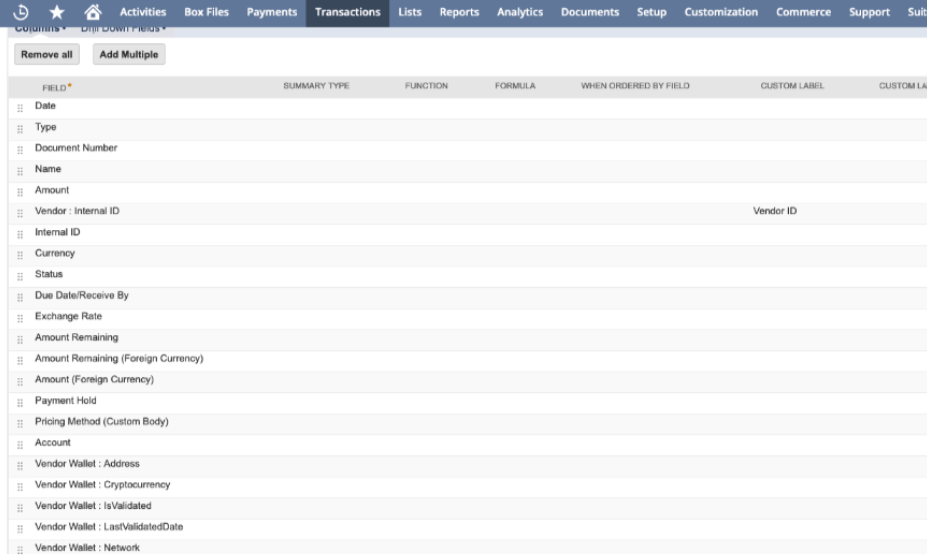
Step 2a: Create Saved Search FOR BILLS
The following are the fields that are needed
Step 2b: Create Saved Search FOR Vendors
The following are the fields that are needed:
• Vendor Name
• Email1
• Email 2
We use this for emailing remittance to vendors
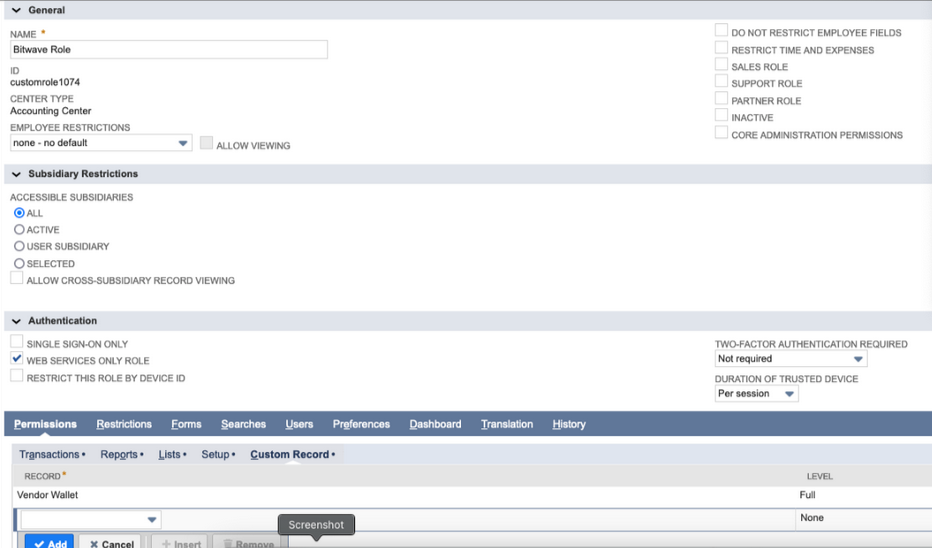
Step 3: Add Permissions for Custom Record to the “Bitwave Role”
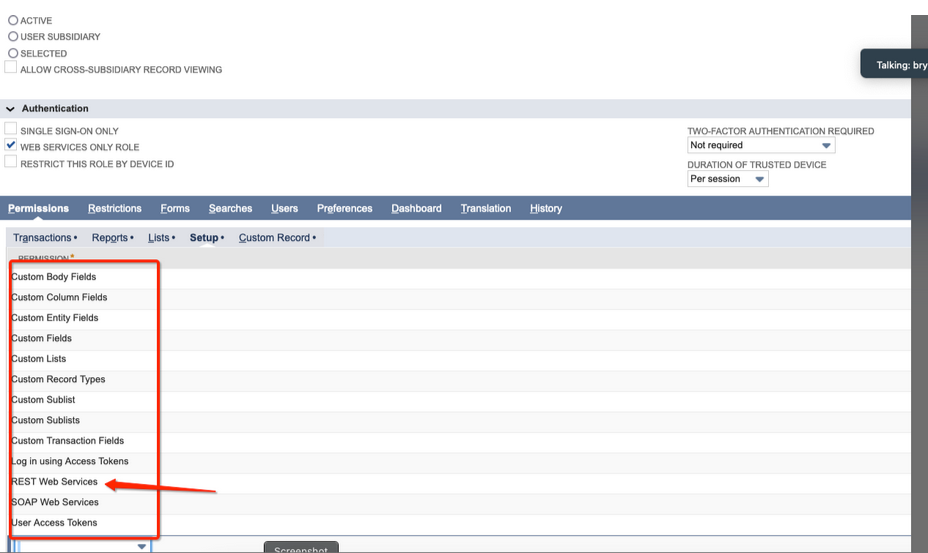
Add the REST WEB SERVICES
Step 4: Provide The following IDS from Netsuite Custom Record
• Script ID
• Address
• Network
• IsValidated
• LastValidatedDate
• Vendor
• Cryptocurrency
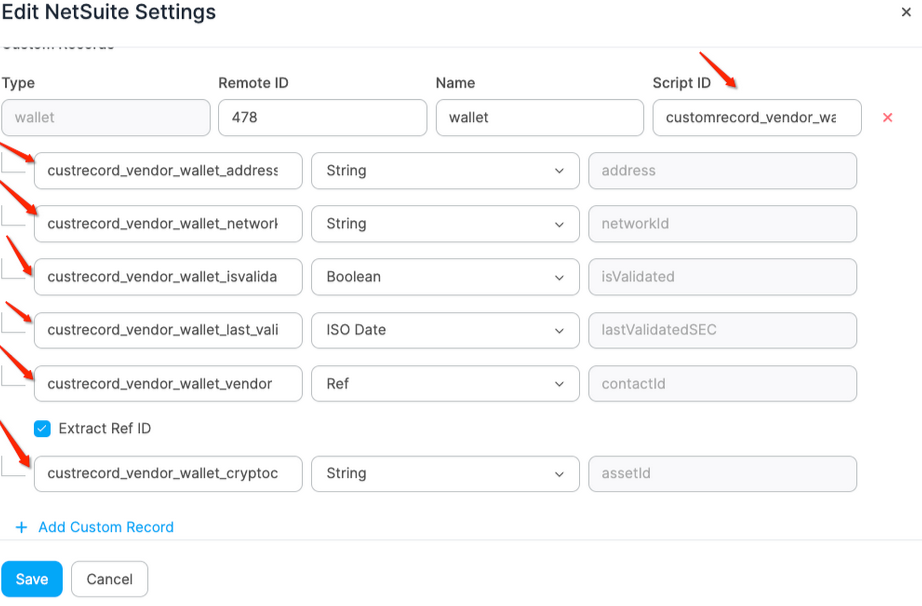
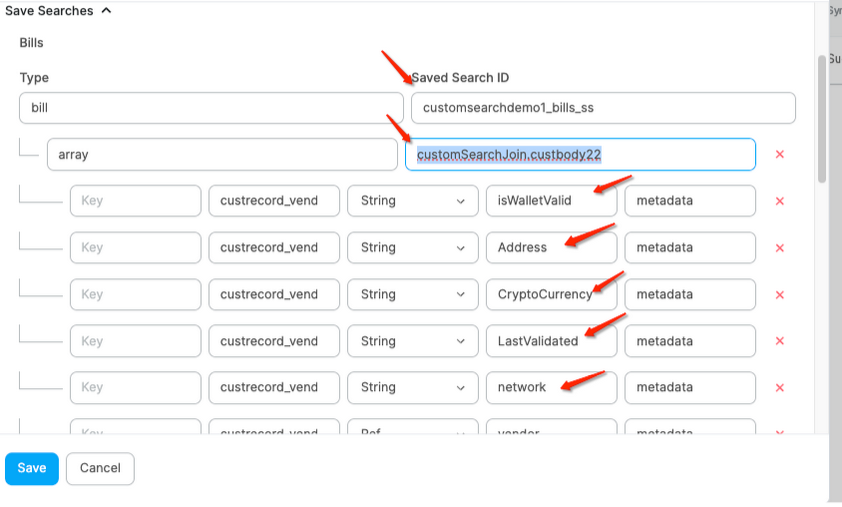
Step 5: Provide The following IDS from the Netsuite Bill Saved Search
• Bill Saved Search ID
• Array ID
• isWalletValid
• Address
• CryptoCurrency
• LastValidated
• Network
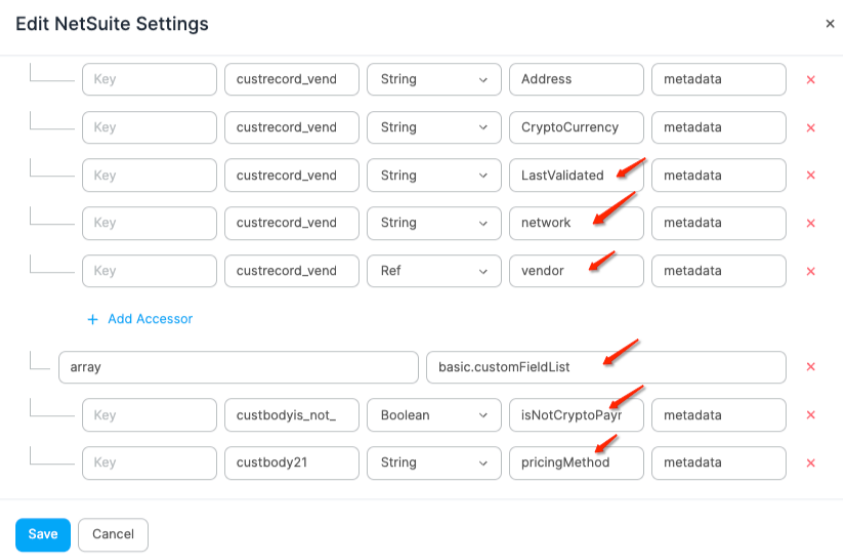
• Vendor
• IsNotCrypto
• PricingMethod (Optional / Future)
Step 6: Obtain the following IDs from the Vendor Saved Search
• Saved Search ID
• Array ID
• Email1 ID
• Email2 ID
Once you have this information a Bitwave Solutions Specialist can use this information to connect Bitwave to Netsuite Saved Search which would then sync information into the Enterprise Payments App.
Updated about 1 year ago