
How to Connect NetSuite
Introduction
Connecting NetSuite allows Bitwave to sync accounting data between Bitwave and your ERP.
Once connected, Bitwave can generate journal entries from your crypto transactions and sync them to NetSuite based on your accounting configuration.
Depending on your setup, the integration may also support:
- Syncing the chart of accounts as categories
- Syncing customers and vendors as contacts
- Syncing invoices and bills
- Syncing journal entries
Requirements
Before connecting NetSuite, make sure you have:
- Admin access to NetSuite (Administer Role required)
- Admin access to your Bitwave organization
- Permission to create integrations and access tokens in NetSuite
- Access to the NetSuite chart of accounts
- Access to subsidiaries and accounting dimensions in NetSuite
Connection Method
Bitwave connects to NetSuite using Token-Based Authentication (TBA). This is a secure API authentication method built into NetSuite that does not require sharing your NetSuite login credentials.
Token-based authentication involves three things you will create in NetSuite:
- An Integration Record - identifies Bitwave as a trusted application
- A Role - defines what Bitwave is allowed to do in NetSuite
- An Access Token - grants Bitwave secure API access on behalf of a user
Set Up NetSuite
NetSuite requires configuration before it can connect to Bitwave. Complete the following steps inside NetSuite first.
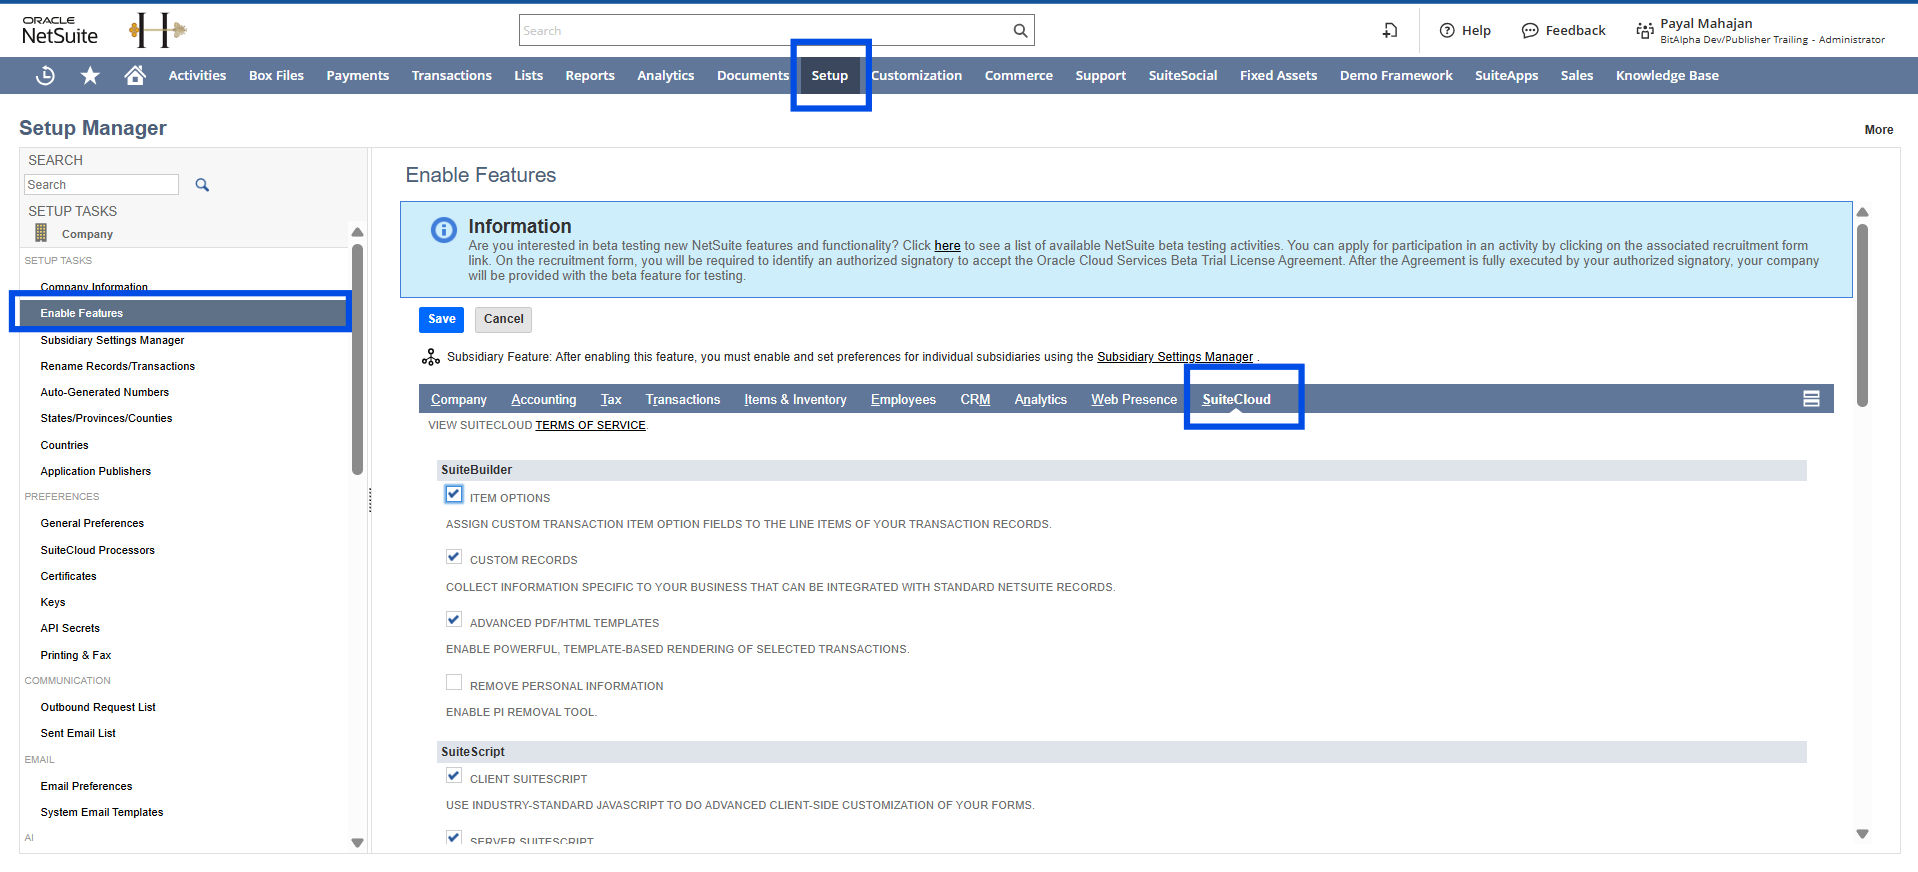
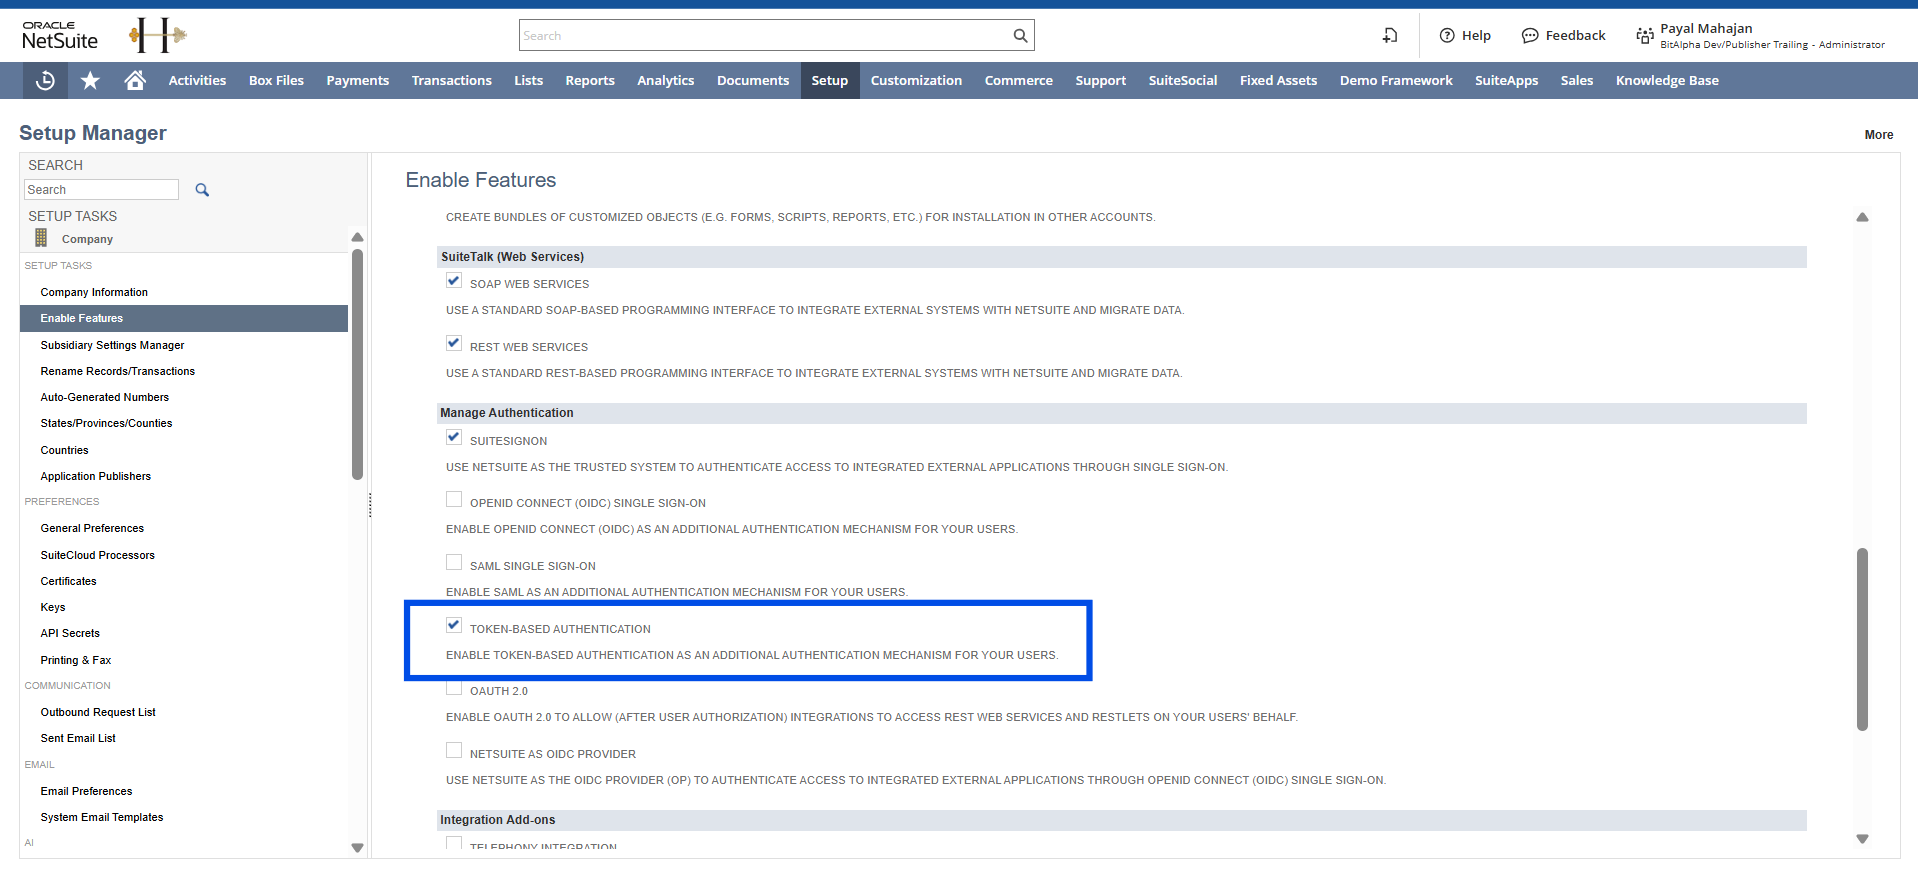
Step 1: Enable Token-Based Authentication
Enable Token-Based Authentication (TBA) in NetSuite to allow secure API access.
-
Navigate to Setup > Company > Enable Features
-
Click the SuiteCloud tab
-
Find Token-Based Authentication and check the box to enable it
-
Click Save.
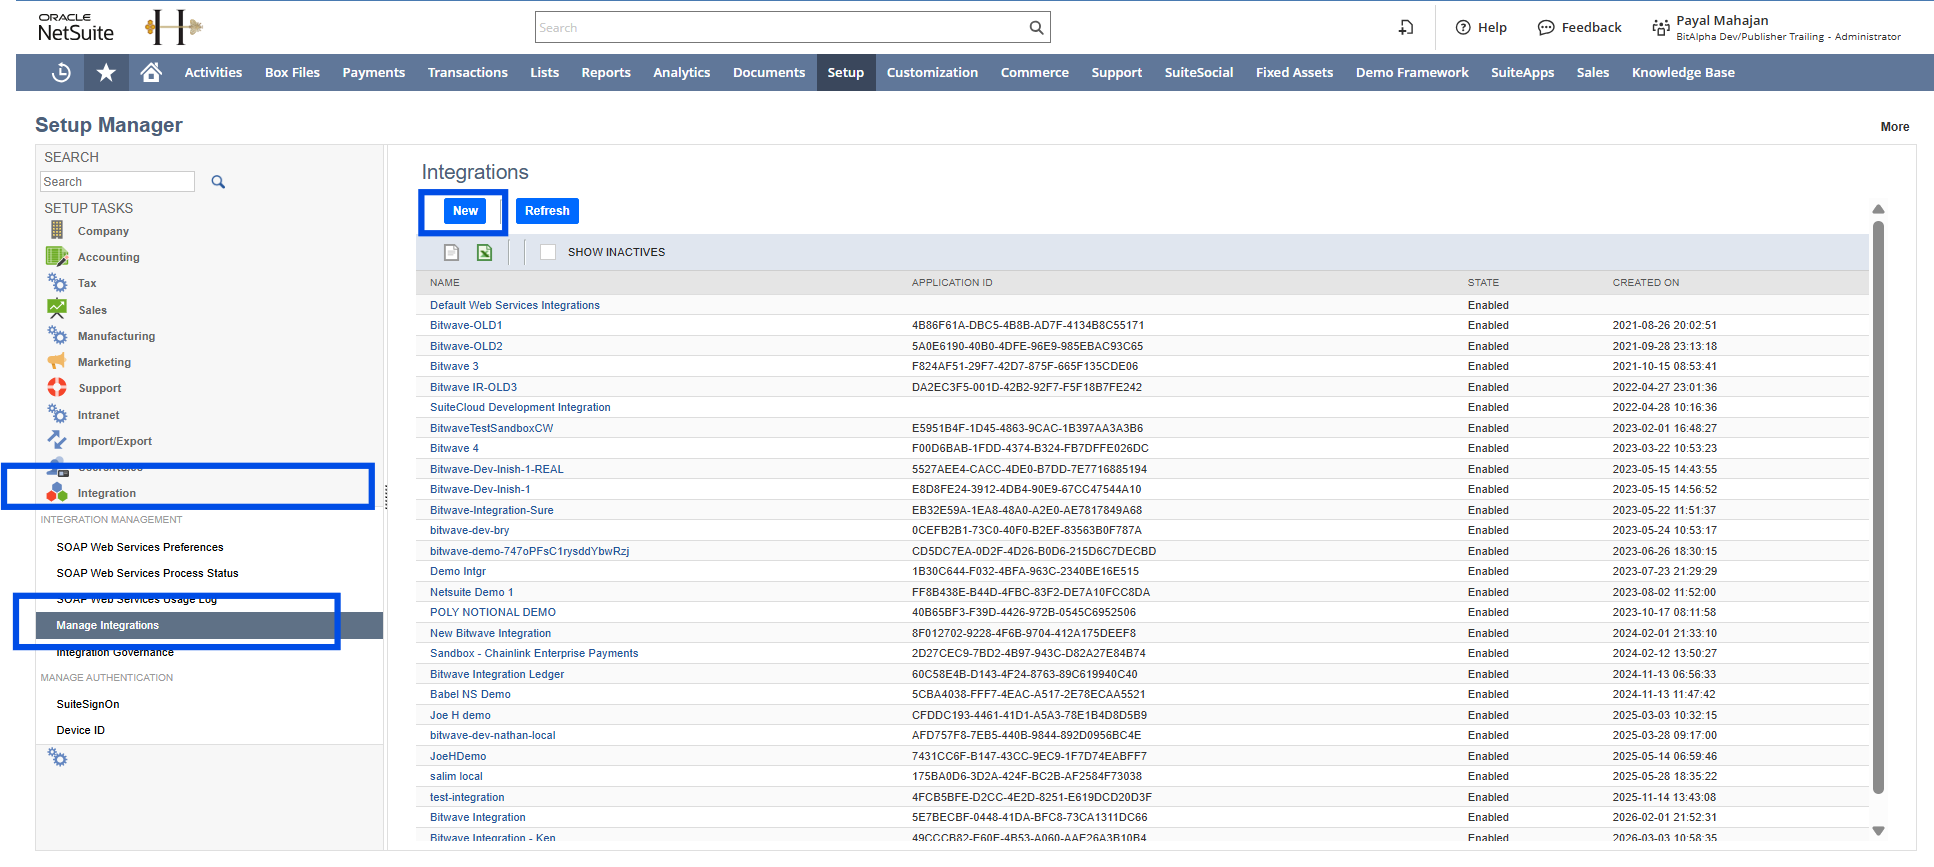
Step 2: Create an Integration Record
Create a new integration record in NetSuite for Bitwave. This generates your Consumer Key and Consumer Secret.
-
Navigate to Setup > Integrations > Manage Integrations > New
-
Name the integration "Bitwave Integration"
-
Under Authentication, check Token-based Authentication
-
Check TBA Issuetoken Endpoint
-
Uncheck TBA Authorization Flow
-
Uncheck Authorization Code Grant
-
Click Save.
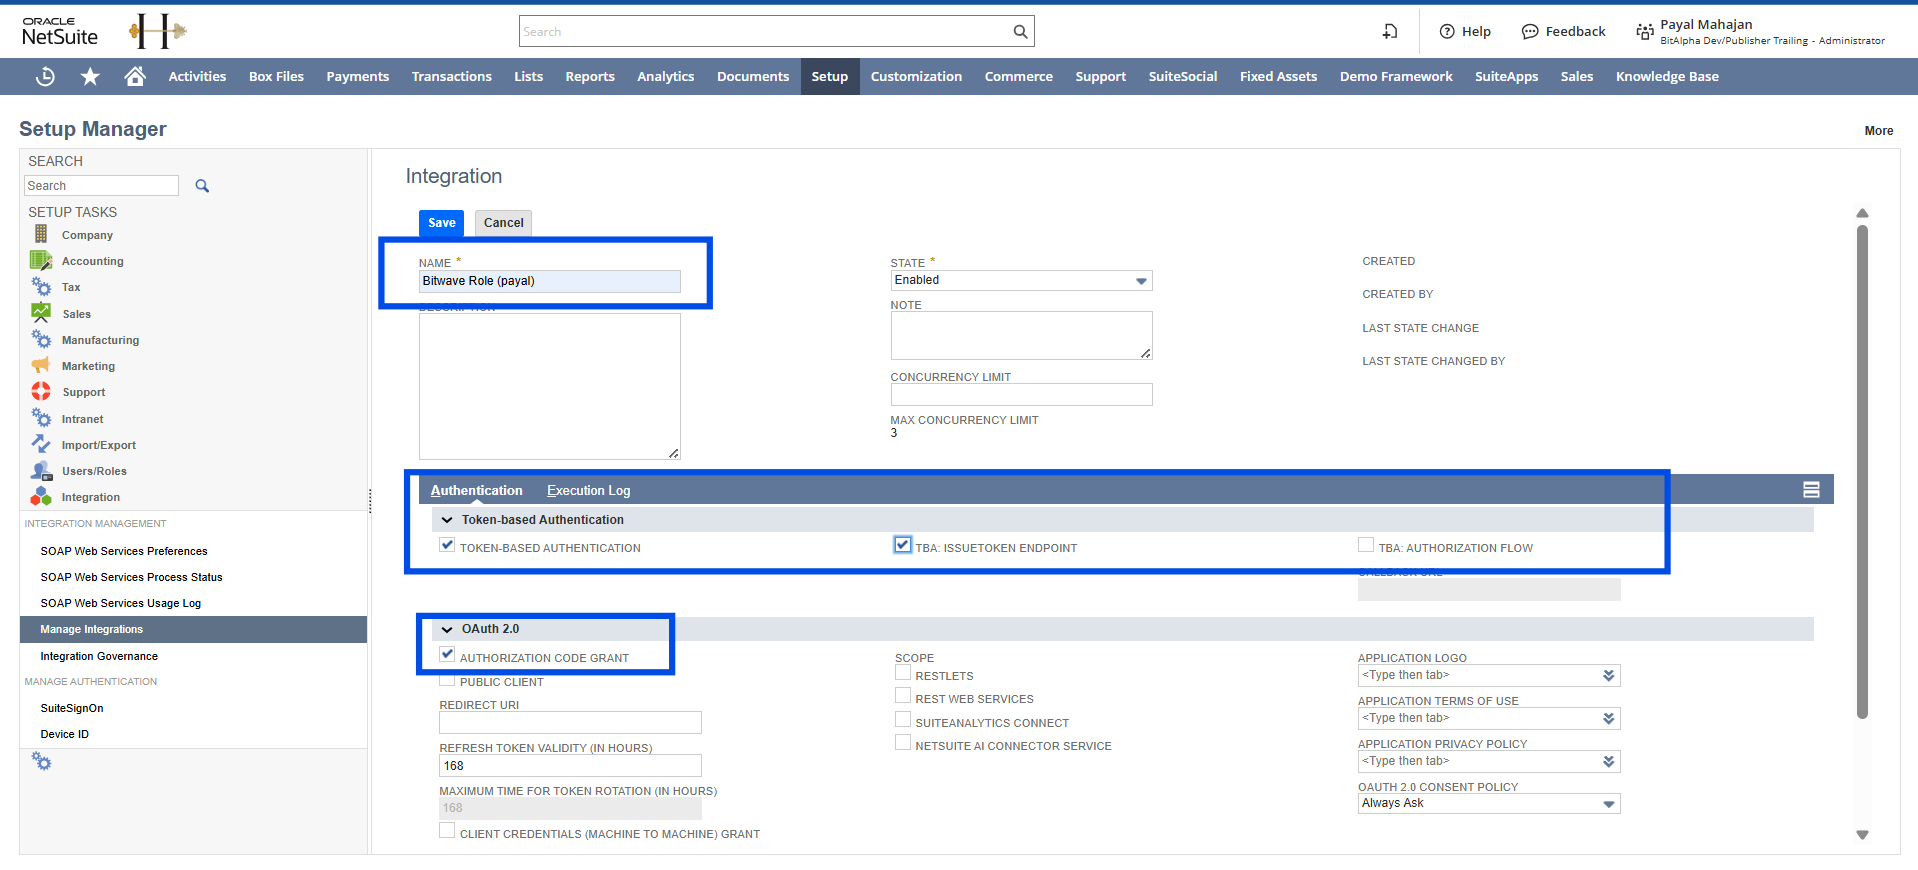
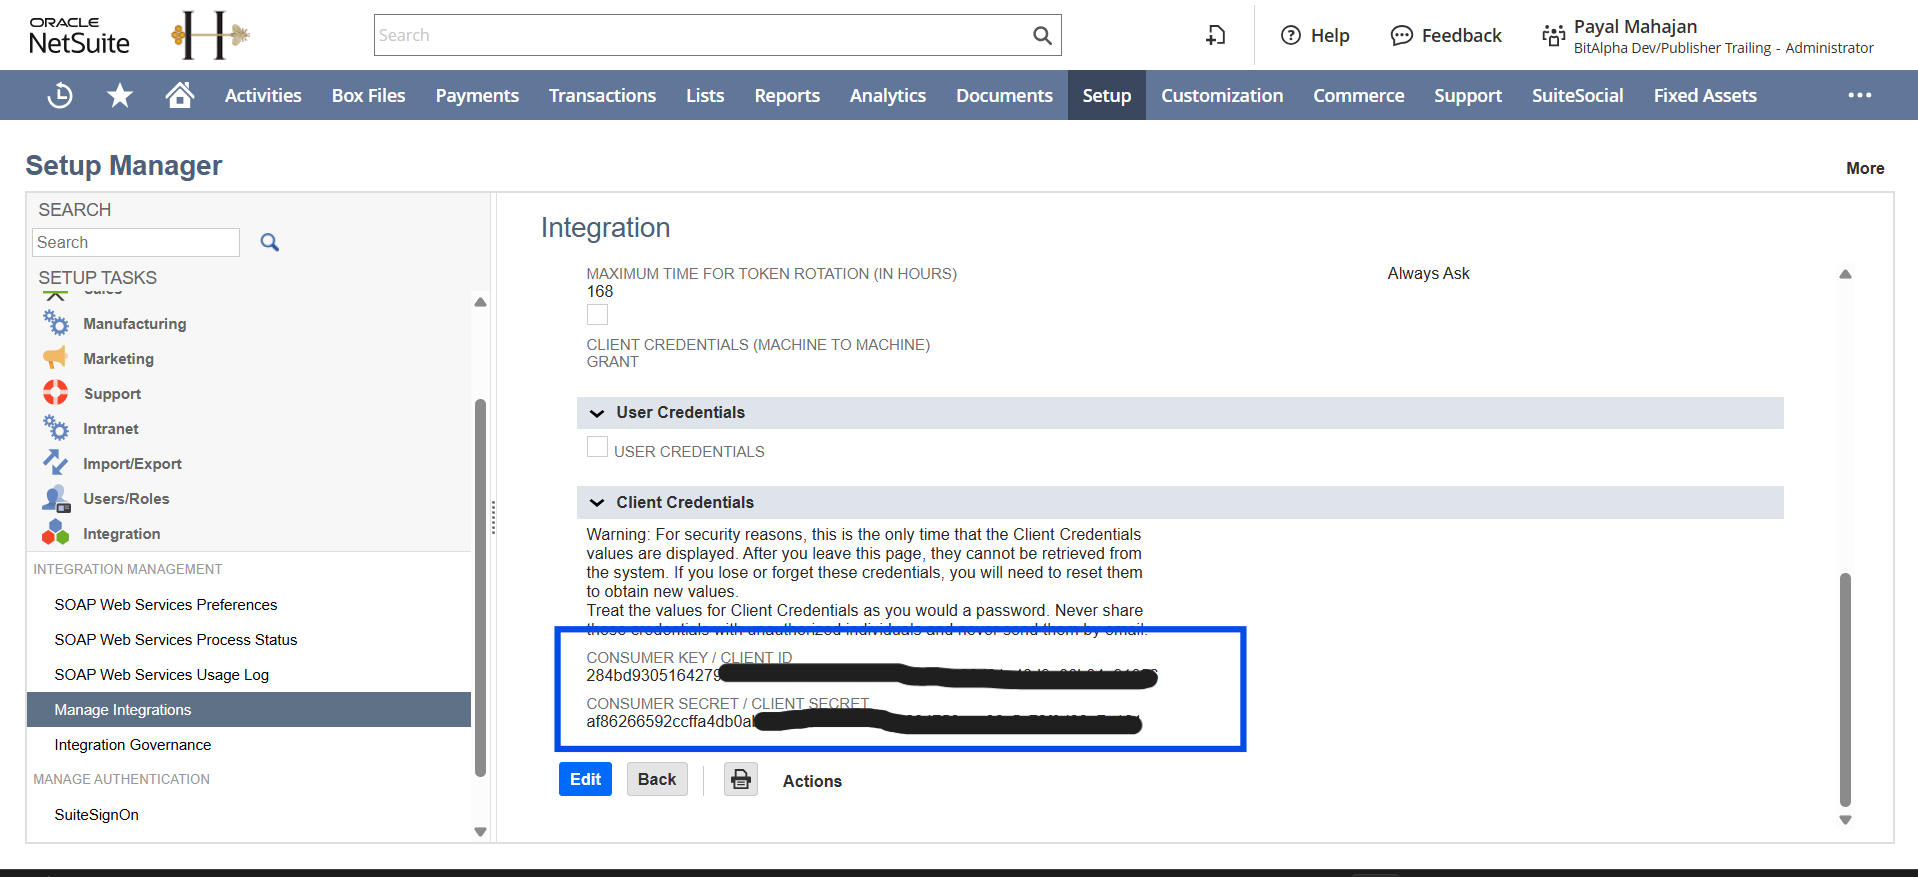
IMPORTANT: NetSuite shows your Consumer Key and Consumer Secret only once. Copy and save both in a secure place before leaving this page. You will not be able to retrieve them again.
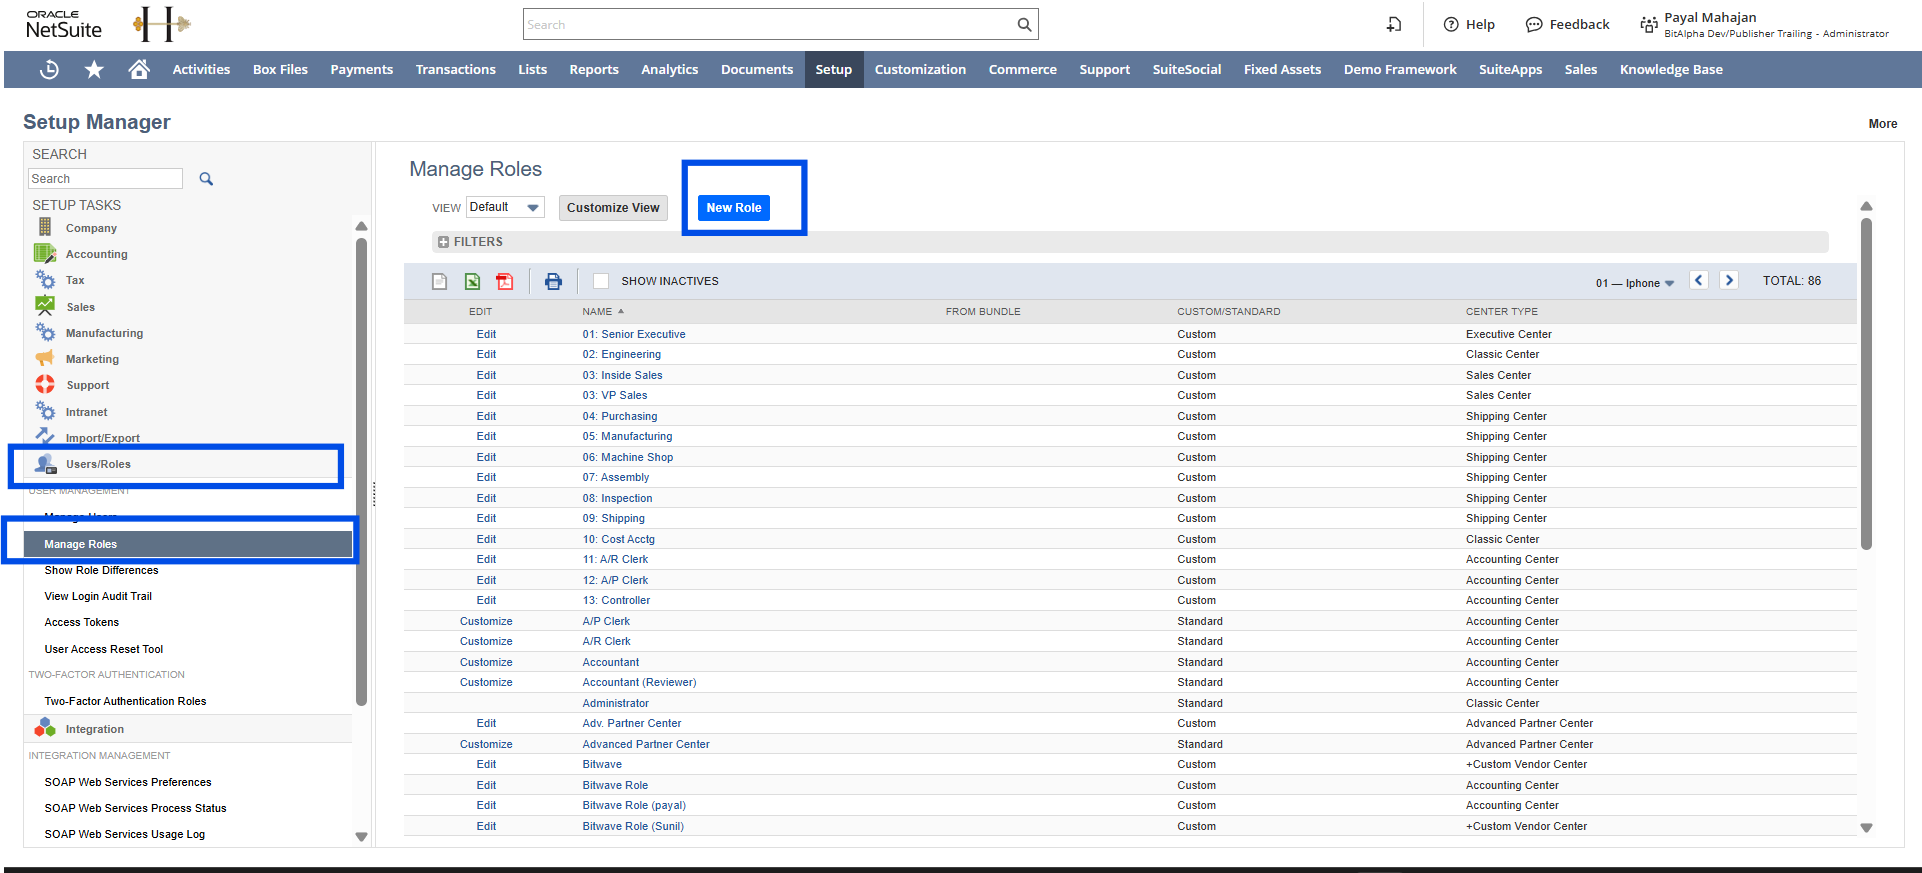
Step 3: Create the Bitwave Role**
Create a dedicated role in NetSuite with the permissions Bitwave needs to read and write accounting data.
-
Navigate to Setup > Users/Roles > Manage Roles > New
-
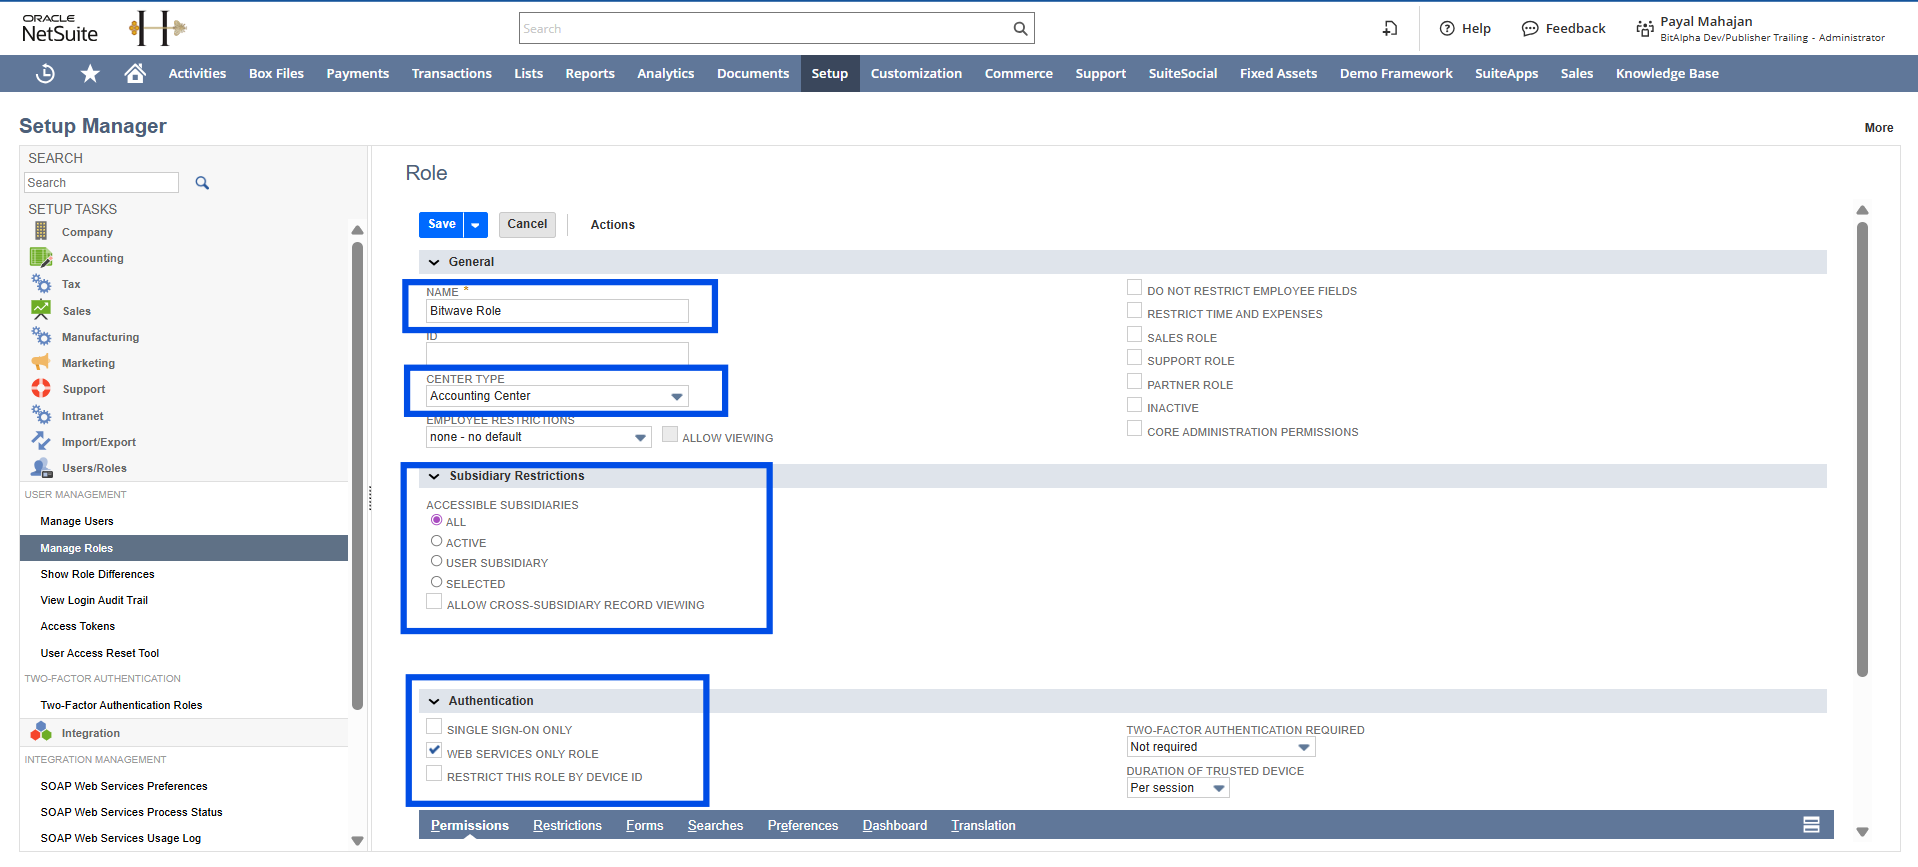
Name the role "Bitwave Role"
-
Select a Center Type (e.g. Accounting Center)
-
Set Accessible Subsidiaries to All
-
Check Web Services Only Role
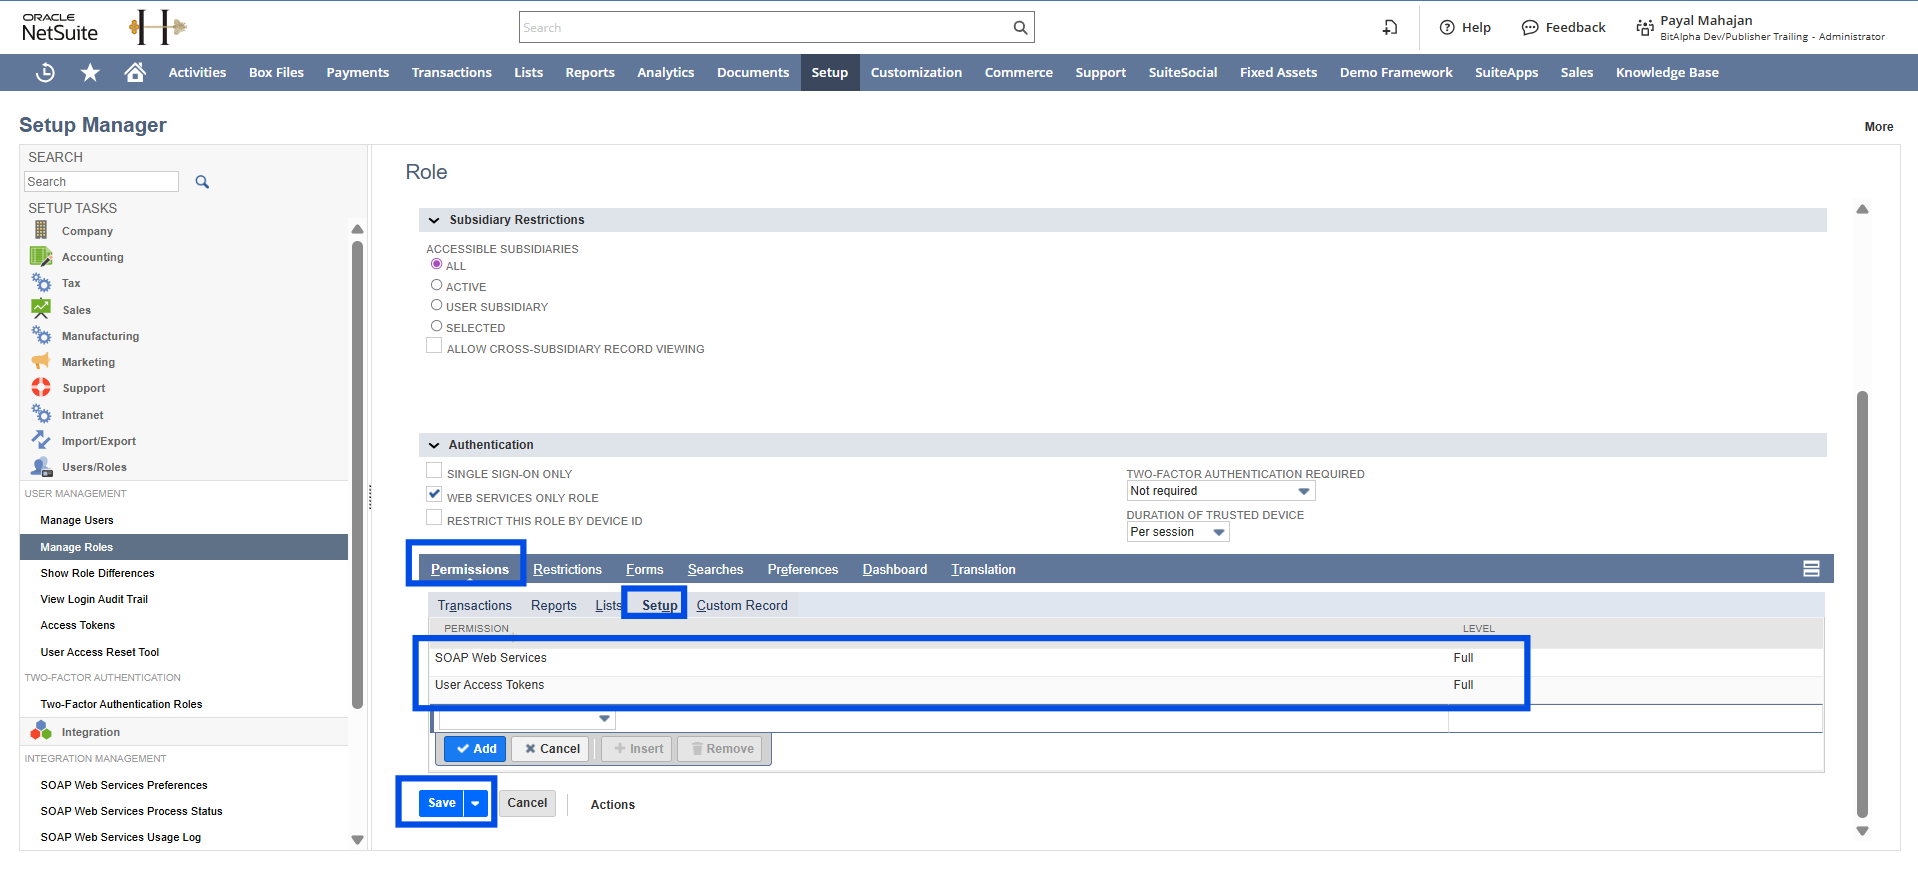
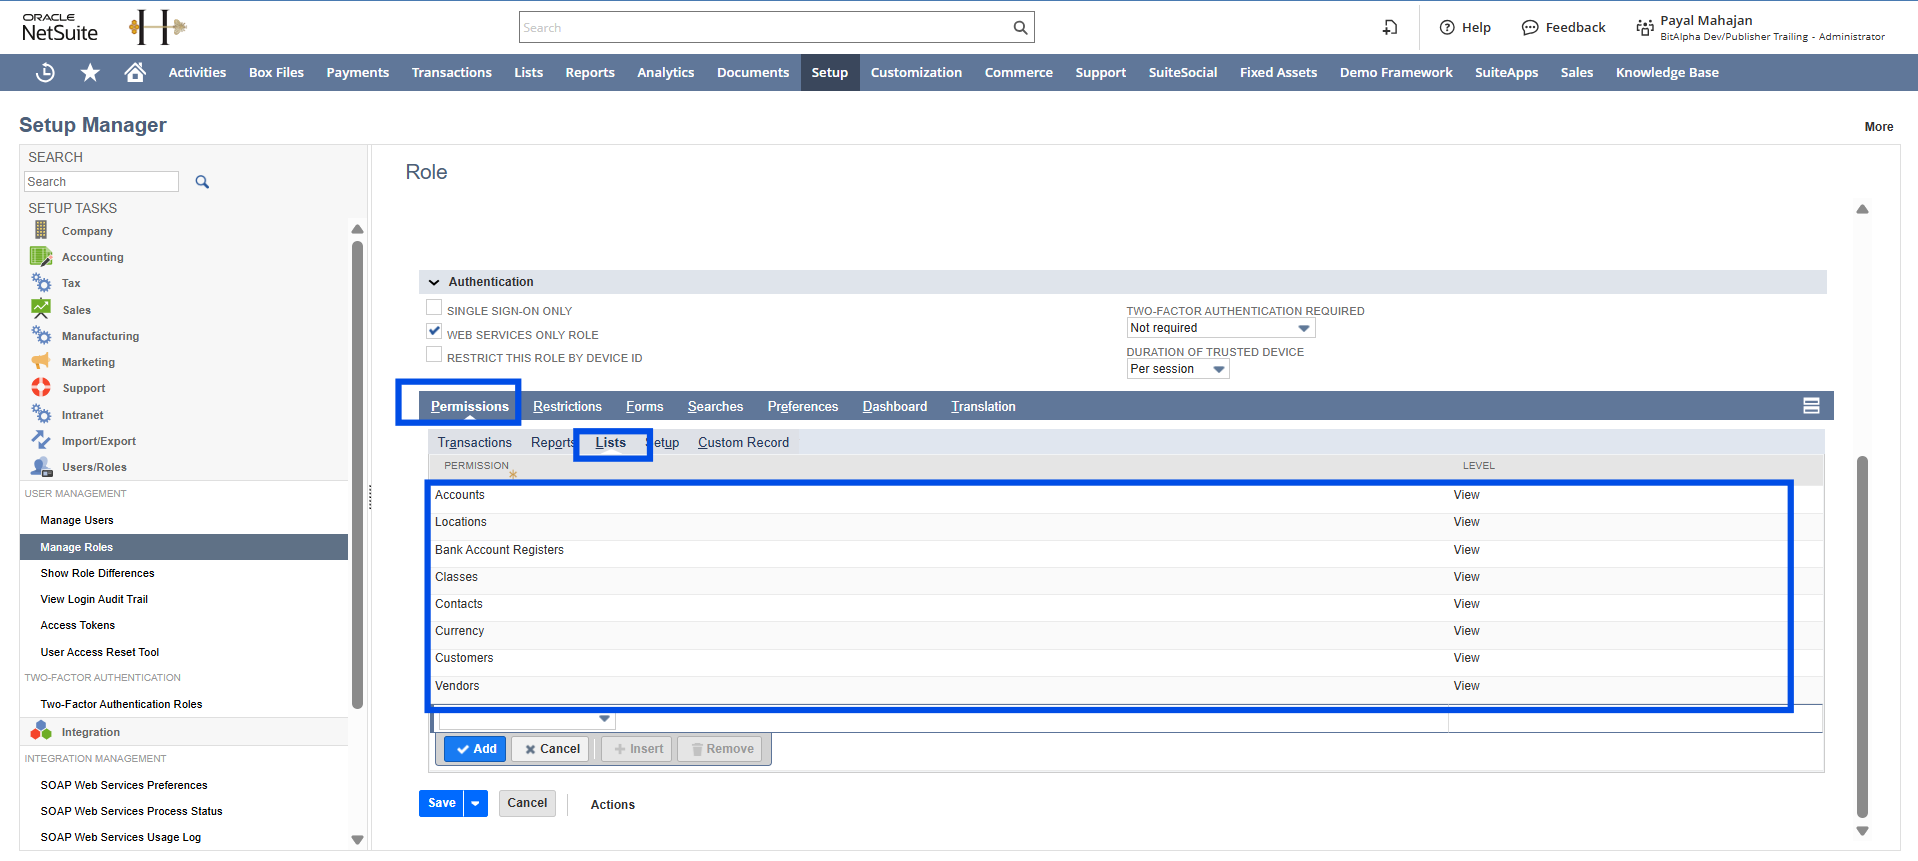
- Under the Permissions tab, set the following permissions:
Full Access
Grant Full permission to the following:
Transactions
- Cash Sale
- Cash Sale Refund
- Check
- Customer Payments
- Deposit
- Invoice
- Pay Bills
- Transfer Funds

Setup tab
- SOAP Web Services,
- User Access Tokens
View Only
Grant View permission to the following:
Lists
- Accounts
- Locations
- Bank Account Registers
- Classes
- Contacts
- Currency
- Customers
- Vendors
- Click Save.
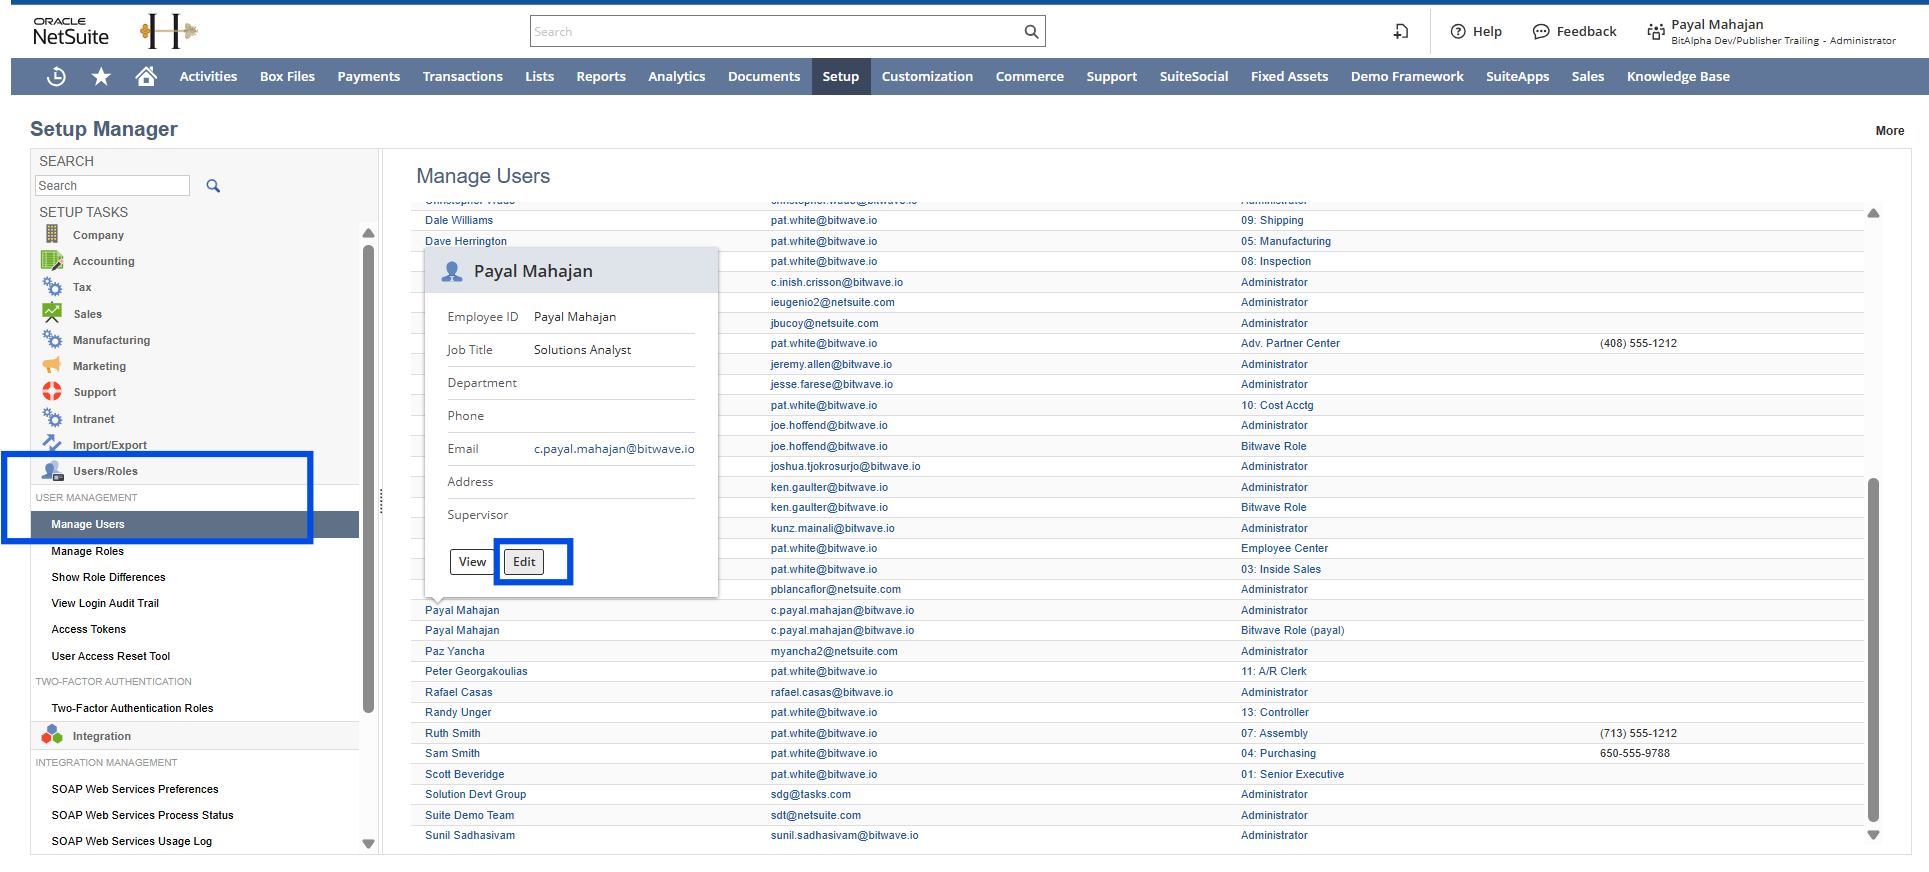
Step 4: Assign the Bitwave Role to a User**
Assign the Bitwave Role to the NetSuite user that will be used for the integration.
- Navigate to Setup > Users/Roles > Manage Users
- Find the user you want to issue a Bitwave token for and click Edit
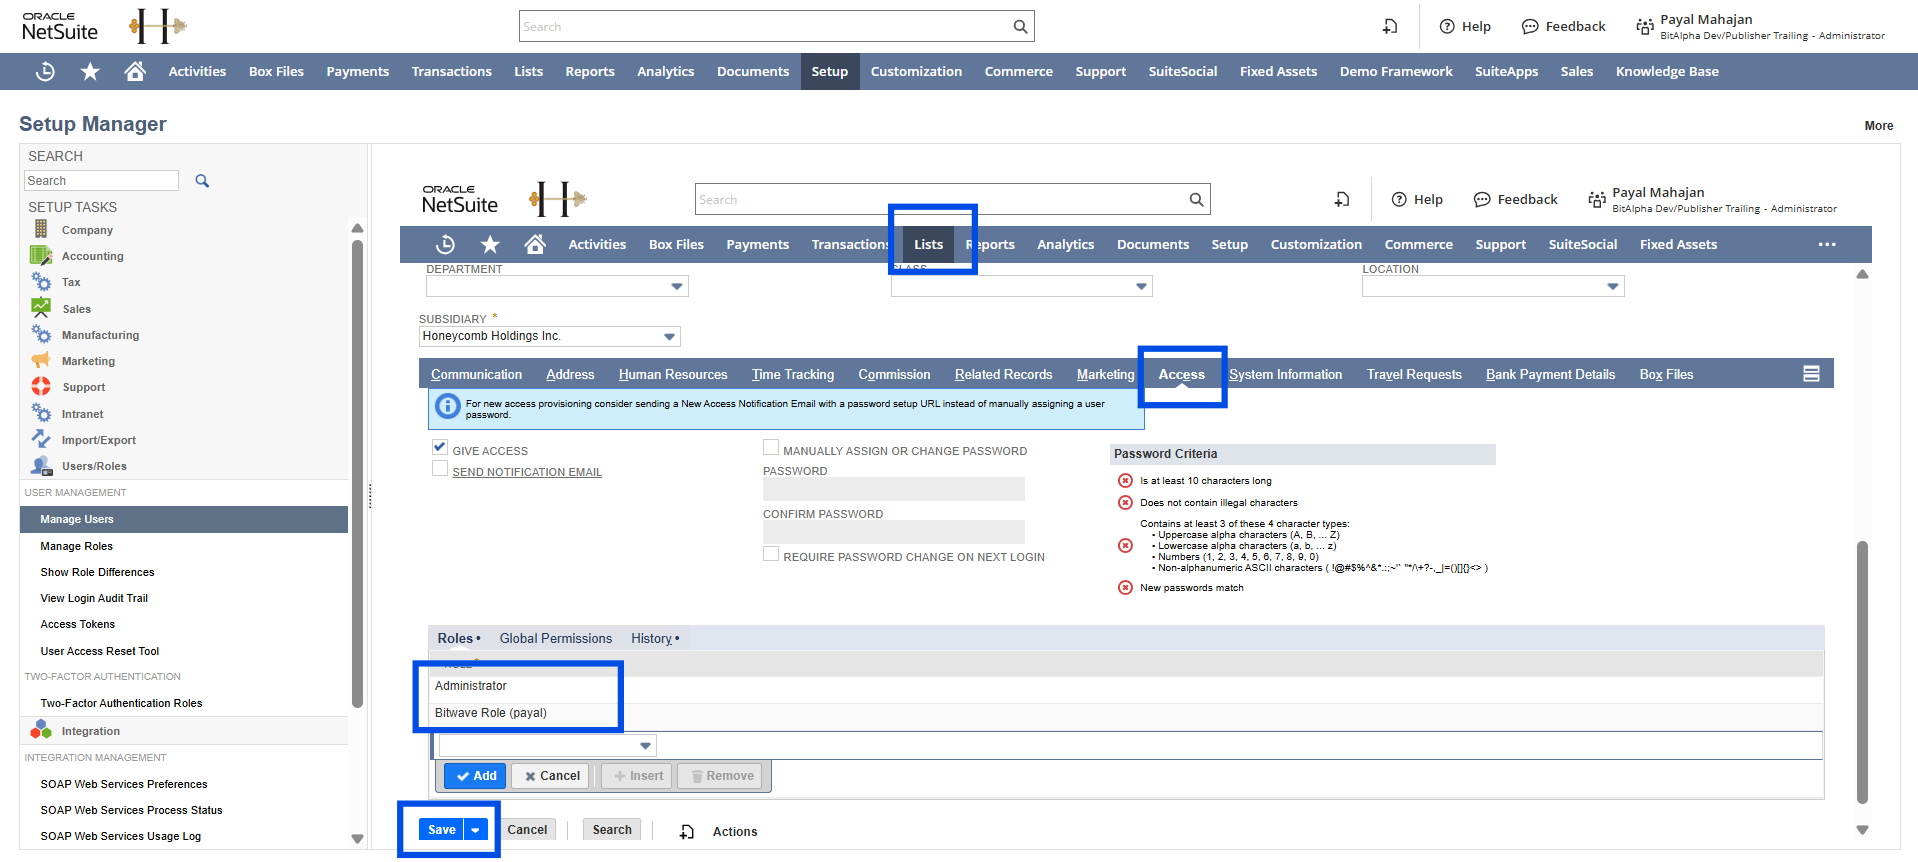
- Click the Access tab
- In the Roles section, select Bitwave Role
- Click Save.
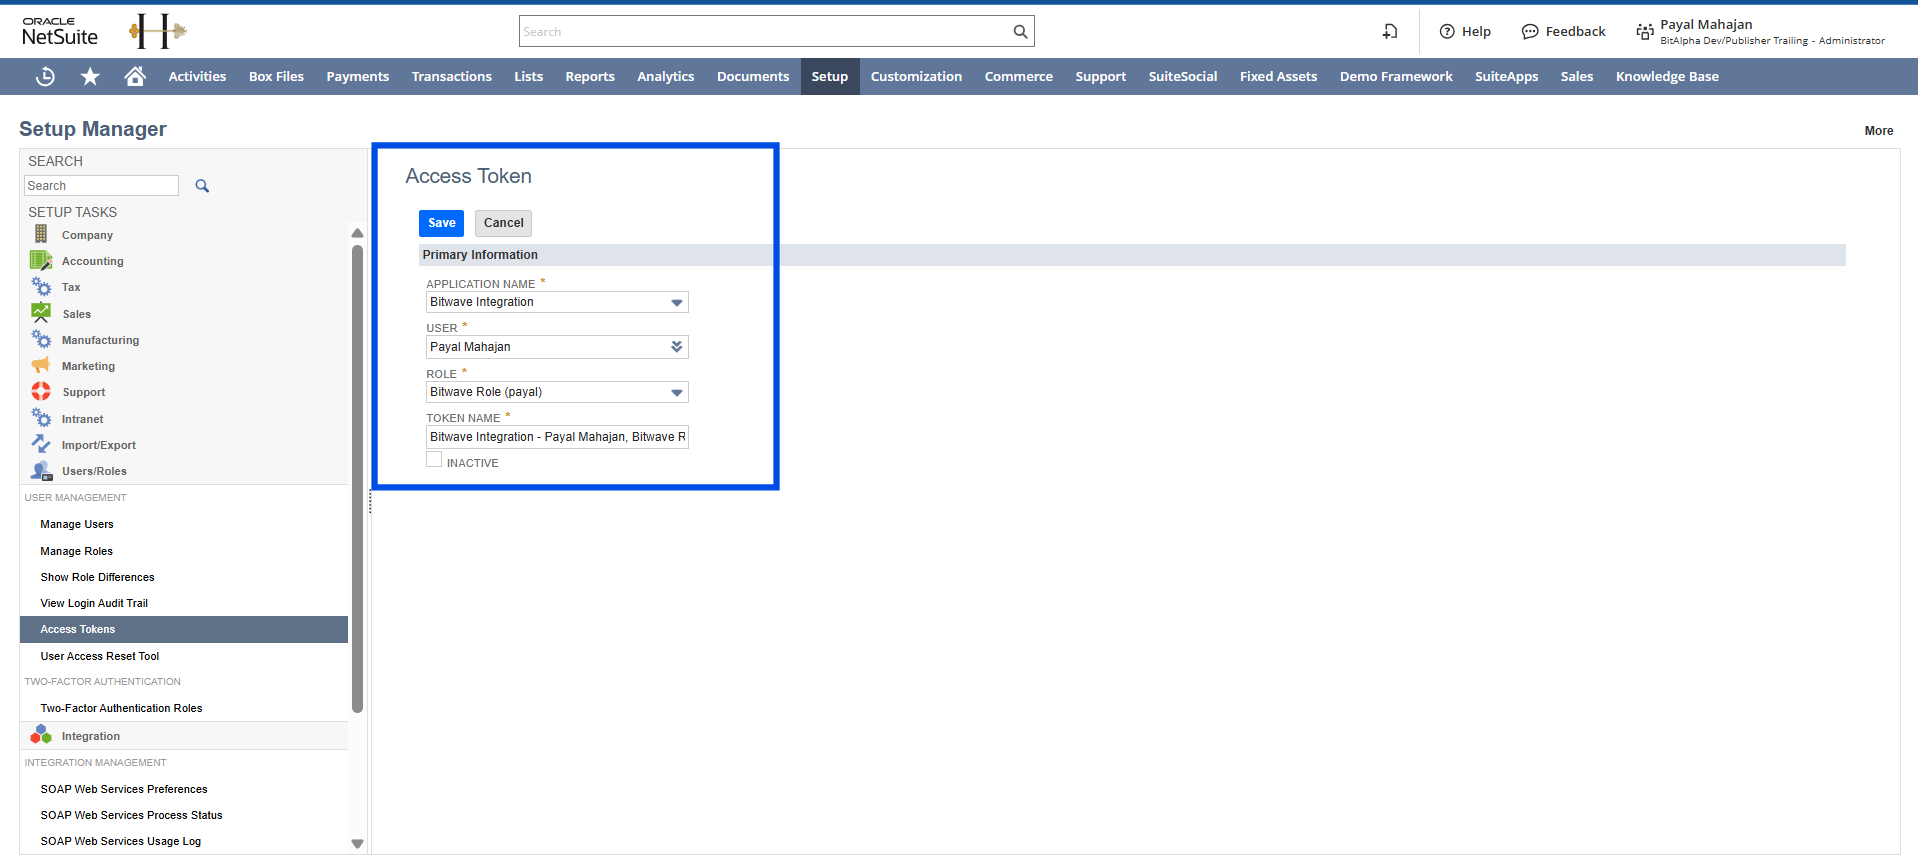
Step 5: Create an Access Token
Generate an access token for the Bitwave integration. This produces your Token ID and Token Secret.
- Navigate to Setup > Users/Roles > Access Tokens > New Access Token
- Select Application Name: Bitwave Integration
- Select User: the user from Step 4
- Select Role: Bitwave Role from Step 3
- Click Save.
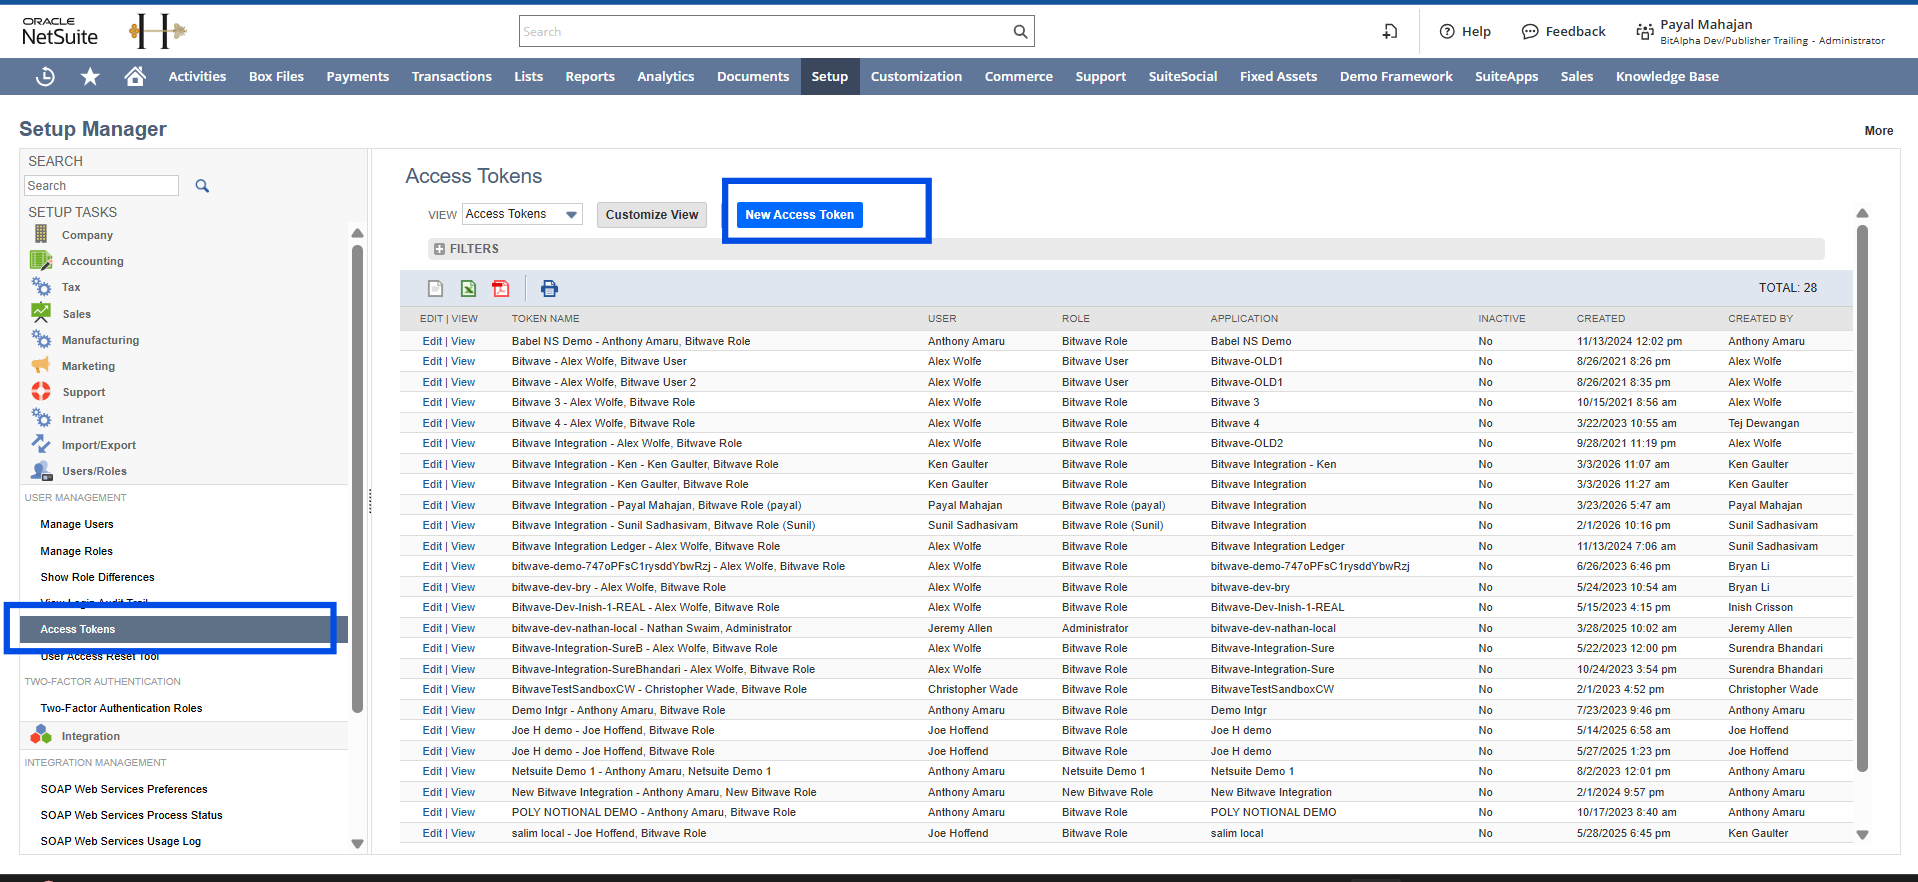
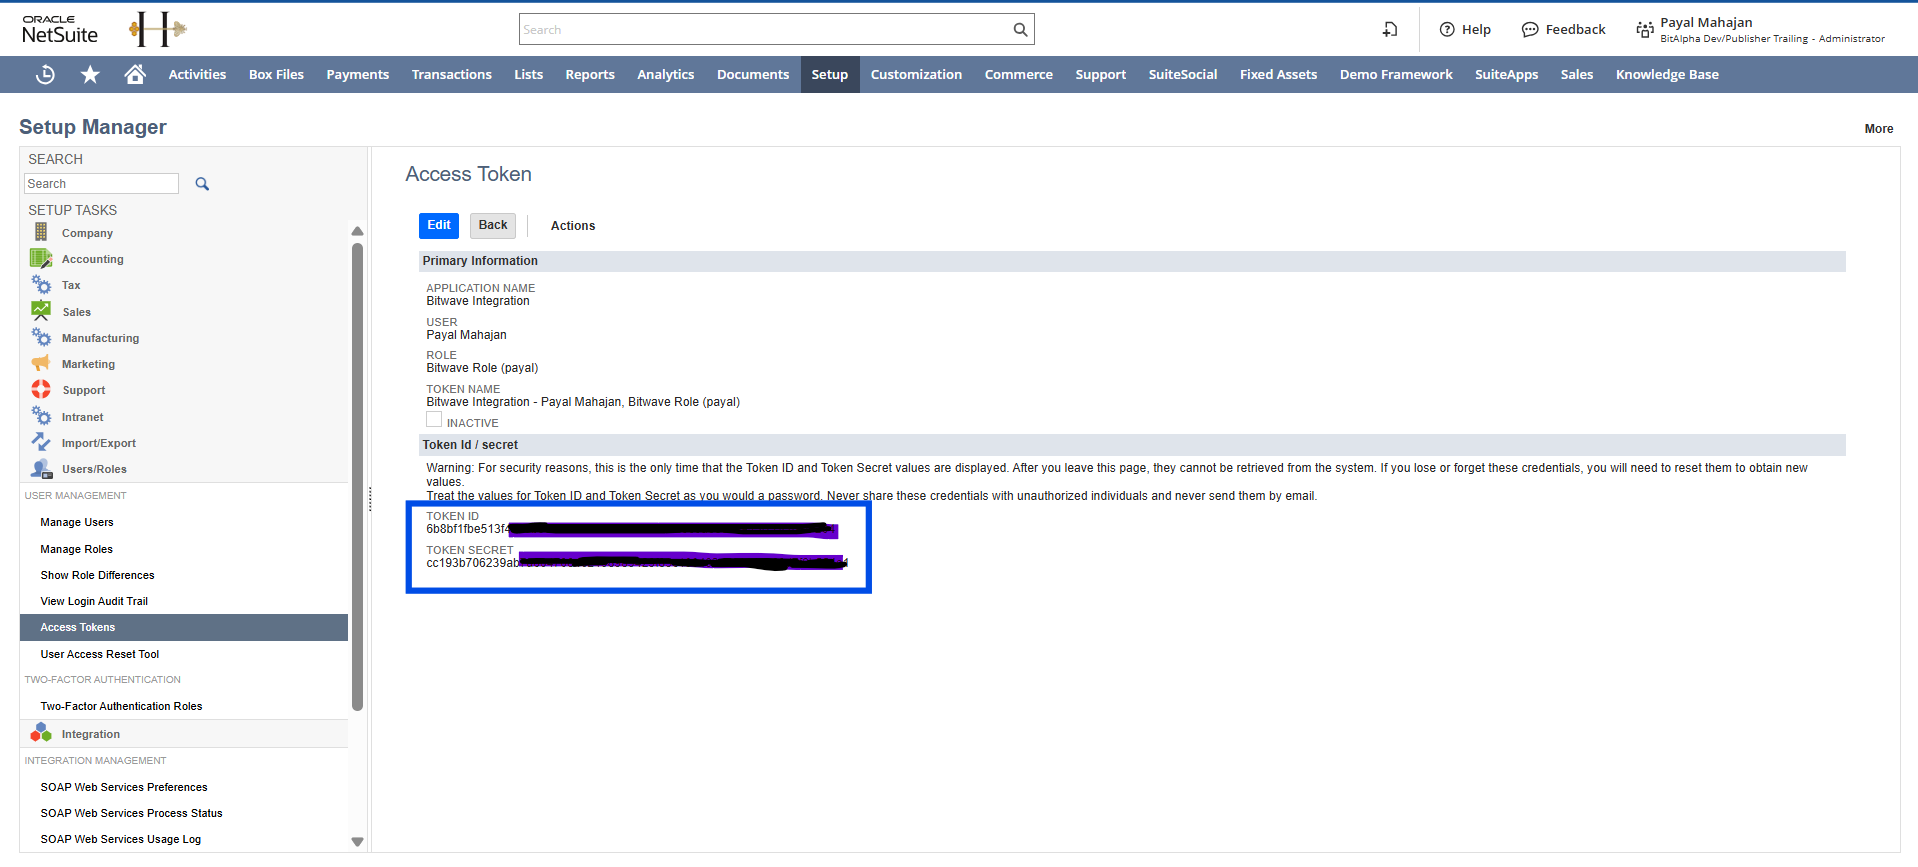
IMPORTANT: NetSuite shows your Token ID and Token Secret only once. Copy and save both immediately before leaving this page.
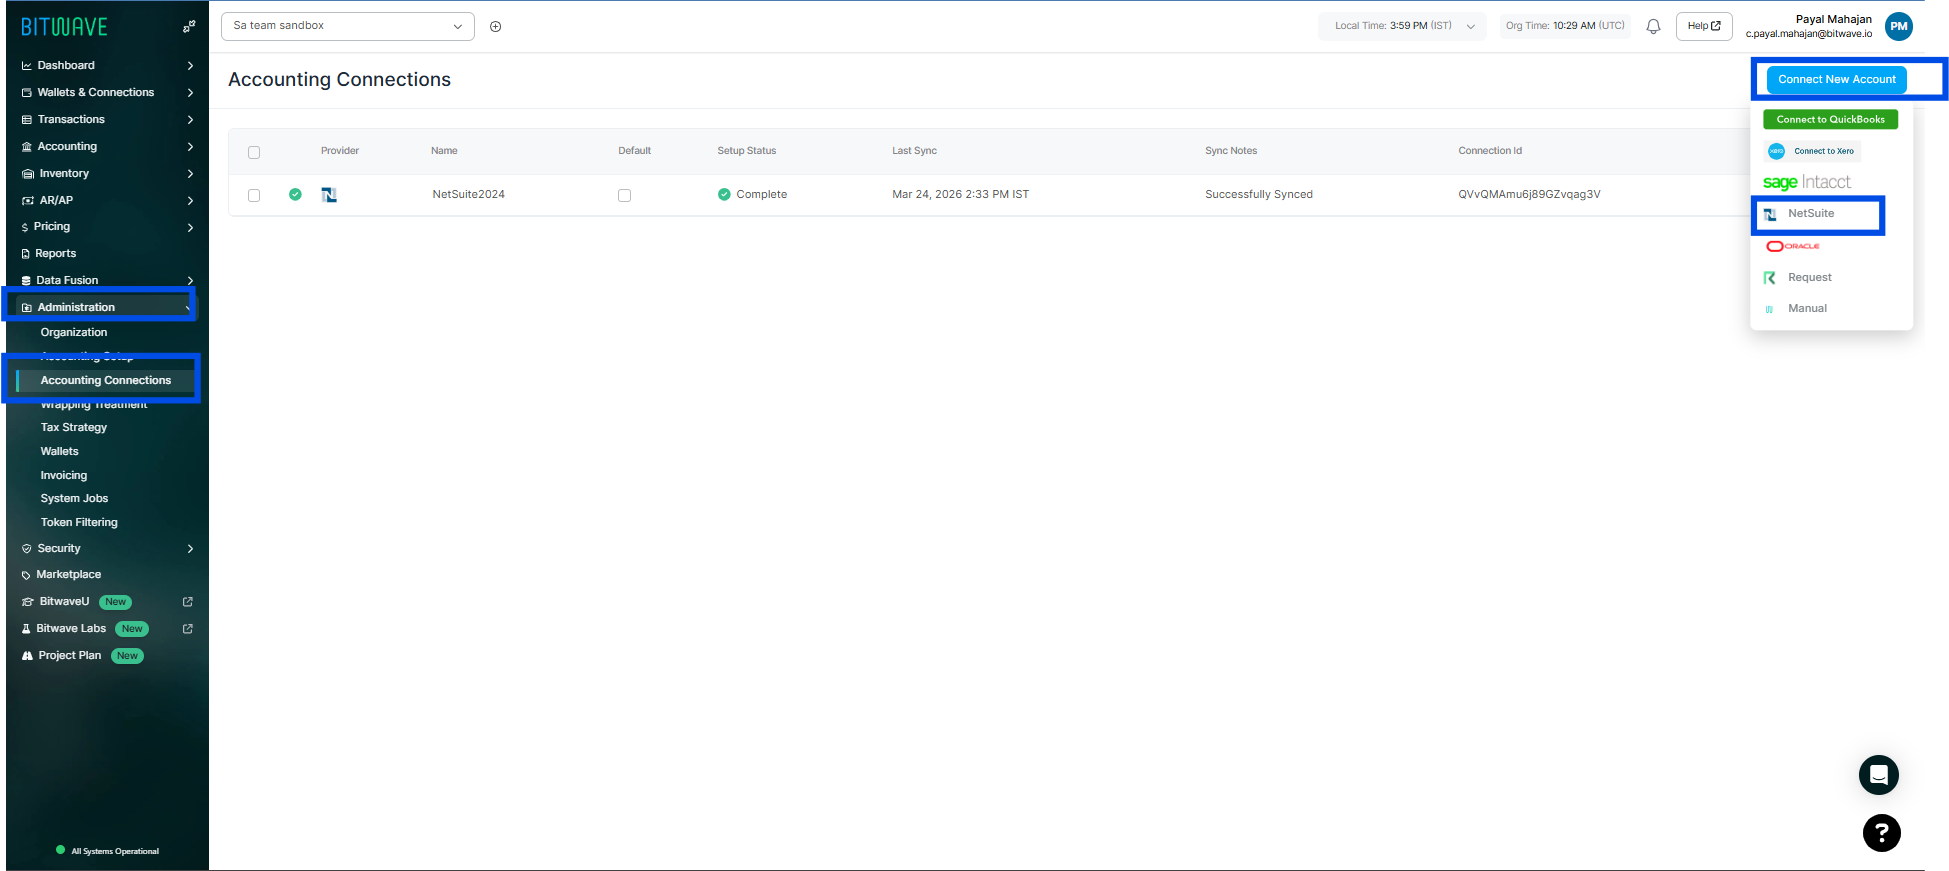
Connect NetSuite in Bitwave
Once you have completed the NetSuite setup above, return to Bitwave to complete the connection.
- In Bitwave, navigate to Administration > Accounting Connections
- Click Connect new account
- Select NetSuite from the list of available ERPs
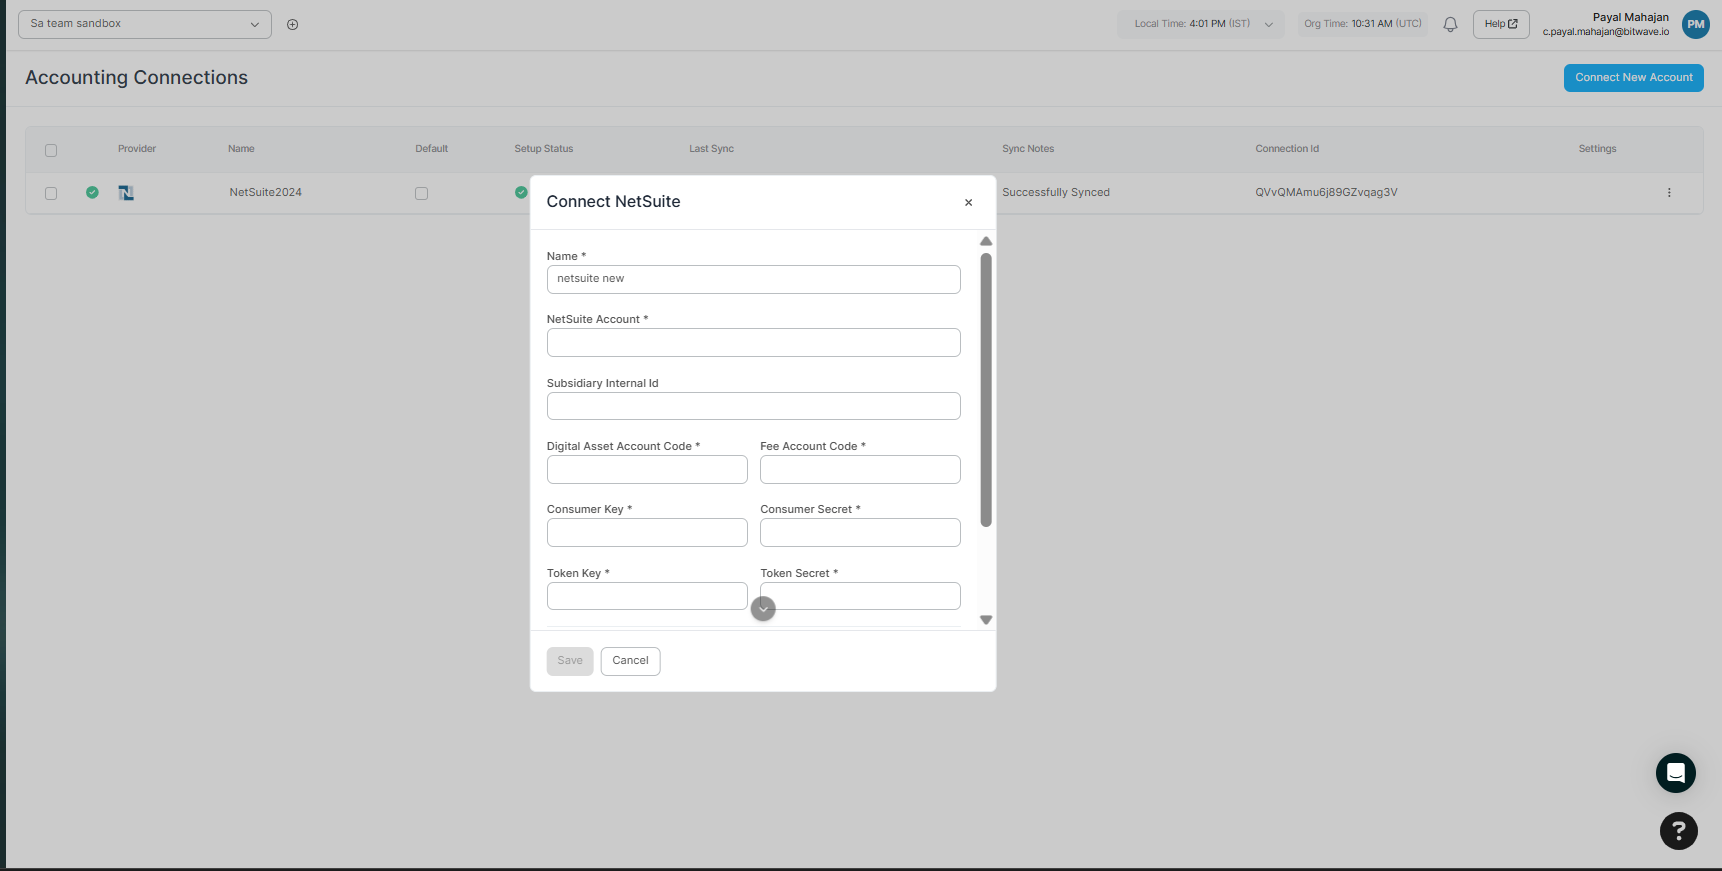
- Enter the credentials you collected from NetSuite:
| Field | Description |
|---|---|
| Consumer Key | From Step 2 - also called Client ID |
| Consumer Secret | From Step 2 - also called Client Secret |
| Token ID | From Step 5 |
| Token Secret | From Step 5 |
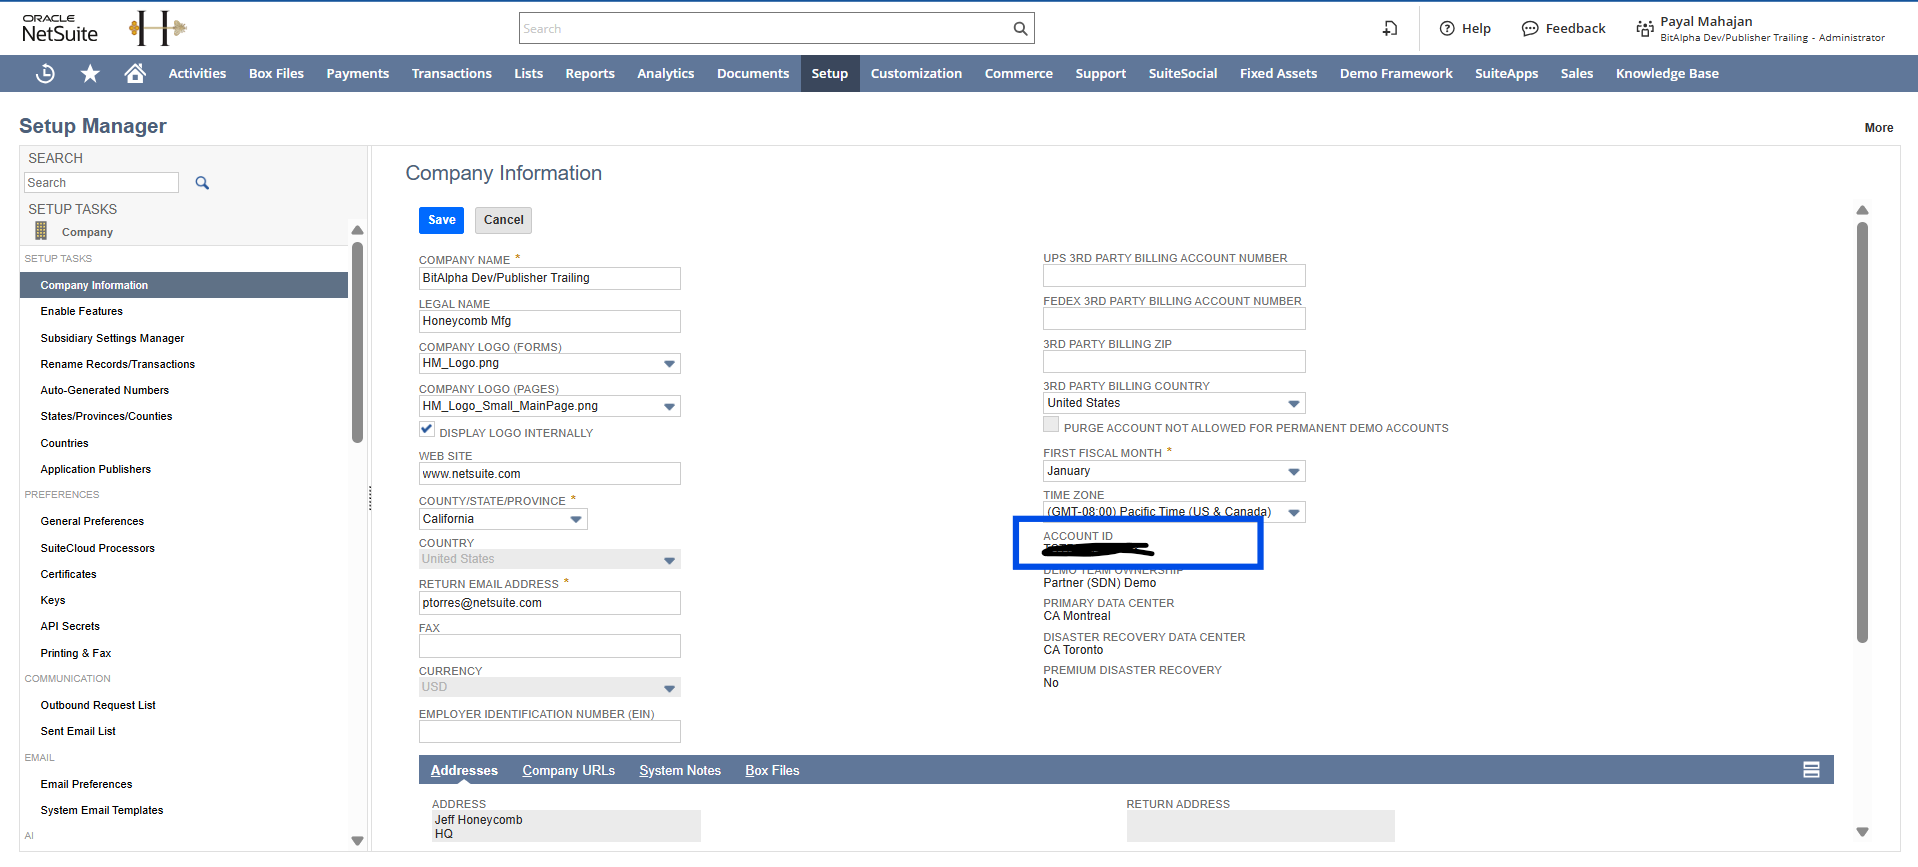
| Account ID | From Setup > Company > Company Information |
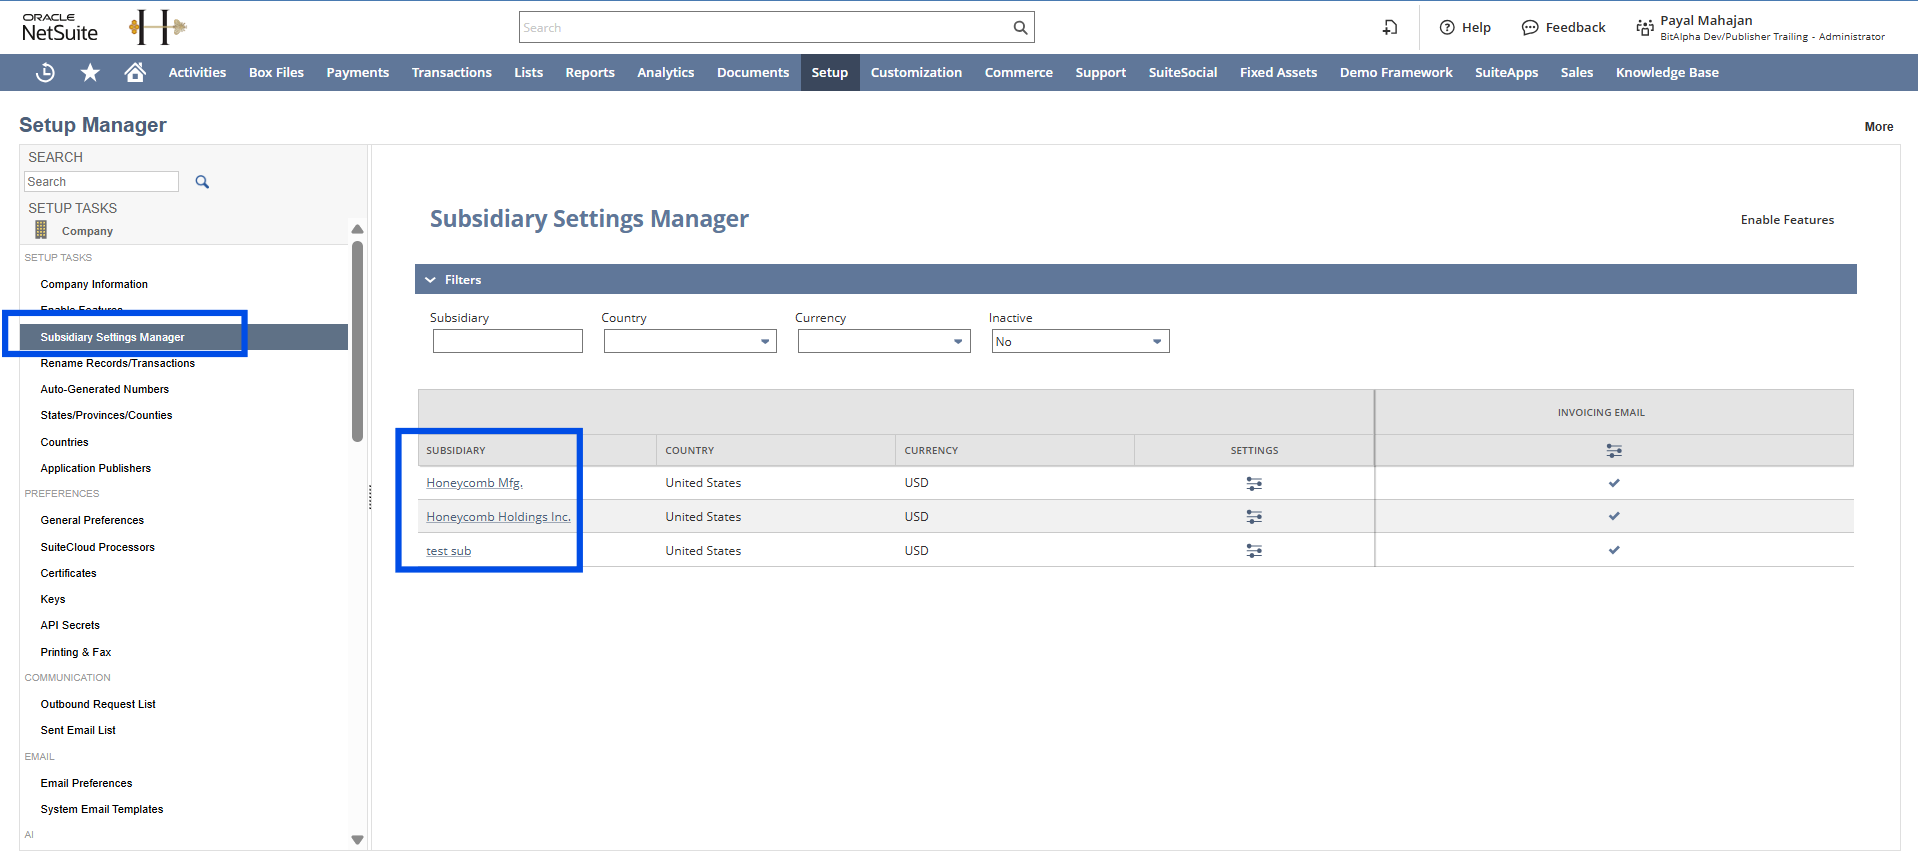
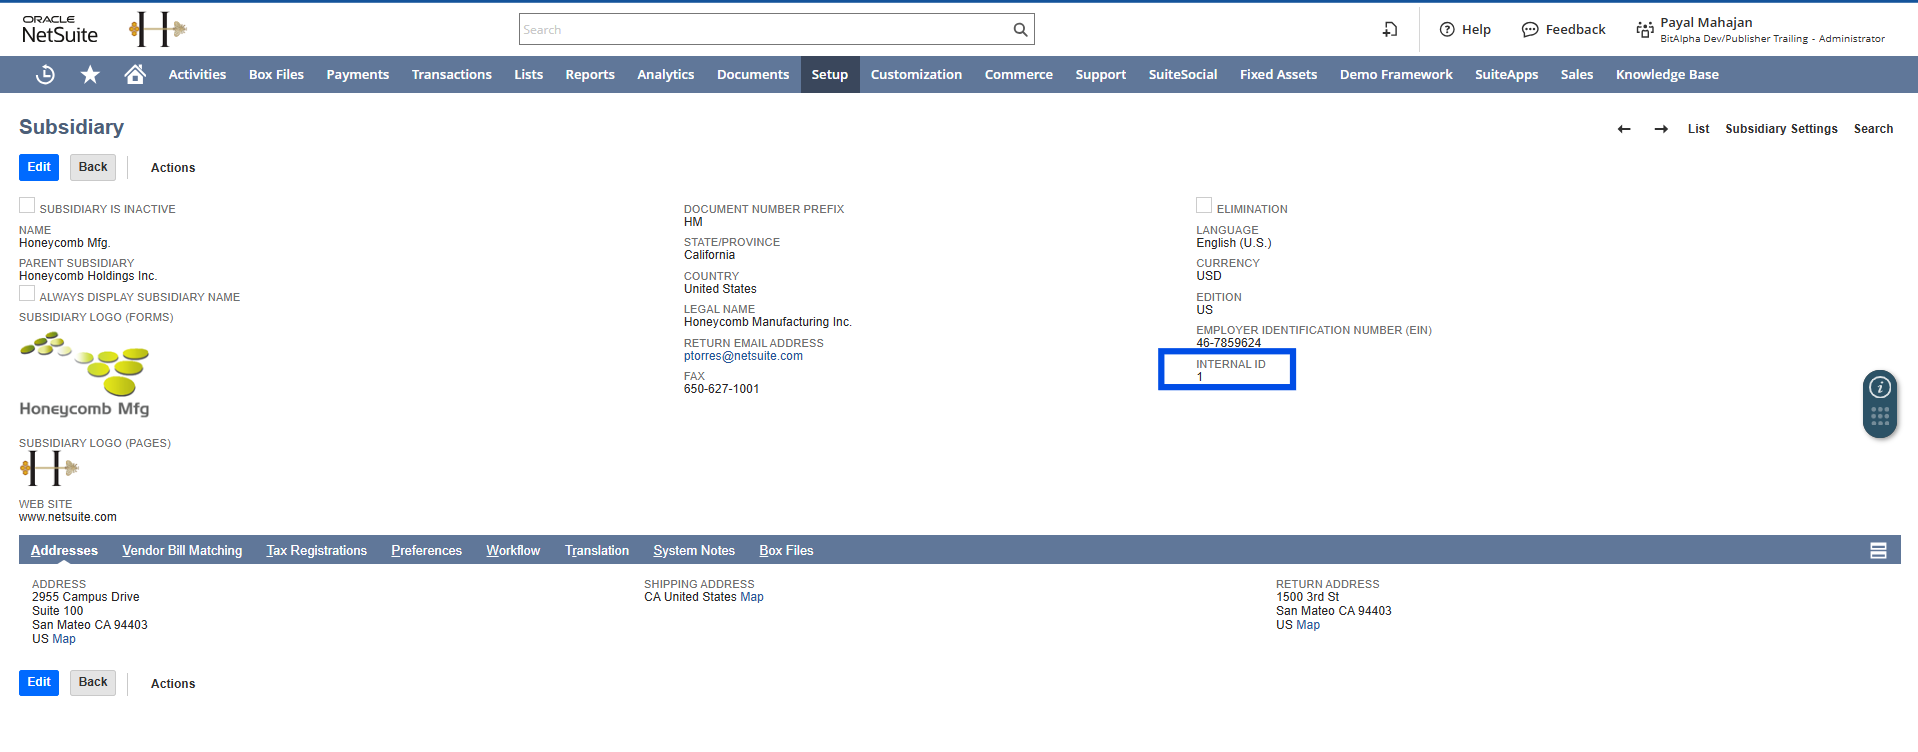
| Subsidiary Internal ID | Internal ID of your NetSuite subsidiary |
-
Click Save or Connect to authorize the integration
Configure Accounting Settings
After the connection is authorized, Bitwave requires additional accounting configuration to map your NetSuite accounts correctly.
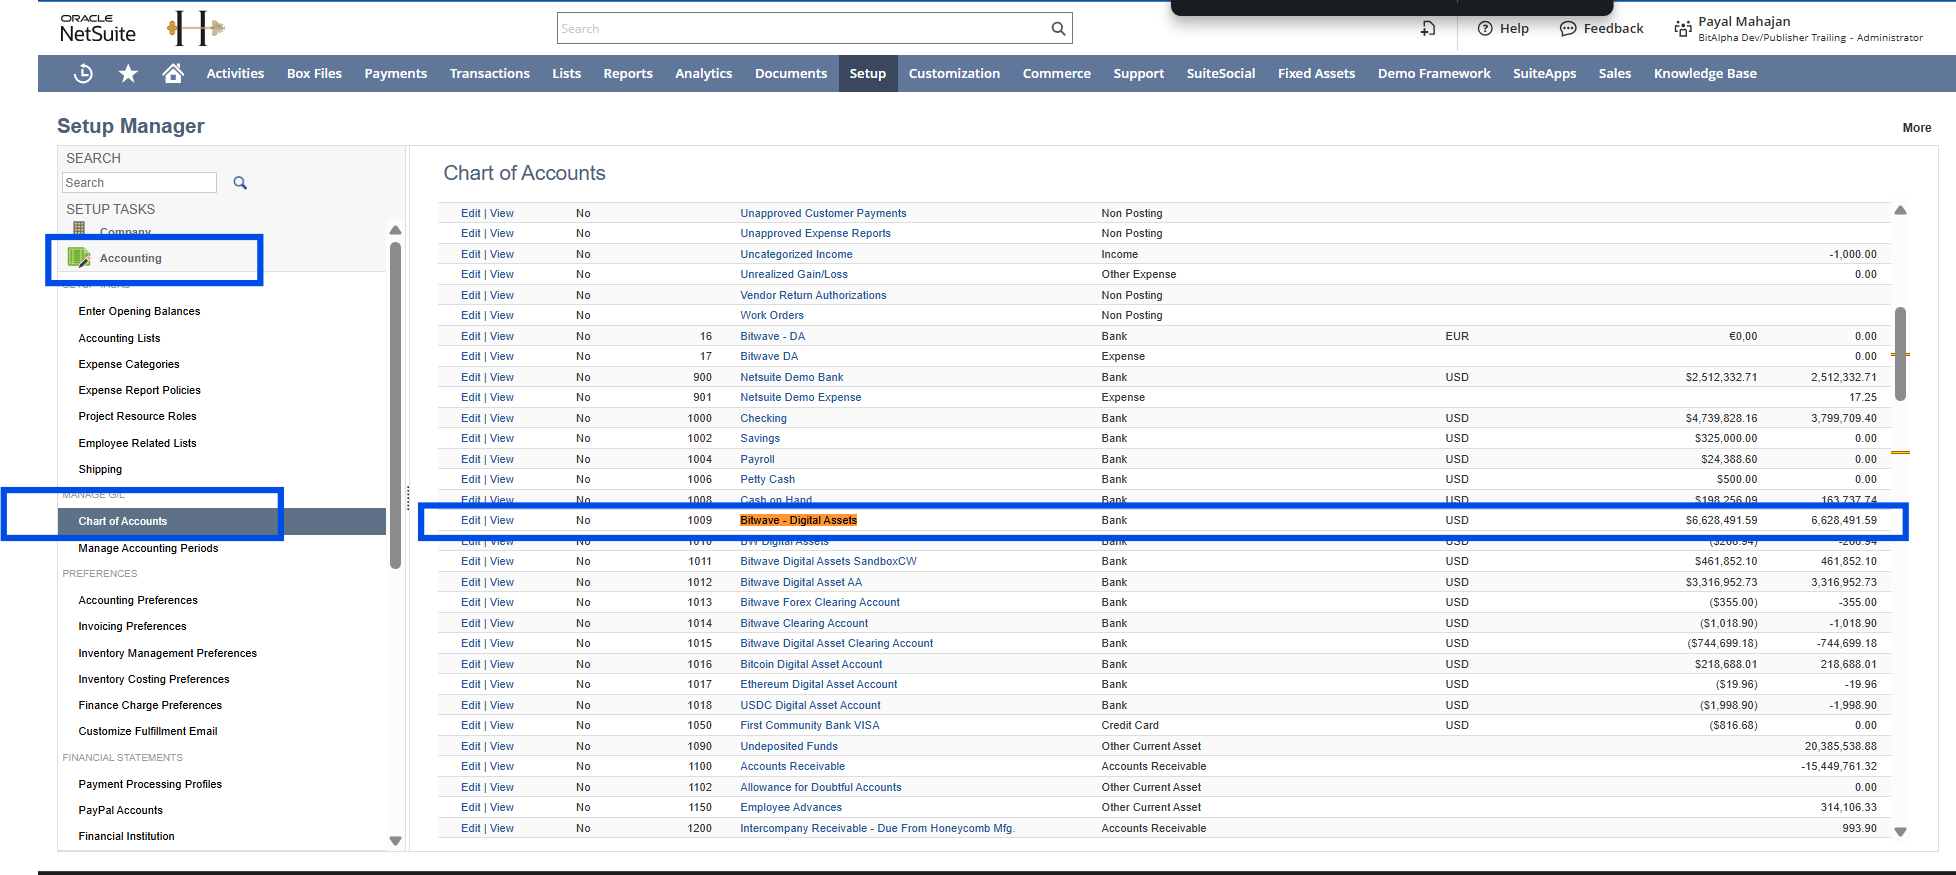
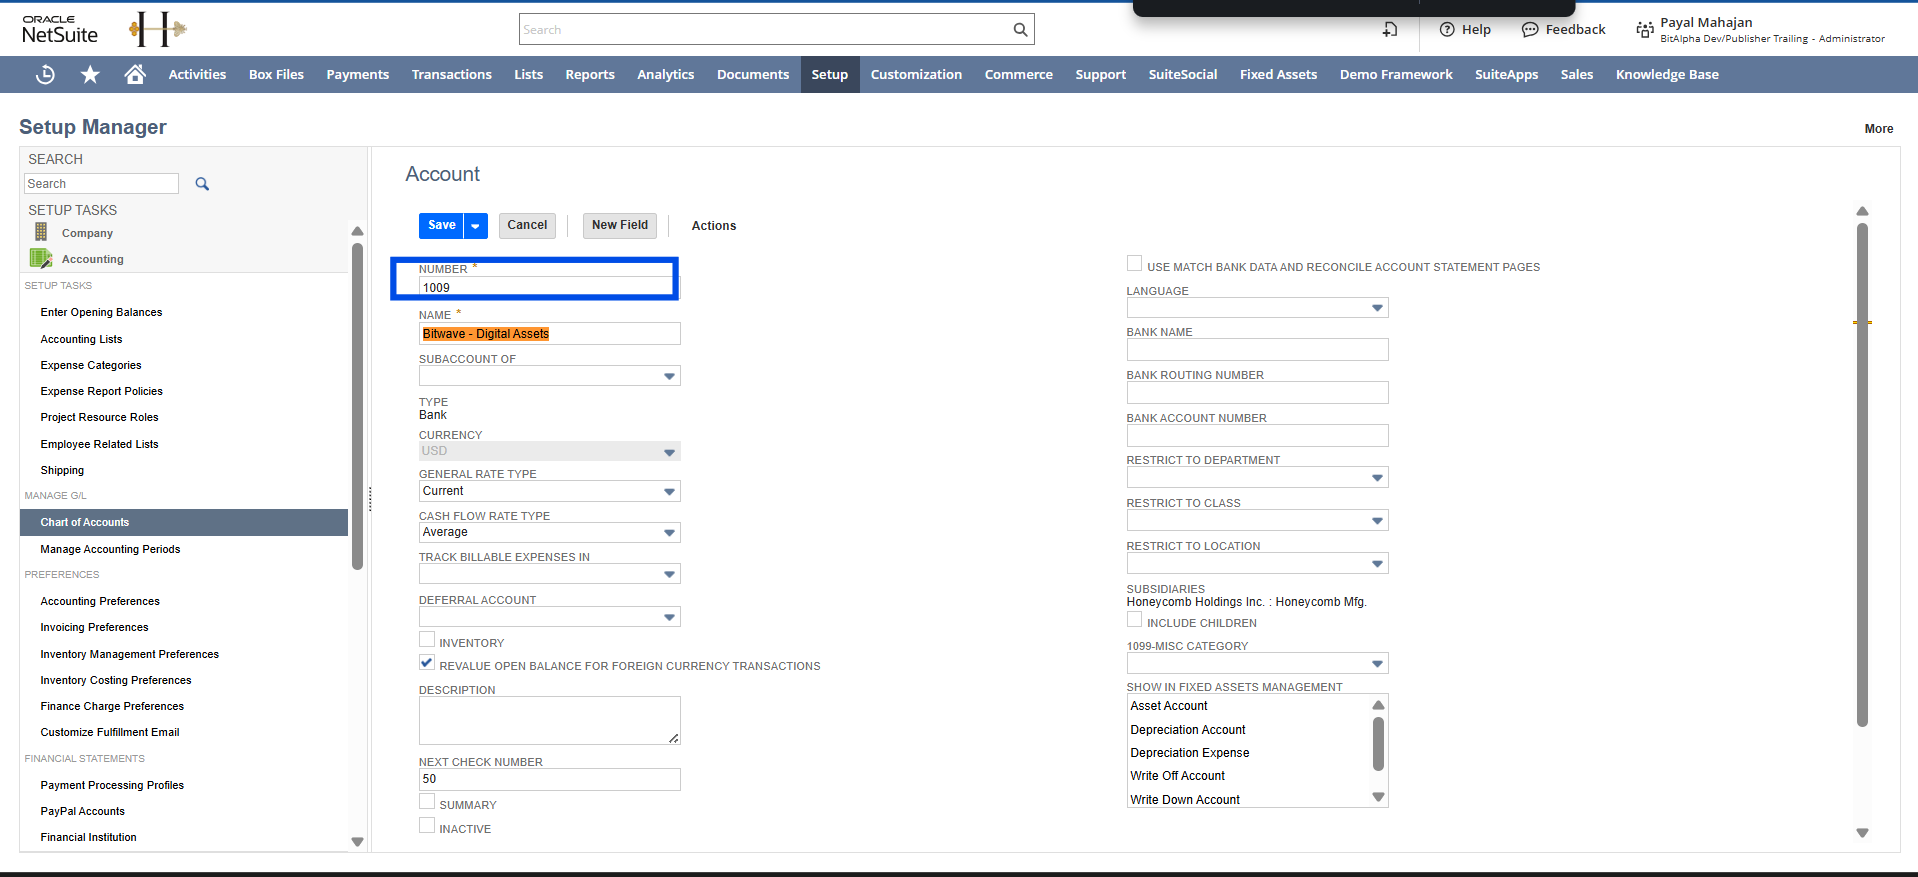
Step 6: Find Your Digital Asset Account Code
- Navigate to Setup > Accounting> Chart of Accounts in NetSuite
- Find the account named "Bitwave - Digital Assets"
- Record the Number (account code) from the Number column.
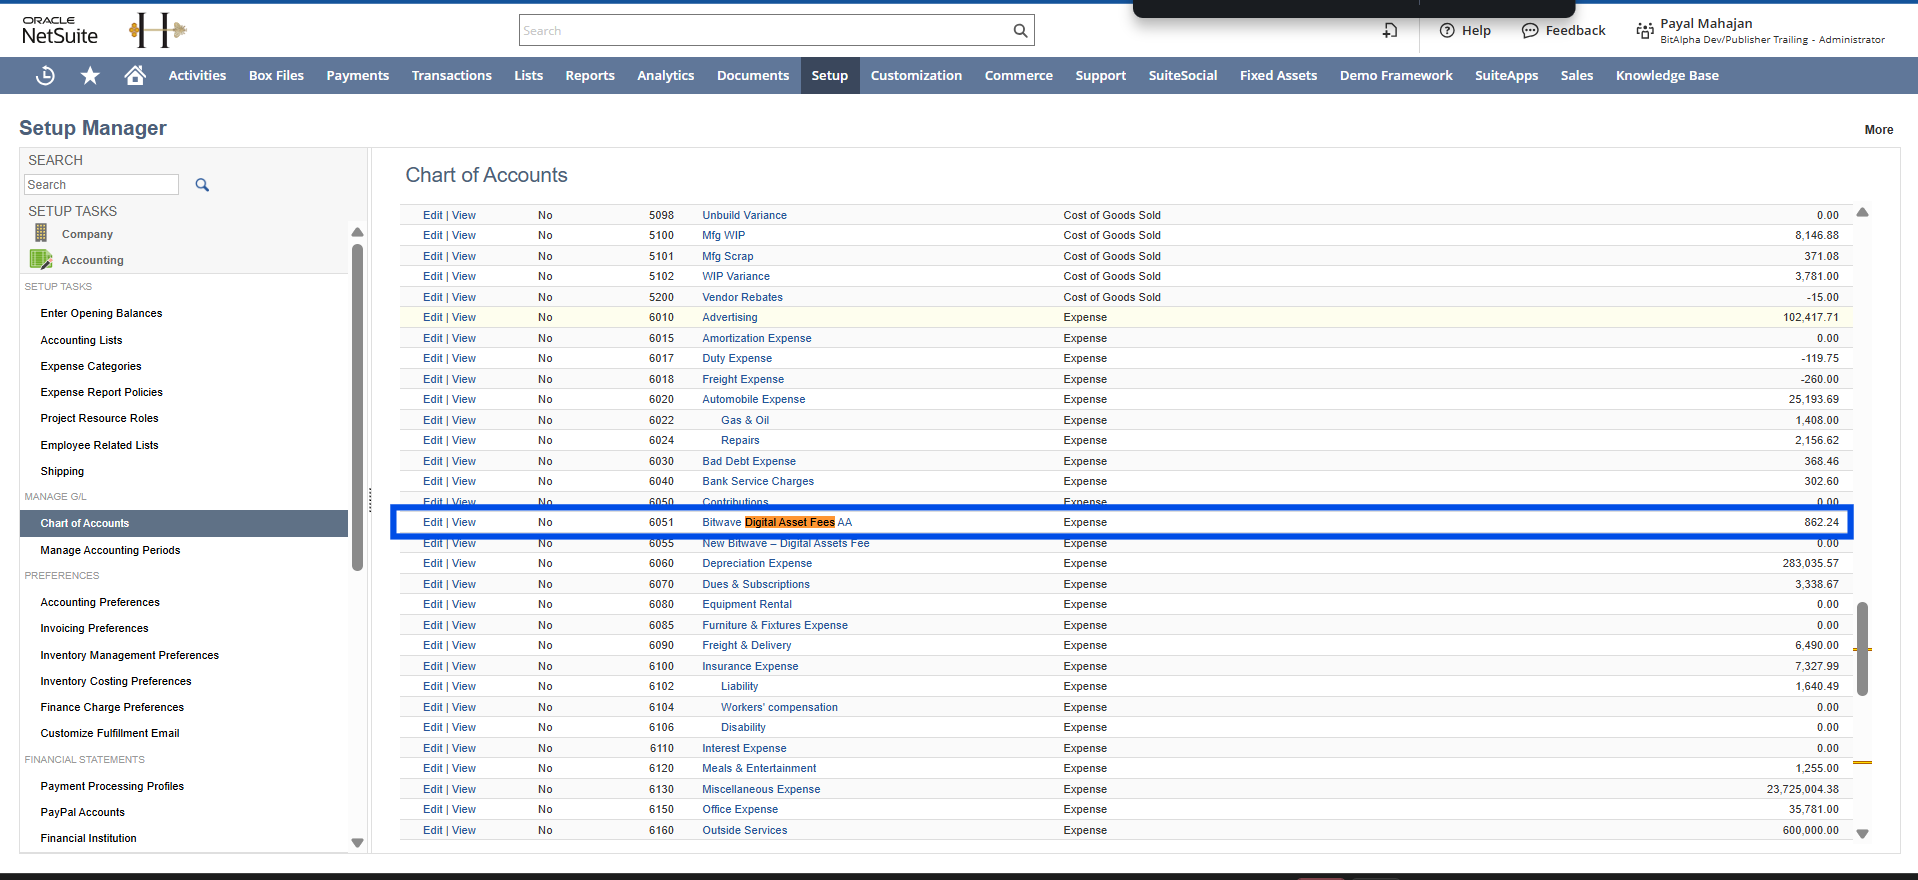
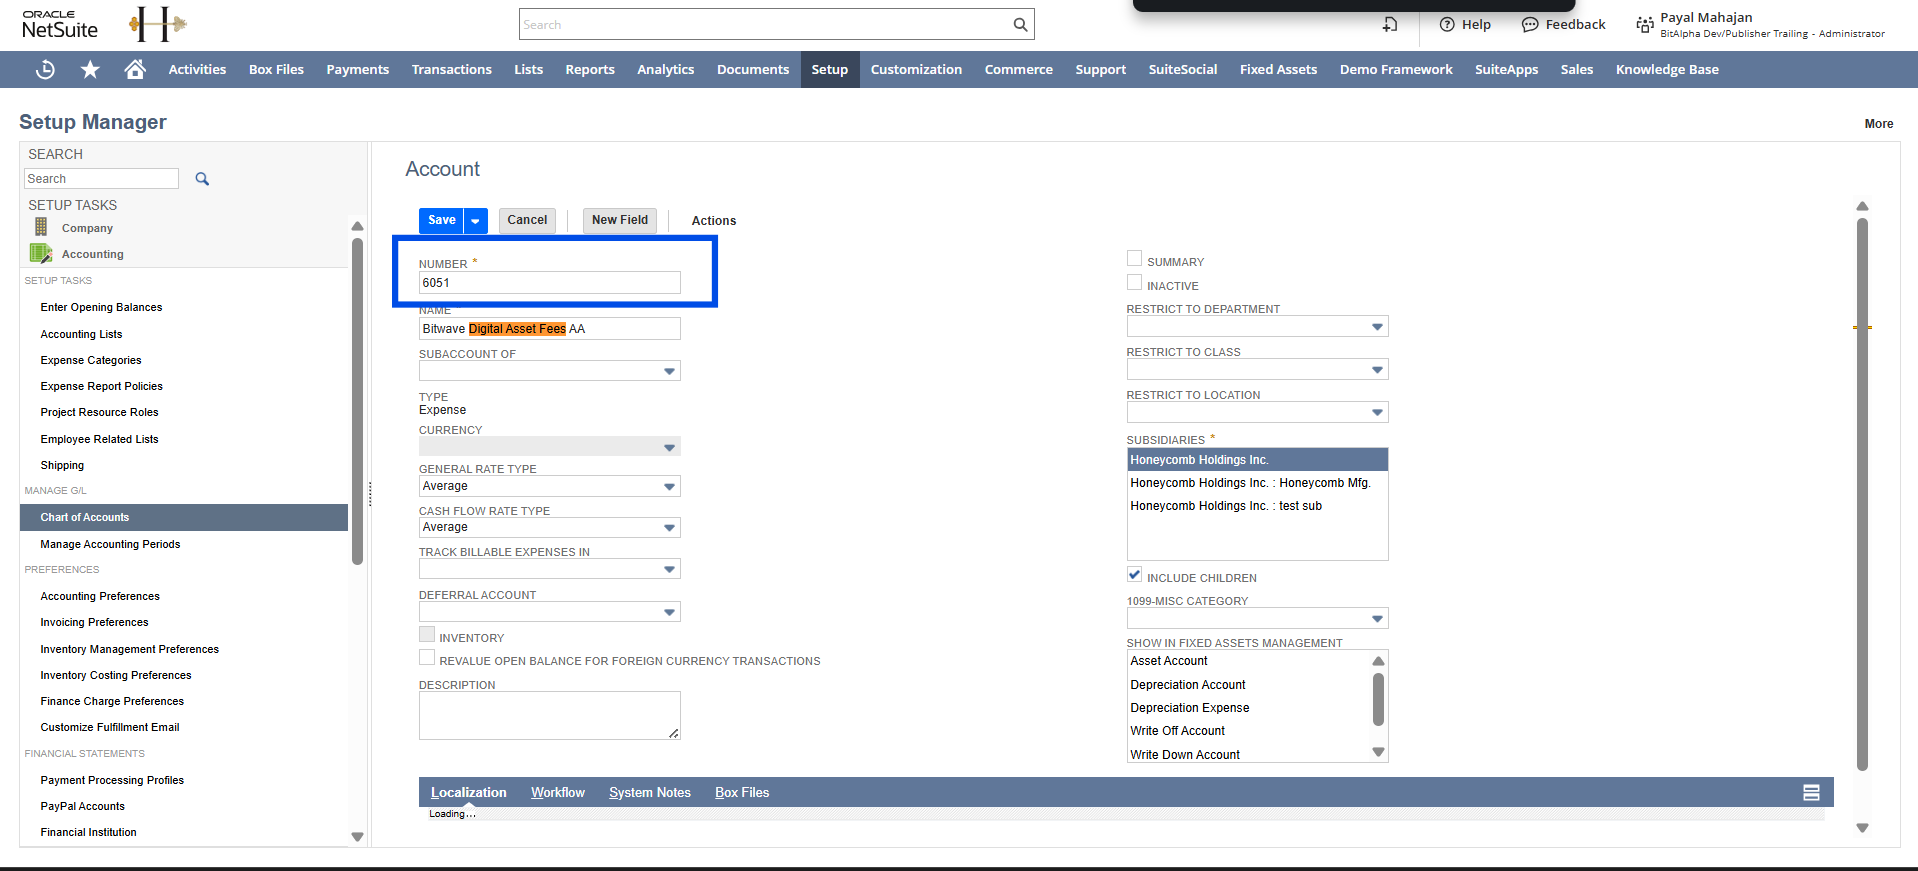
Step 7: Find Your Fee Account Code
- Navigate to Setup > Accounting> Chart of Accounts in NetSuite
- Find the account named "Bitwave - Digital Asset Fees"
- Record the Number (account code) from the Number column.
Step 8: Set Up AR/AP Accounts (if applicable)
If you plan to process Accounts Receivable or Accounts Payable through Bitwave, two additional clearing accounts are required.
| Field | Description |
|---|---|
| Default digital asset account | The NetSuite account code used to record digital asset balances |
| Default fee account | The NetSuite account code used for transaction and network fees |
| Subsidiary Internal ID | Internal ID of the subsidiary selected when creating accounts |
| Account ID | Your NetSuite company Account ID from Company Information |
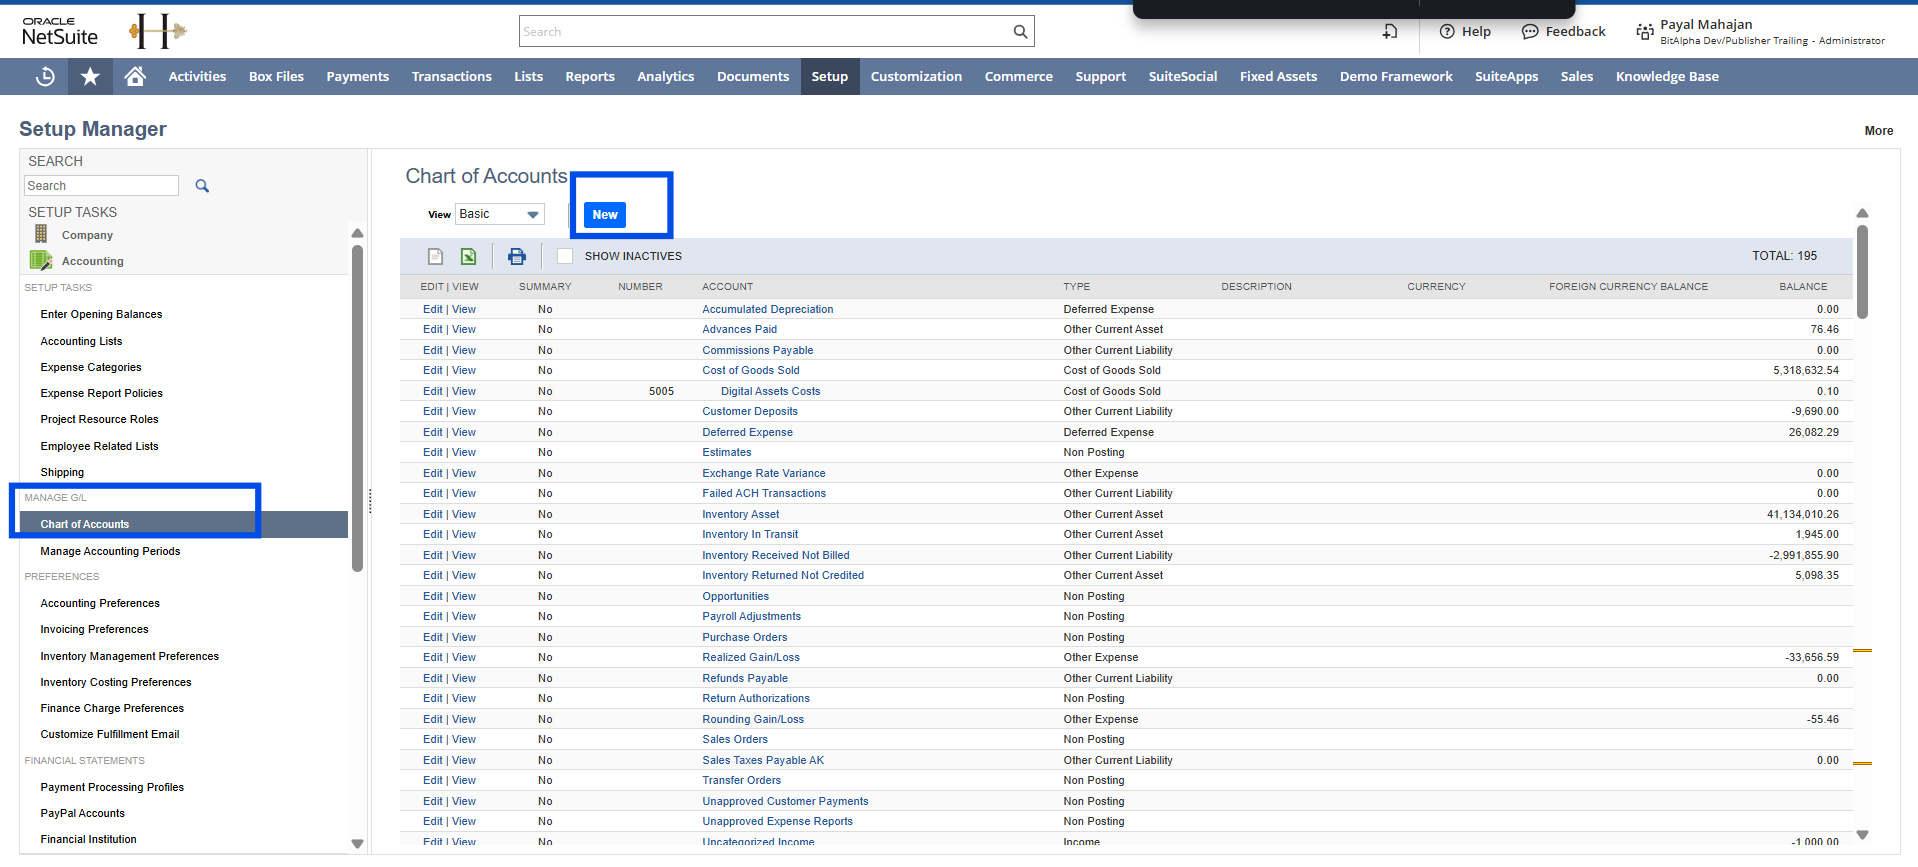
In NetSuite:
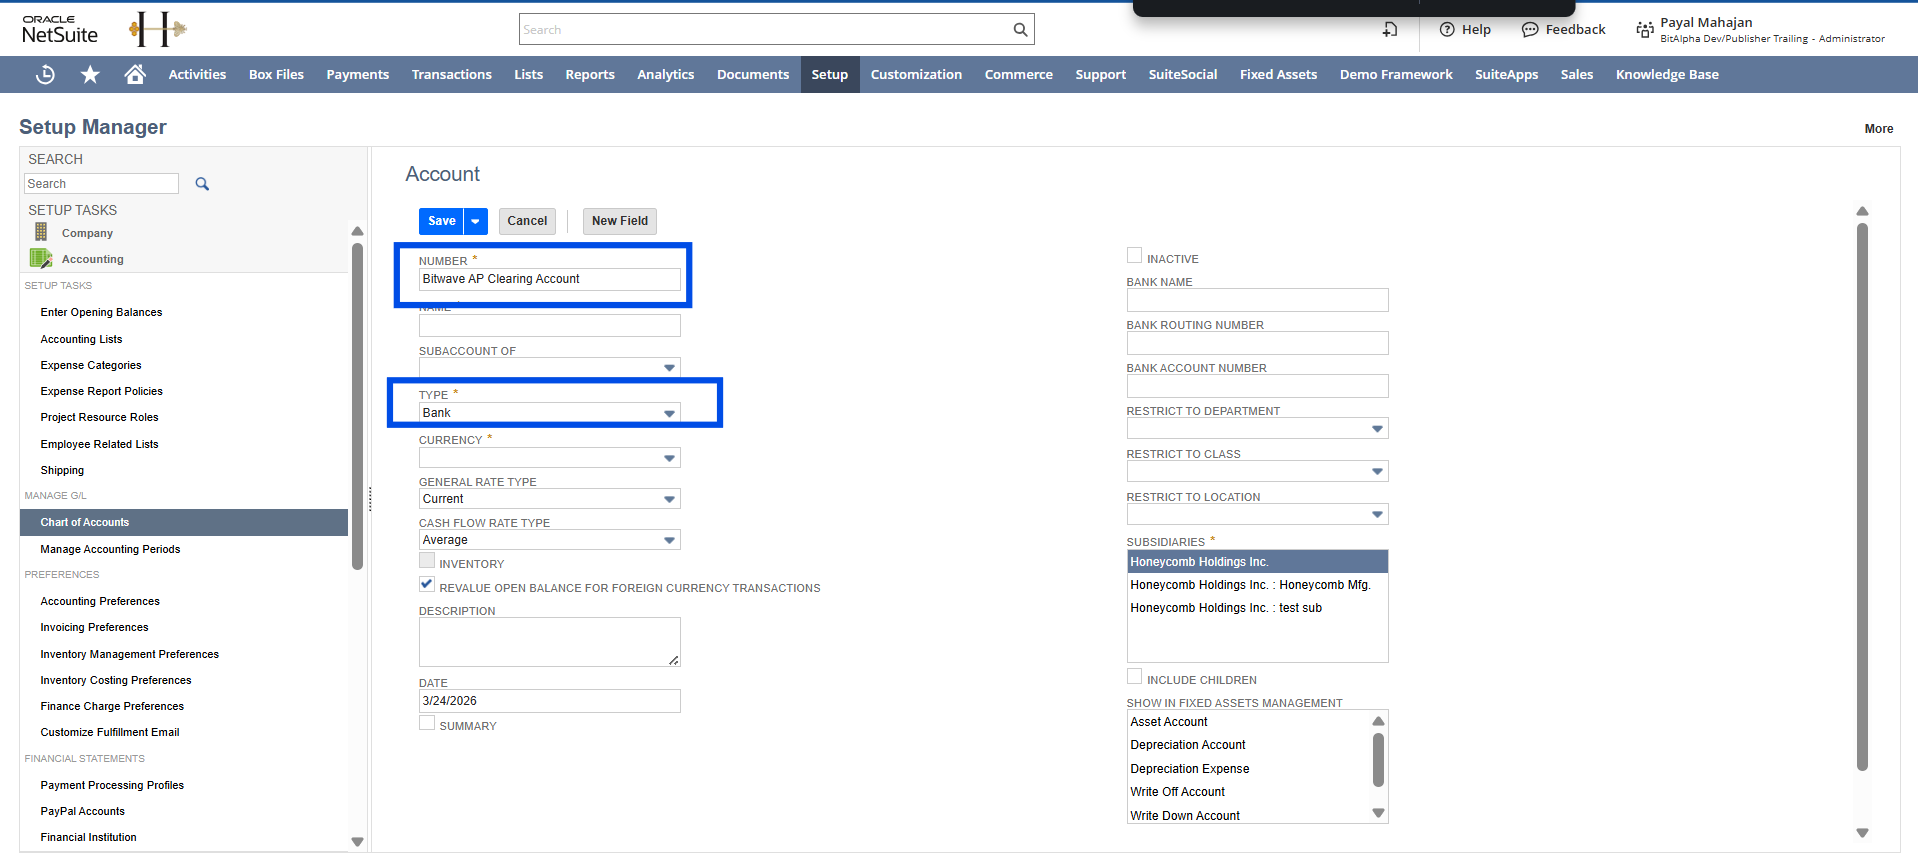
- Navigate to Setup > Accounitng> Chart of Accounts > New
- Create an AR clearing account: set Type to Bank, name it "Bitwave AR Clearing Account"
- Create an AP clearing account: set Type to Bank, name it "Bitwave AP Clearing Account"
💡 Both clearing accounts must be of Type BANK. This is a NetSuite requirement for the integration to work correctly.

In Bitwave:
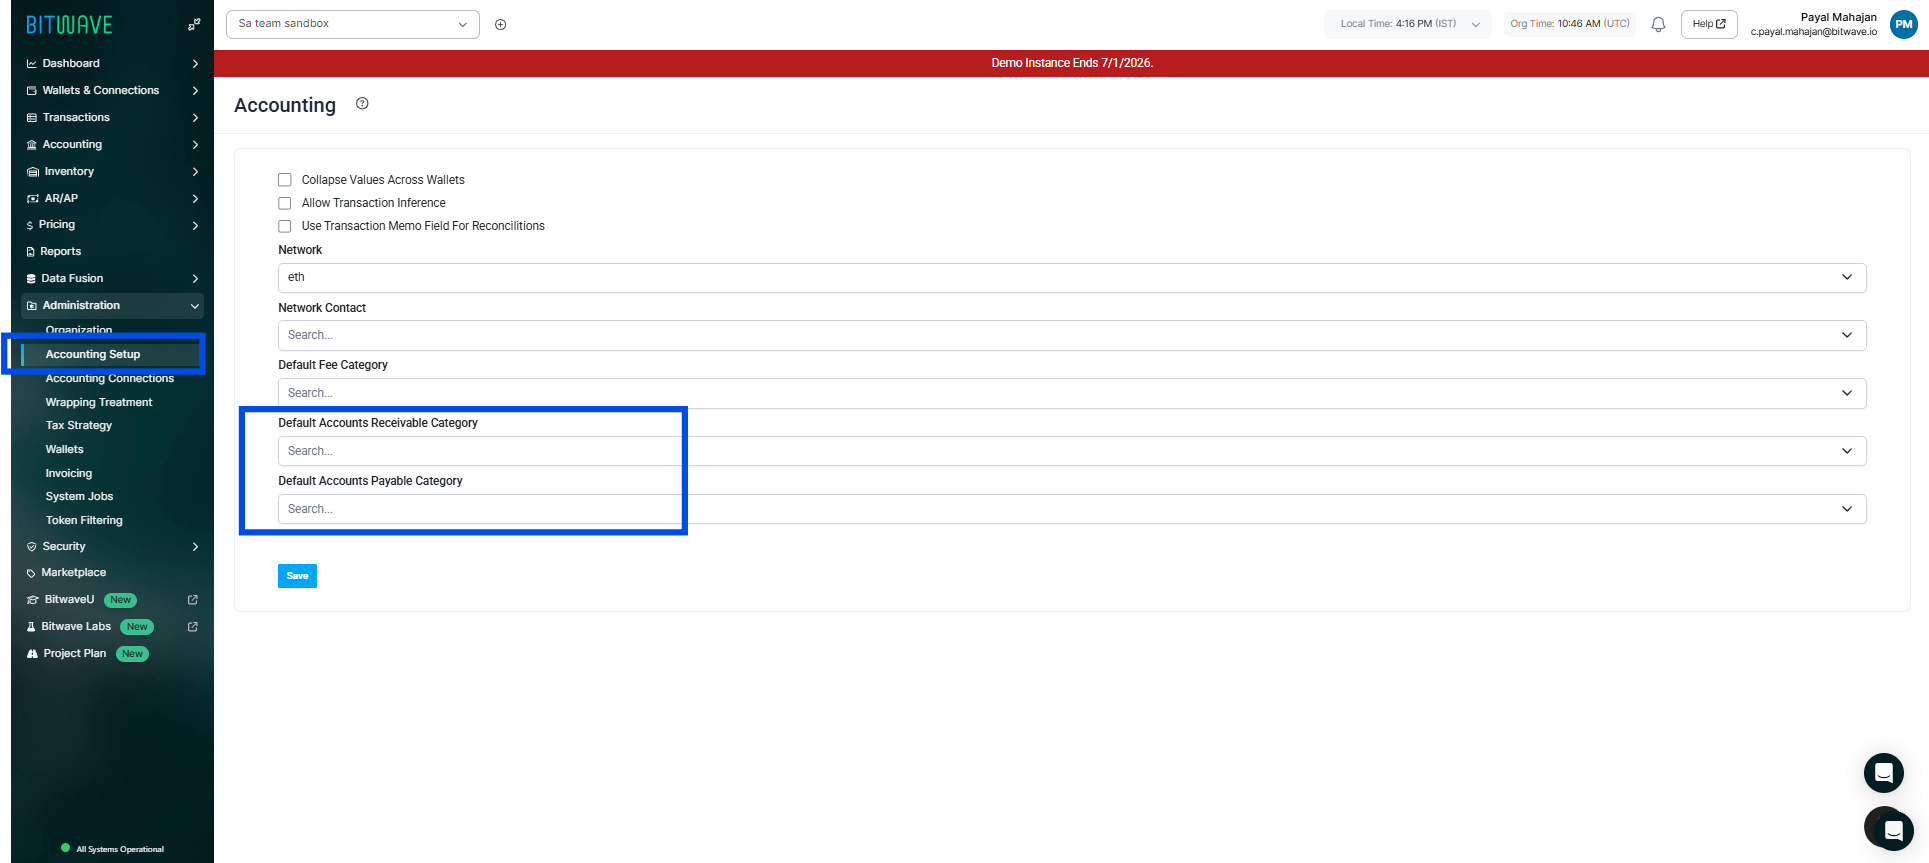
- Navigate to Administration > Accounting Setup
- Set the Default Accounts Receivable Category to your AR clearing account
- Set the Default Accounts Payable Category to your AP clearing account
- Click Save.
Verify the Connection
To confirm the NetSuite integration is working correctly:
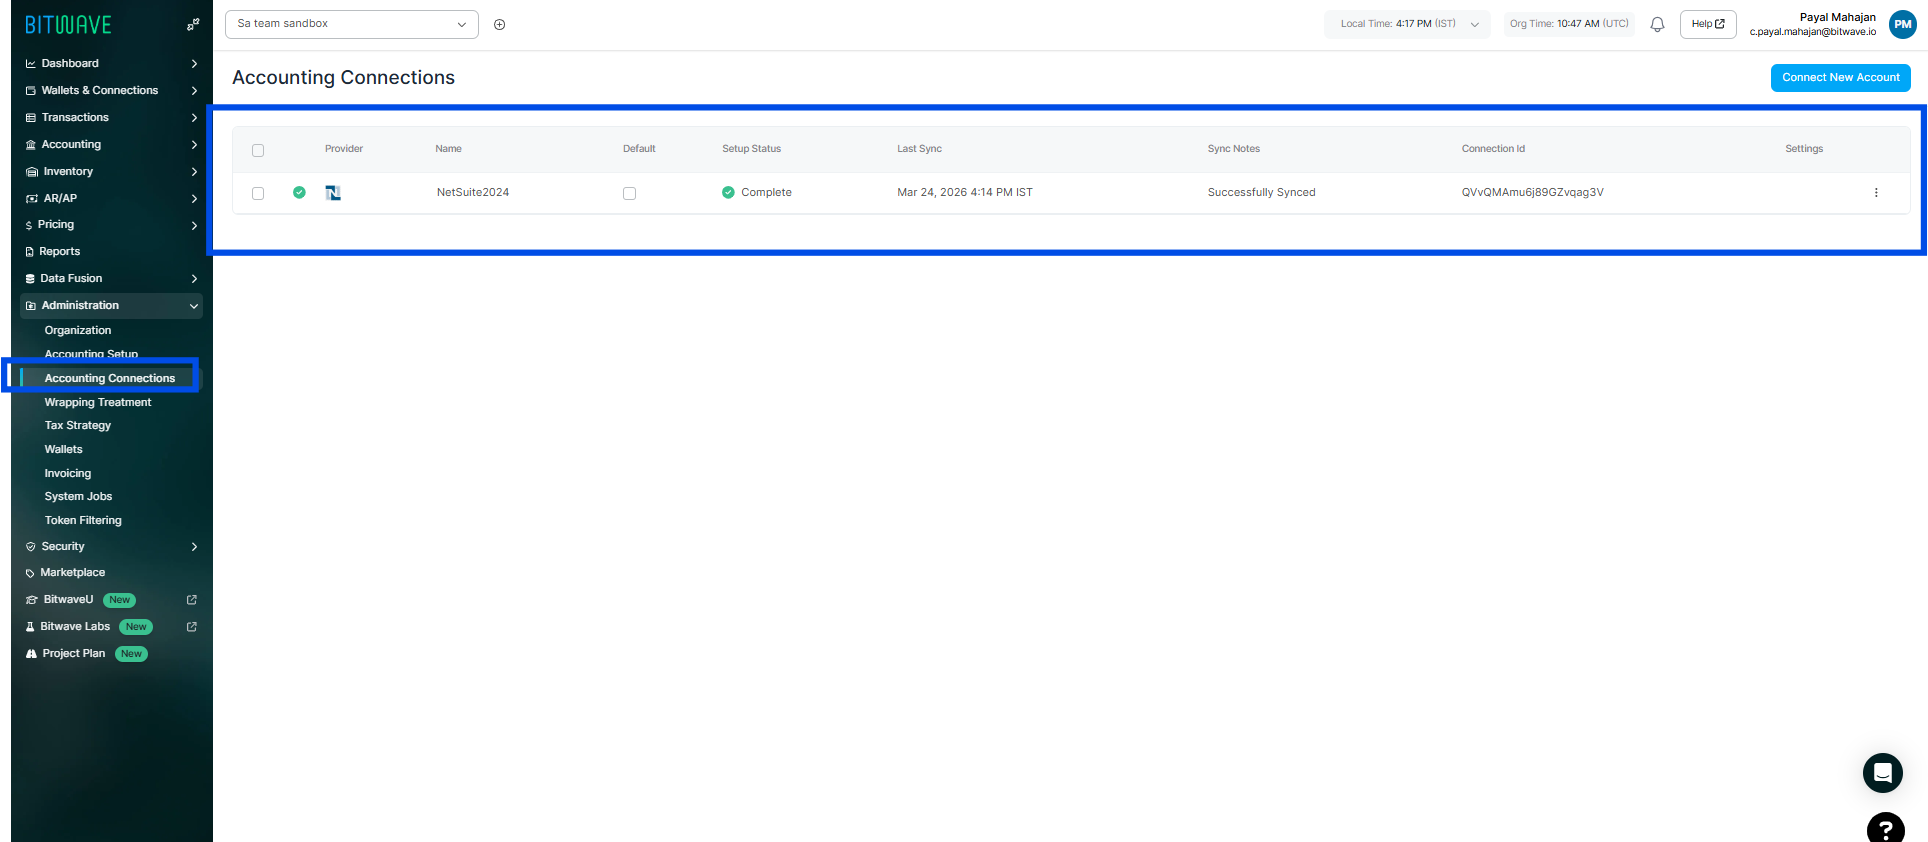
- In Bitwave, navigate to Administration > Accounting Connections
- Confirm NetSuite appears in the connection list
- Review the connection status - it should show as active or connected
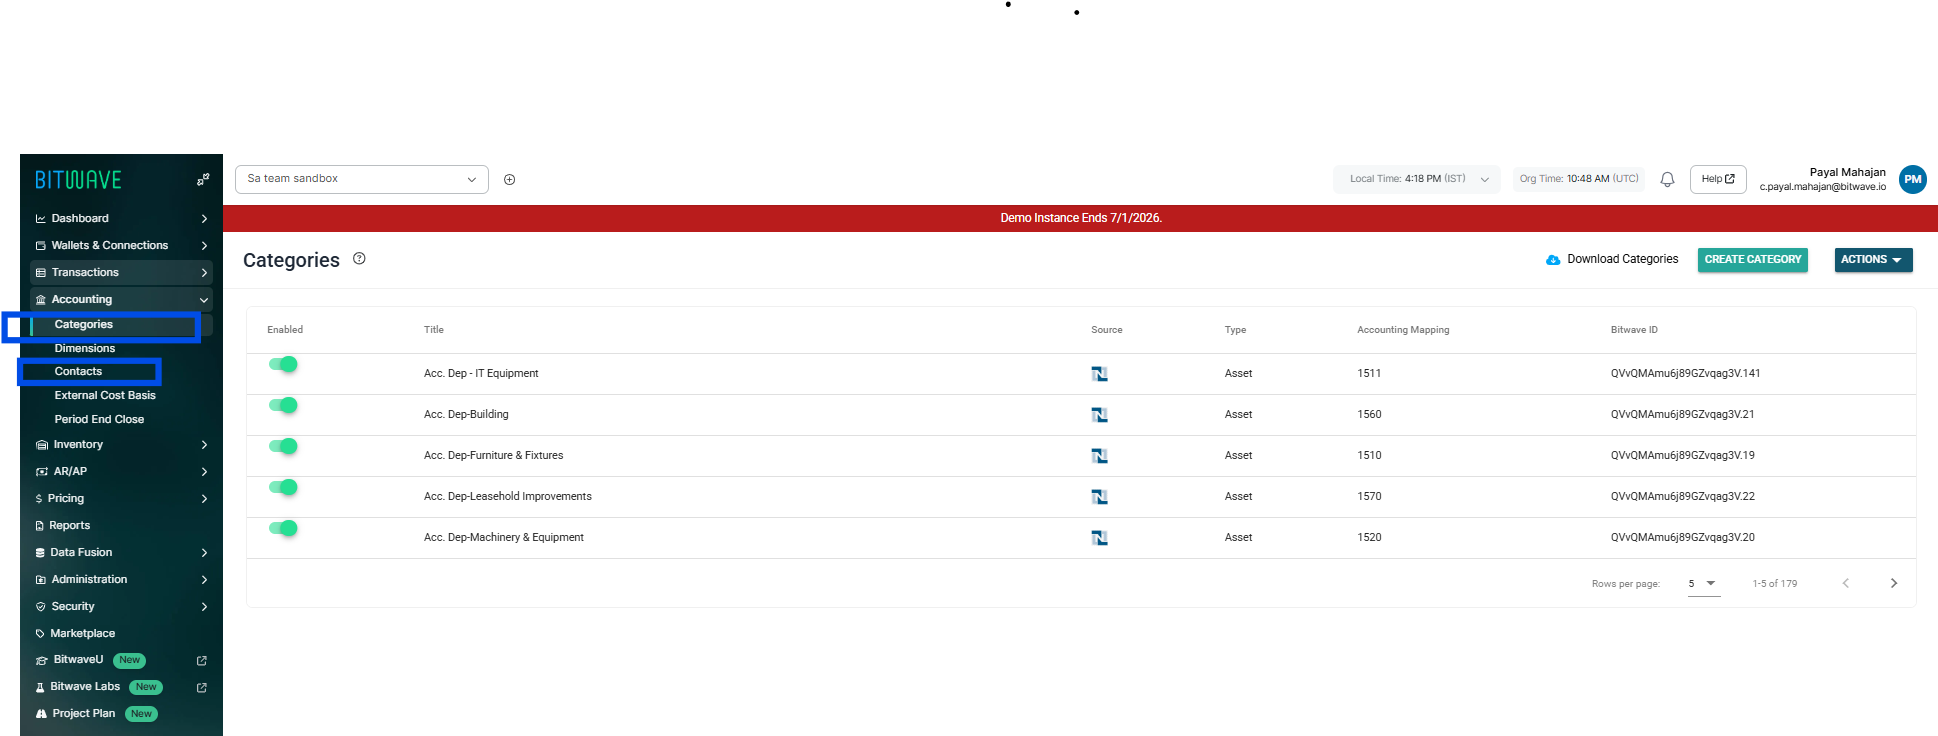
- Navigate to Accounting > Chart of Accounts and confirm your NetSuite accounts have synced as categories
- Generate a test journal entry or run a sync to confirm data is flowing correctly.
💡 If your chart of accounts does not appear in Bitwave after connecting, try refreshing the sync from the Accounting Connections page.
Troubleshooting
Authentication Failed
Possible causes:
- Token-Based Authentication is not enabled in NetSuite (Step 1)
- Credentials were copied with extra spaces or characters
- The wrong user or role was selected when creating the access token
- The Bitwave Role is missing required permissions
Solution: Reconnect NetSuite and confirm all credentials and permissions are correct.
Data Is Not Syncing
Possible causes:
- Digital asset or fee account codes are entered incorrectly in Bitwave
- The Subsidiary Internal ID does not match the subsidiary on the accounts
- Required account mappings are not configured
Solution: Review the Accounting Connections settings in Bitwave and confirm all required fields are configured.
Journal Entries Fail to Sync
Possible causes:
- The selected accounts do not exist in the NetSuite chart of accounts
- The Bitwave Role is missing FULL permission for required transaction types
- ERP dimensions such as subsidiary are missing from the configuration
Solution: Review the accounting configuration in Bitwave and confirm the correct accounts and permissions are in place.
Security Notes
Bitwave connects to NetSuite using Token-Based Authentication, which is the secure API authentication method supported by NetSuite.
- Only the permissions required for the integration are granted to the Bitwave Role
- The connection is used exclusively to sync accounting data and create journal entries in NetSuite
- Consumer Keys, Consumer Secrets, Token IDs and Token Secrets should be treated like passwords and never shared
- If any credentials are compromised, revoke the access token in NetSuite immediately and generate new credentials
💡 Bitwave does not store your NetSuite login credentials. All access is managed through the access token you created in Step 5.
Need More Help?
- Contact your bitwavesupport.io or use the in-app support chat if you run into any issues during setup.
Updated 3 months ago