
Add Coinbase Retail API
Customers should select CB Retail when trying to connect a Coinbase Business account
Step 1: Generate Your Keys
Step 2: Configure the API Keys
Step 3: Link Your Keys to Bitwave
Step 4: Success!
Step 1: Generate Your Keys
- Sign into your Coinbase Retail account and click on Profile.
- Navigate to your API settings.
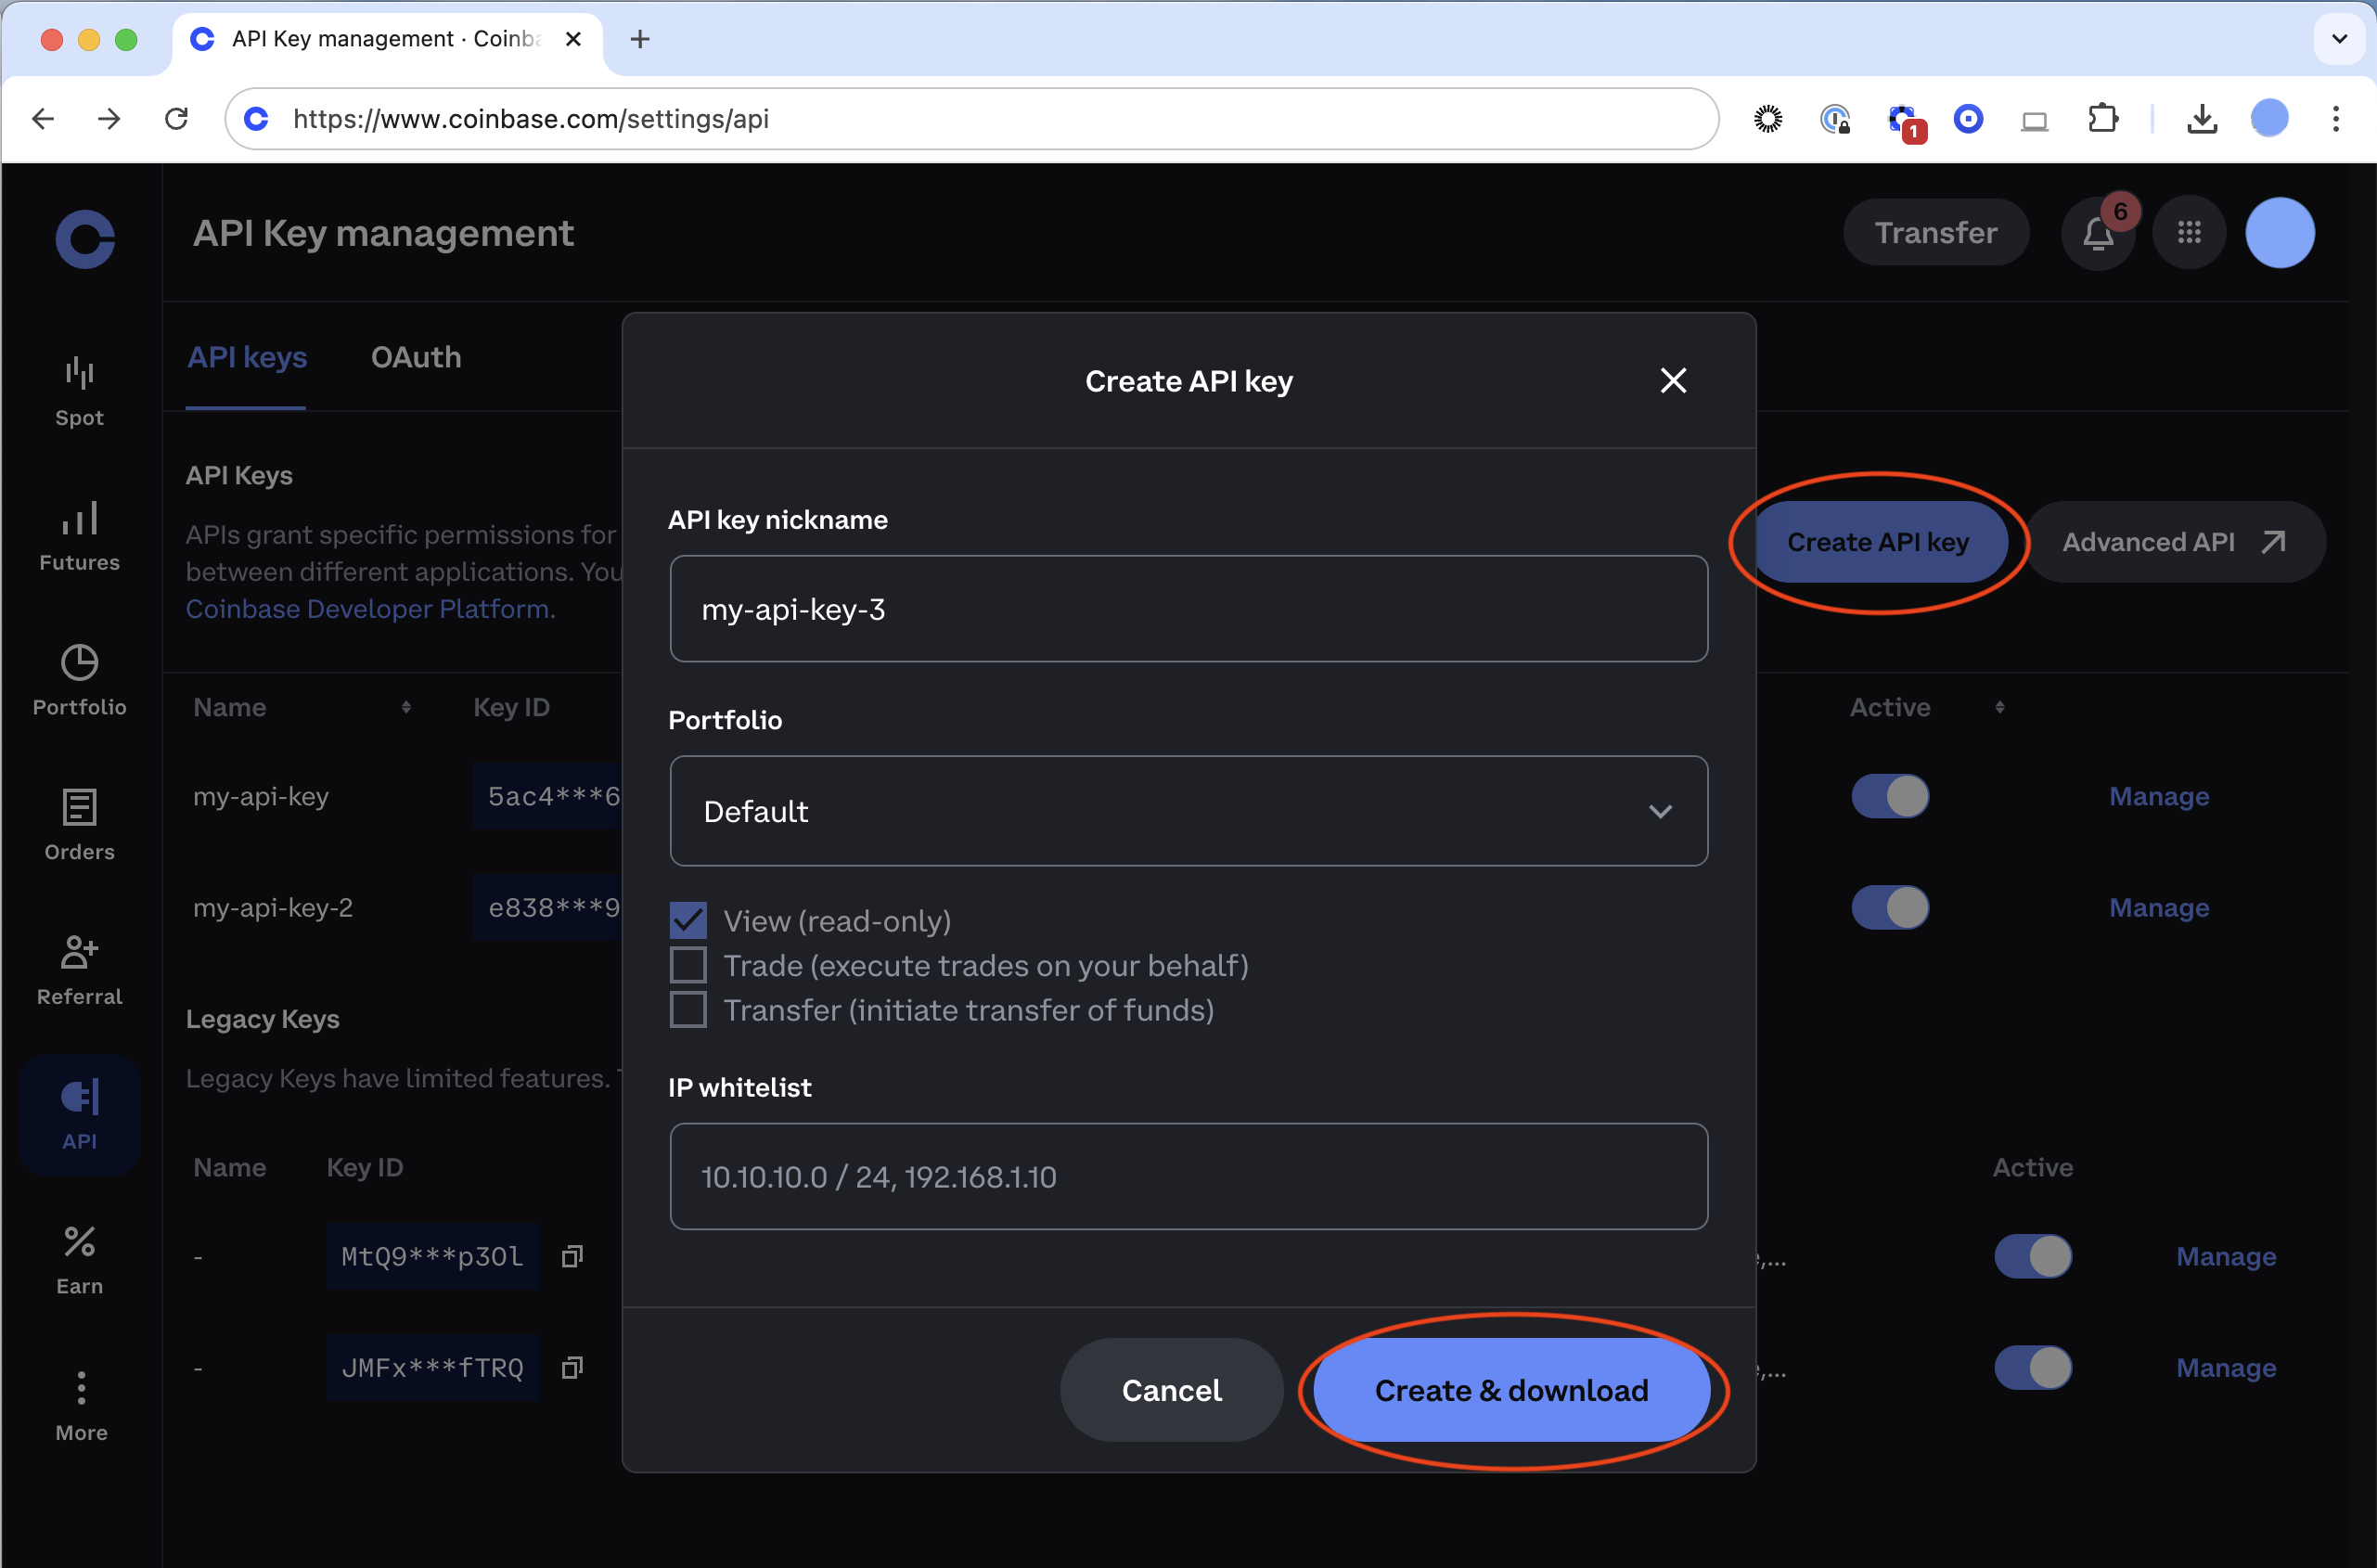
- Click the Create API key button.
- In the popup dialog configure:
• API key nickname
• Portfolio
• Permissions (editing this value prompts 2FA)
• IP allowlist
• ECDSA key type (Ed25519 is not yet supported) - Click Create & Download.
- Copy and secure your private/public key pair in a safe location.
- Click I've saved my key.
Step 2: Configure the API Keys
Compared to CDP API keys which follow ECDSA format and have the following characteristics:
- Key name is 64 characters long
- Key secret is 128 characters long
Here is what Coinbase will output on the website:
Example CDP key name:
organizations/8f1ac569-ed29-48ae-b989-6798a975afab/apiKeys/87d98ae9-f31f-42ee-9b69-723d3ff9dd77
Example CDP key secret:
-----BEGIN EC PRIVATE KEY-----\nMHcCAQEEIJsB+NpntMgnAHSo16vS6ies3V6nu/liXhPMd7s7+lZ6oAoGCCqGSM49\nAwEHoUQDQgAEs0MXQHmufOeRPhjeJOkyNPJjaZv.....................Zb5S\nFBoh2Je3Rkj3do3+CU6OVOI7MzXPCX33NQ==\n-----END EC PRIVATE KEY-----\n
Step 3: Link Your Keys to Bitwave
- Sign into your Bitwave account and click on the Wallets & Connections Tab
- Navigate to Connections within Wallets & Connections
- Click the Connect New Account button on top-left
- Select Coinbase Retail
- Fill in the following to Bitwave:
a. API Key: This will be your CDP key name as explained above.
b. Private Key: This will be your CDP key secret and all the \n should be removed while validating/adding the private key.
Here is how that should be plugged into Bitwave.
Bitwave API key name:
organizations/8f1ac569-ed29-48ae-b989-6798a975afab/apiKeys/87d98ae9-f31f-42ee-9b69-723d3ff9dd77
Bitwave Private key:
-----BEGIN EC PRIVATE KEY-----MHcCAQEEIJsB+NpntMgnAHSo16vS6ies3V6nu/liXhPMd7s7+lZ6oAoGCCqGSM49AwEHoUQDQgAEs0MXQHmufOeRPhjeJOkyNPJjaZv.....................Zb5SFBoh2Je3Rkj3do3+CU6OVOI7MzXPCX33NQ==-----END EC PRIVATE KEY-----
c. Exchange Contact
i. This is usually a contact from your ERP software
ii. If you aren't using an ERP integration, you can create one in Company > Contacts > Create Contact
iii. You must use distinct values for Remote ID
Step 4: Success!
Be sure to click on the Sync button and our system will begin to sync over your transaction history. This can take up-to 24 hours.
Bitwave can hide unused Coinbase wallets after they have been loaded in. If this is something you would be interested in then simply inform your Bitwave representative with a list of the wallets to be hidden.
Updated 10 months ago