Add Binance API
Step 1: Generate Your Keys
Step 2: Confirm Your Request
Step 3: Link Your Keys to Bitwave
Step 4: Success!
Step 1: Generate Your Keys
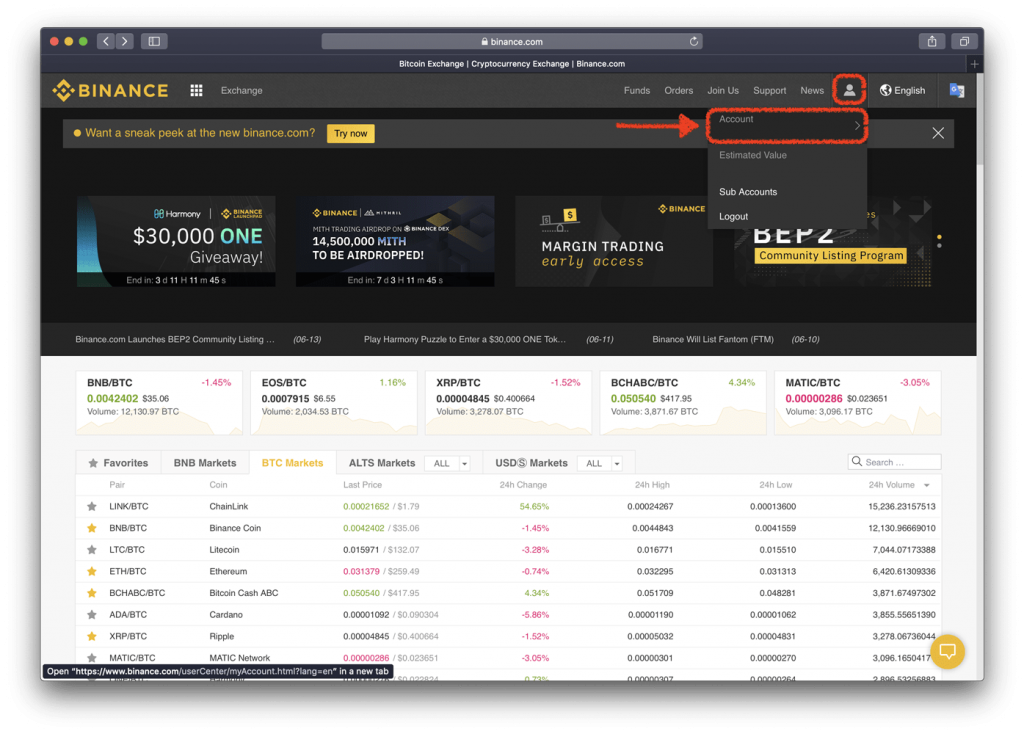
- Sign into your Binance account and click on Account
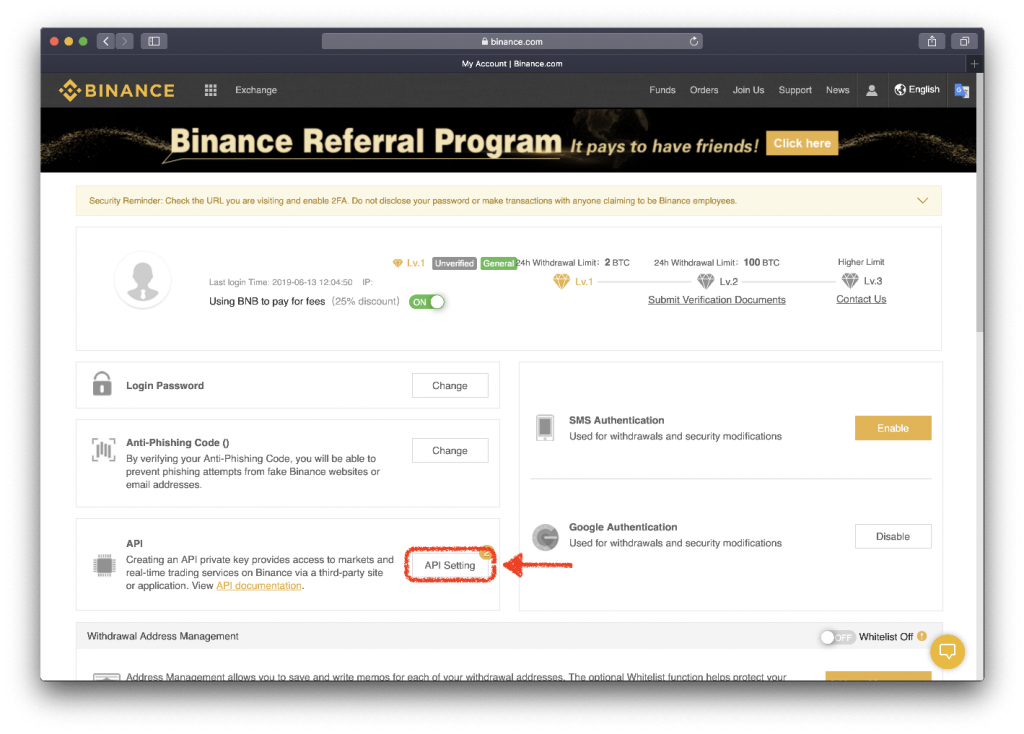
- Click on API Settings
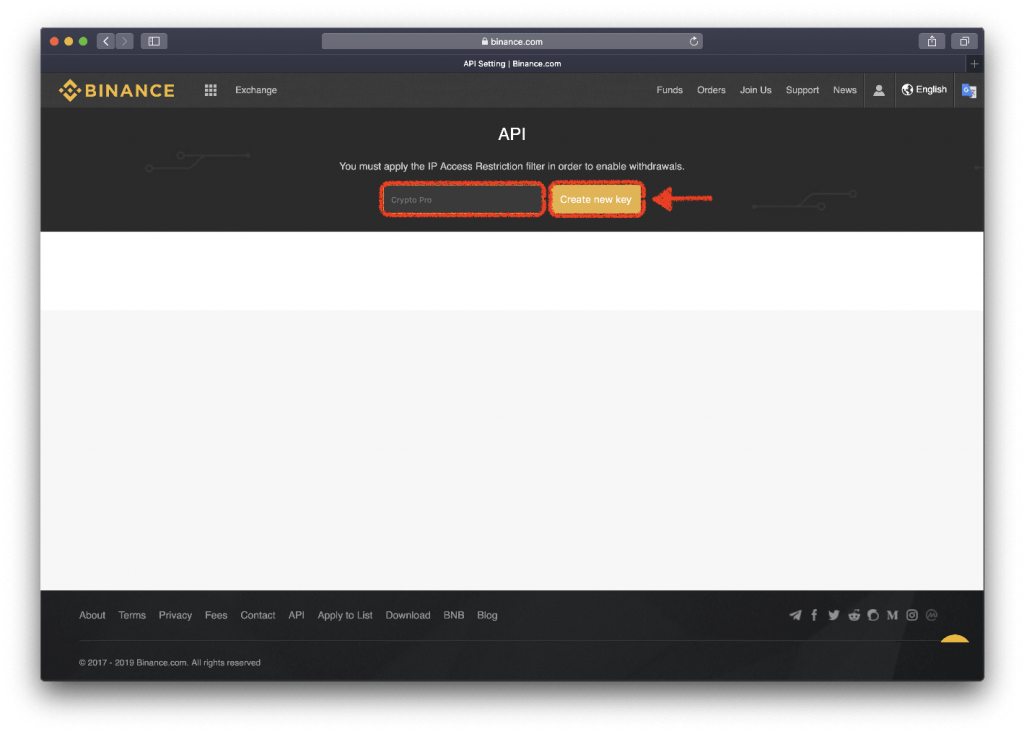
- Type a name for your Key. In this example, we are linking it to the Bitwave App so the name Bitwave is appropriate. Then click on Generate Key
Step 2: Confirm Your Request
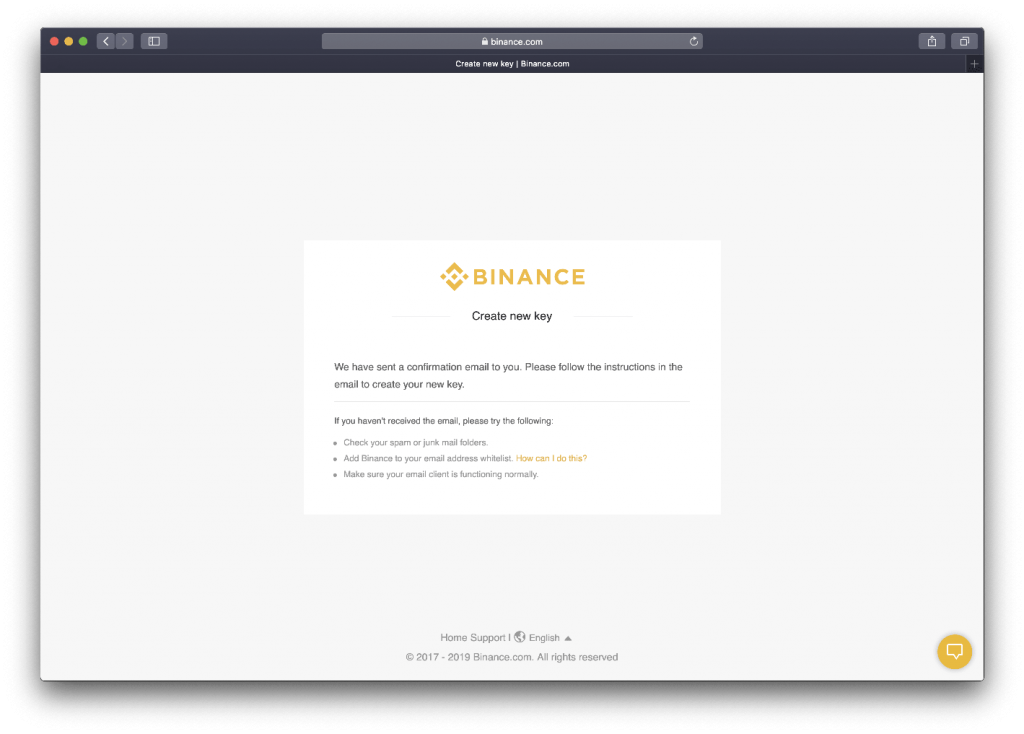
- You should now see a message letting you know that a confirmation email has been sent out.
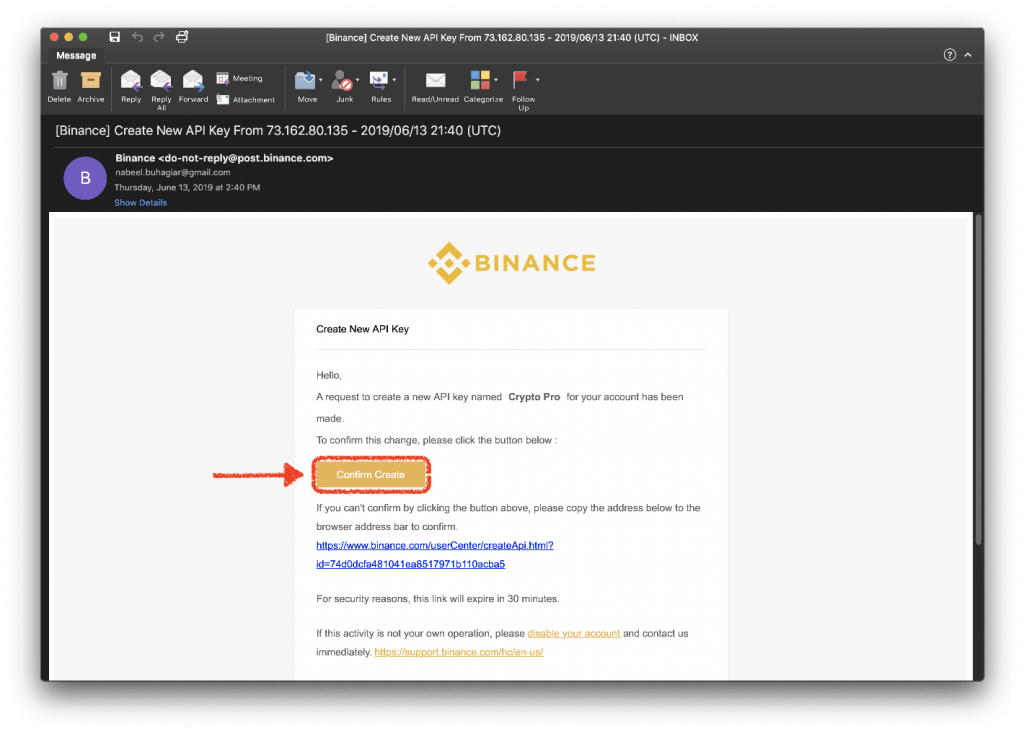
- Check your email address. Binance sends a confirmation email for security purposes. It will be titled: eate New Create New API Key. Open it and click on Confirm Key. Keep in mind that you have 30 minutes to confirm before the link expires. This is a security measure set by Binance.
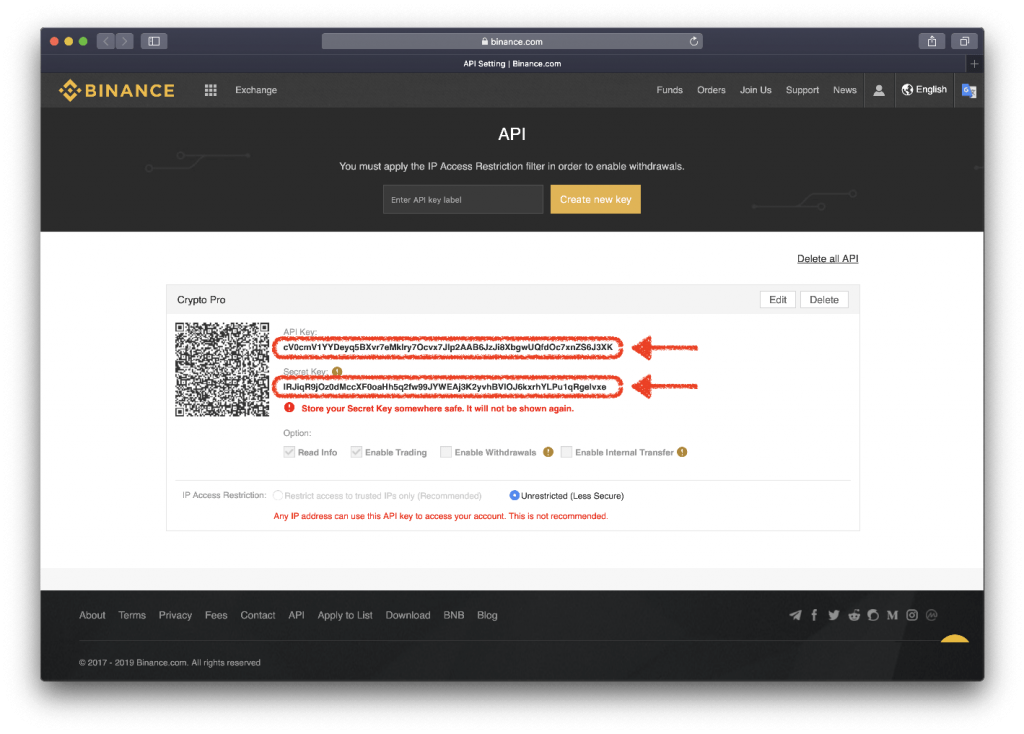
- The link will take you back to Binance and you will be able to see both the API Key and the Secret Key you just generated.
Step 3: Link Your Keys to Bitwave
- Sign into your Bitwave account and click on the Organization Tab
- Navigate to the Connections tab within Organization
- Click the Connect New Account button on top-left
- Select Binance
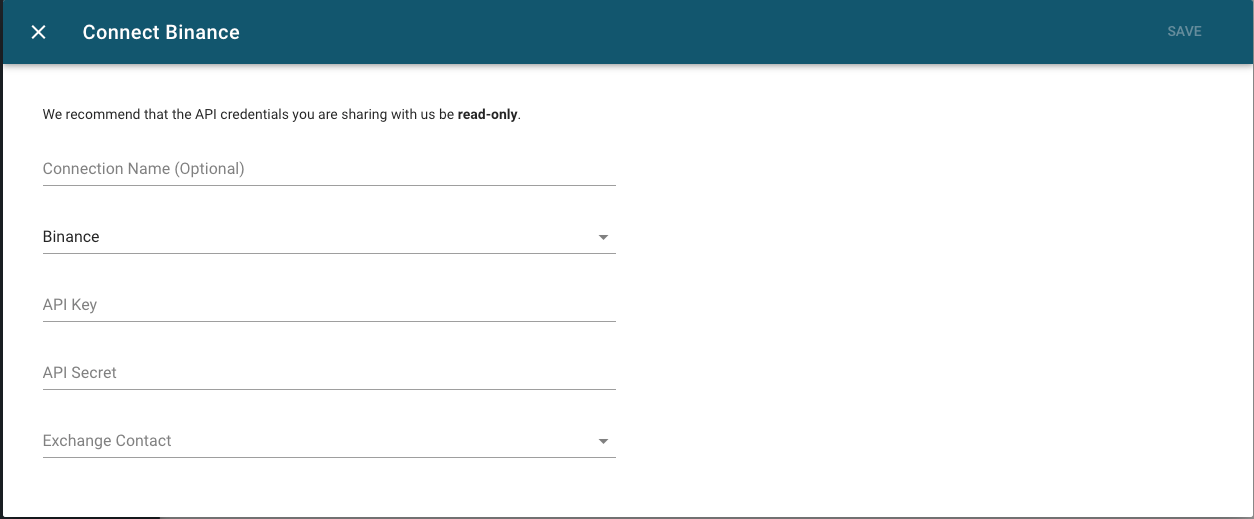
- Fill in the following to Bitwave:
a. Connection Name (Optional)
b. API Key
c. API Secret
d. Exchange Contact
i. This is usually a contact from your ERP software
ii. If you aren't using an ERP integration, you can create one in Company > Contacts > Create Contact
1. You must use distinct values for Remote ID
Step 4: Success!
Be sure to click on the Sync button and our system will begin to sync over your transaction history. This can take up-to 24 hours.
Please note: the above is for Binance - if you are using [Binance.us**](http://Binance.us) there is a video below showing how to create the API. The secret API key is masked in the video as the email was opened in a different tab.
[https://www.loom.com/share/0305dc58807b4fef82efa547e43a7f67]
([https://www.loom.com/share/0305dc58807b4fef82efa547e43a7f67])
Updated 5 months ago
