Add Coinbase Prime/Exchange API
How to setup Coinbase Prime/Exchange API Keys
Step 1: Generate Your Keys
Sign into your Coinbase Pro account and click on your username, then click on API
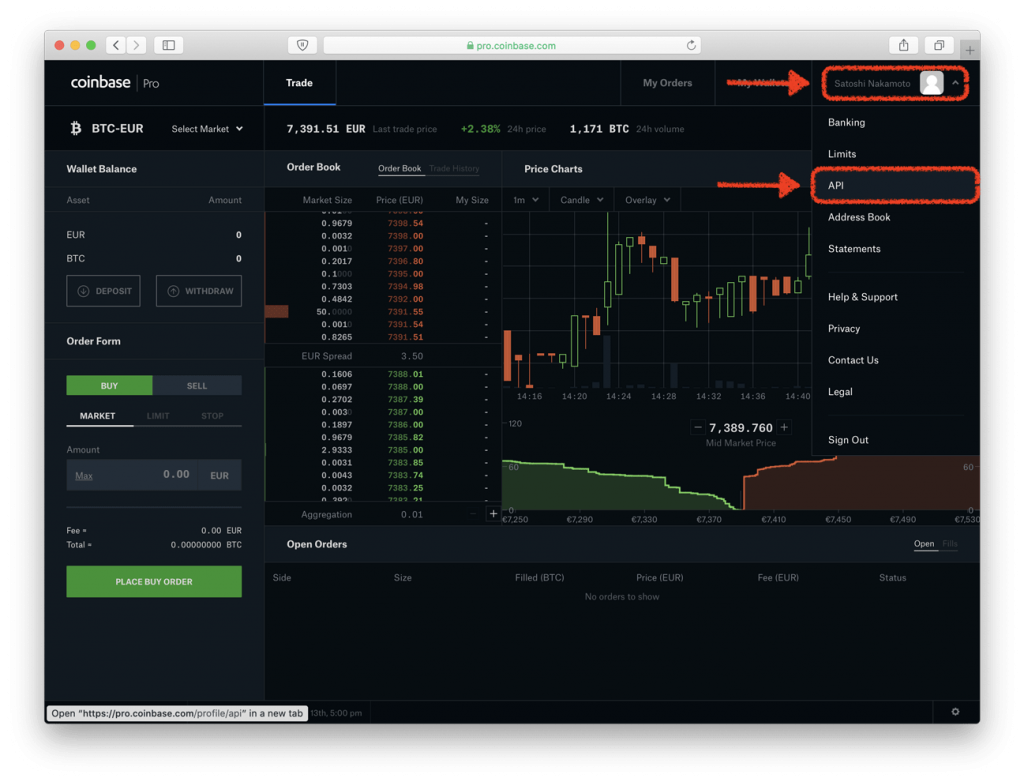
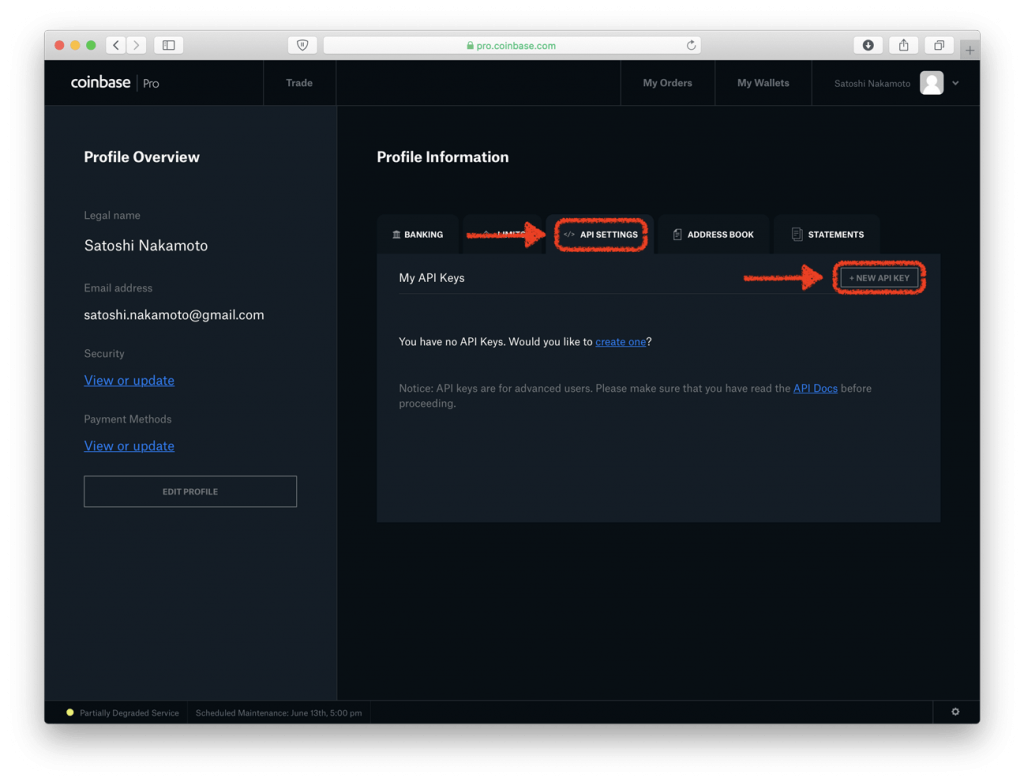
Make sure you are on the API Setting tab, then click on New API Key
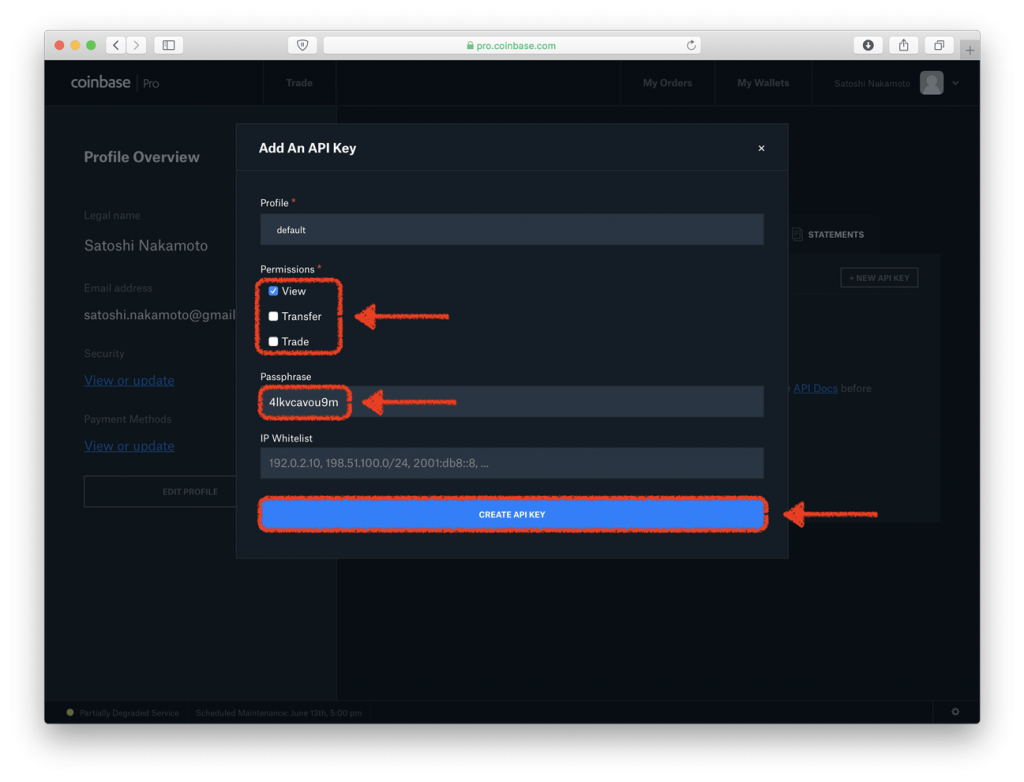
Tick the View box under permissions and then save the Passphrase. You will need to use that later when linking your Bitwave organization. Click on Create Key
Step 2: Save Your Keys
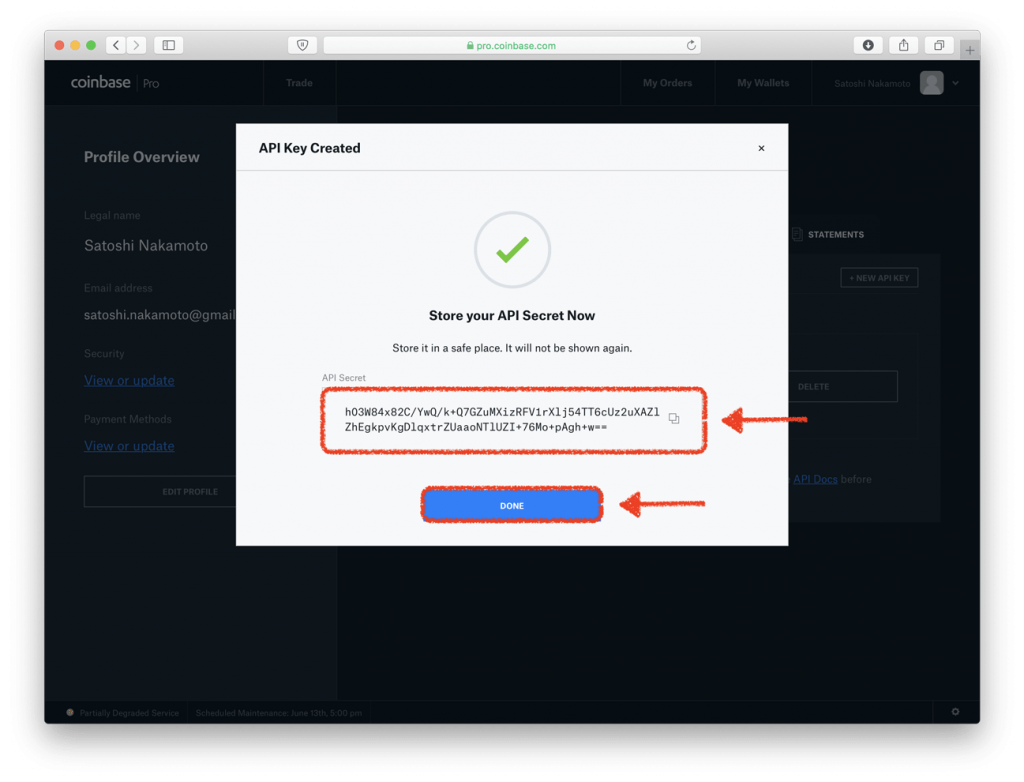
After clicking on Create Key, a new window will appear showing your API Secret Key. Save this Key, then click Done
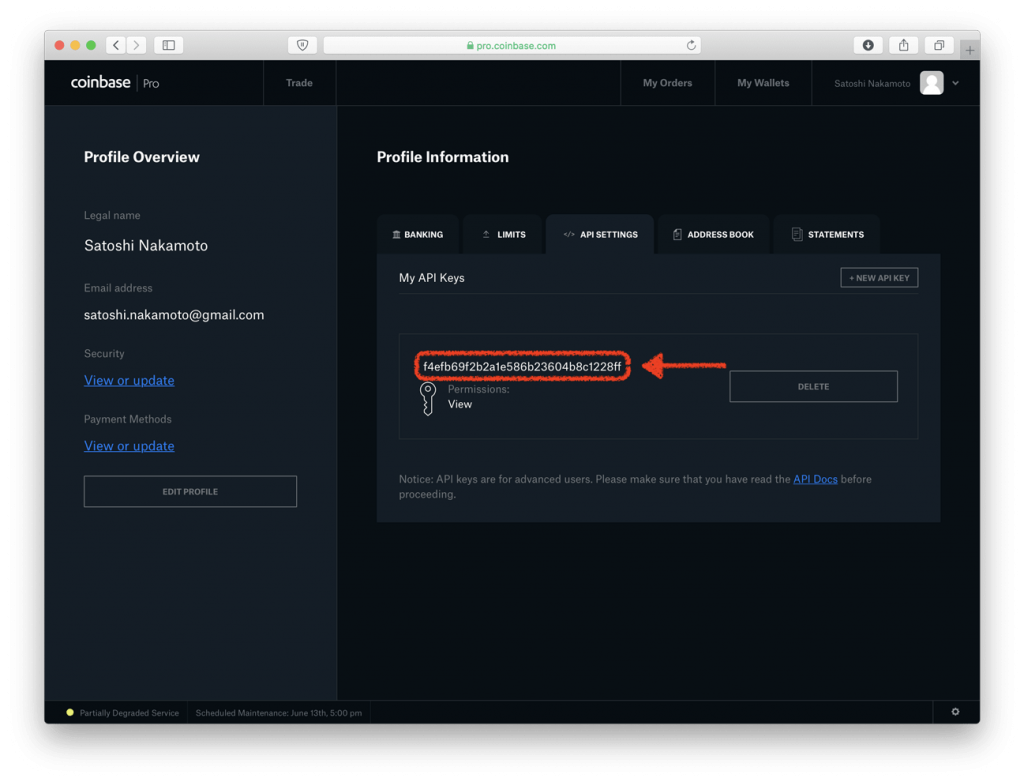
After hitting Done, the API Settings tab will appear once again. This time, however, there will be a new API Key in your list. The Key highlighted in red is your API Key
Step 3: Link Your Keys to Bitwave
- Sign into your Bitwave account and click on the Organization Tab
- Navigate to the Connections tab within Organization
- Click the Connect New Account button on top-left
- Select Coinbase Pro/Prime
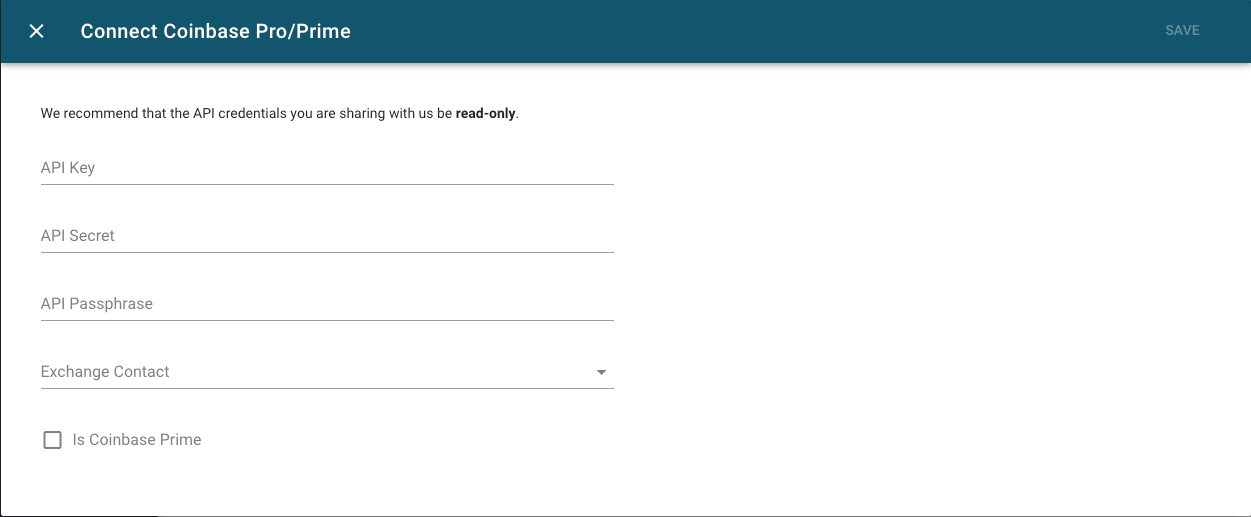
- Fill in the following to Bitwave:
- API Key
- API Secret
- API Passphrase
- Exchange Contact
- This is usually a contact from your ERP software
- If you aren't using an ERP integration, you can create one in Company > Contacts > Create Contact
- You must use distinct values for Remote ID
Step 4: Success!
Be sure to click on the Sync button and our system will begin to sync over your transaction history. This can take up-to 24 hours.
How to Update Your Coinbase Prime/Exchange Connection Keys
Step 1: Navigate to Wallets & Connections > Connections
Step 2: Select "Update Credentials"

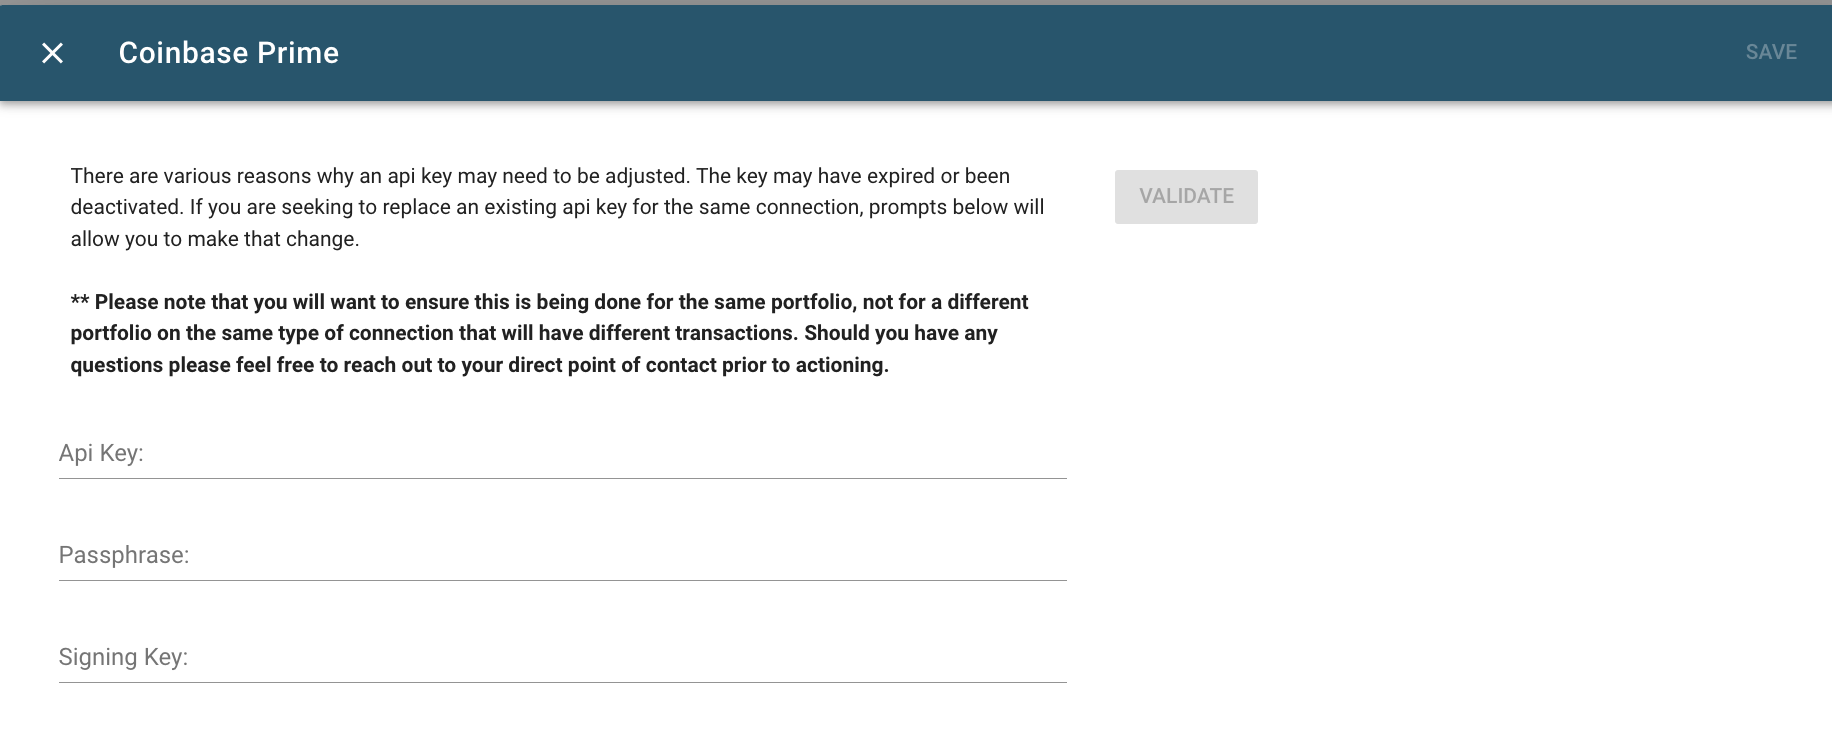
Step 3: Obtain the following fields from your Coinbase Prime or Coinbase Exchange account
- API Key: Follow Step 1 from the previous section
- Passphrase: Follow Step 1 from the previous section
- Signing Key: Follow Step 2 from the previous section
Step 4: Select SAVE. Success!
Updated 5 months ago
