
Setup Inventory Views
How To Set Up an Inventory View
- Create your first inventory view, by going to the “Inventory” menu, click “View”, and click “Create View”. Select your picking strategy, whether to capitalize fees, and whether enable impairment. Lastly, give your view a name, hit SAVE, and you’re off to the races!
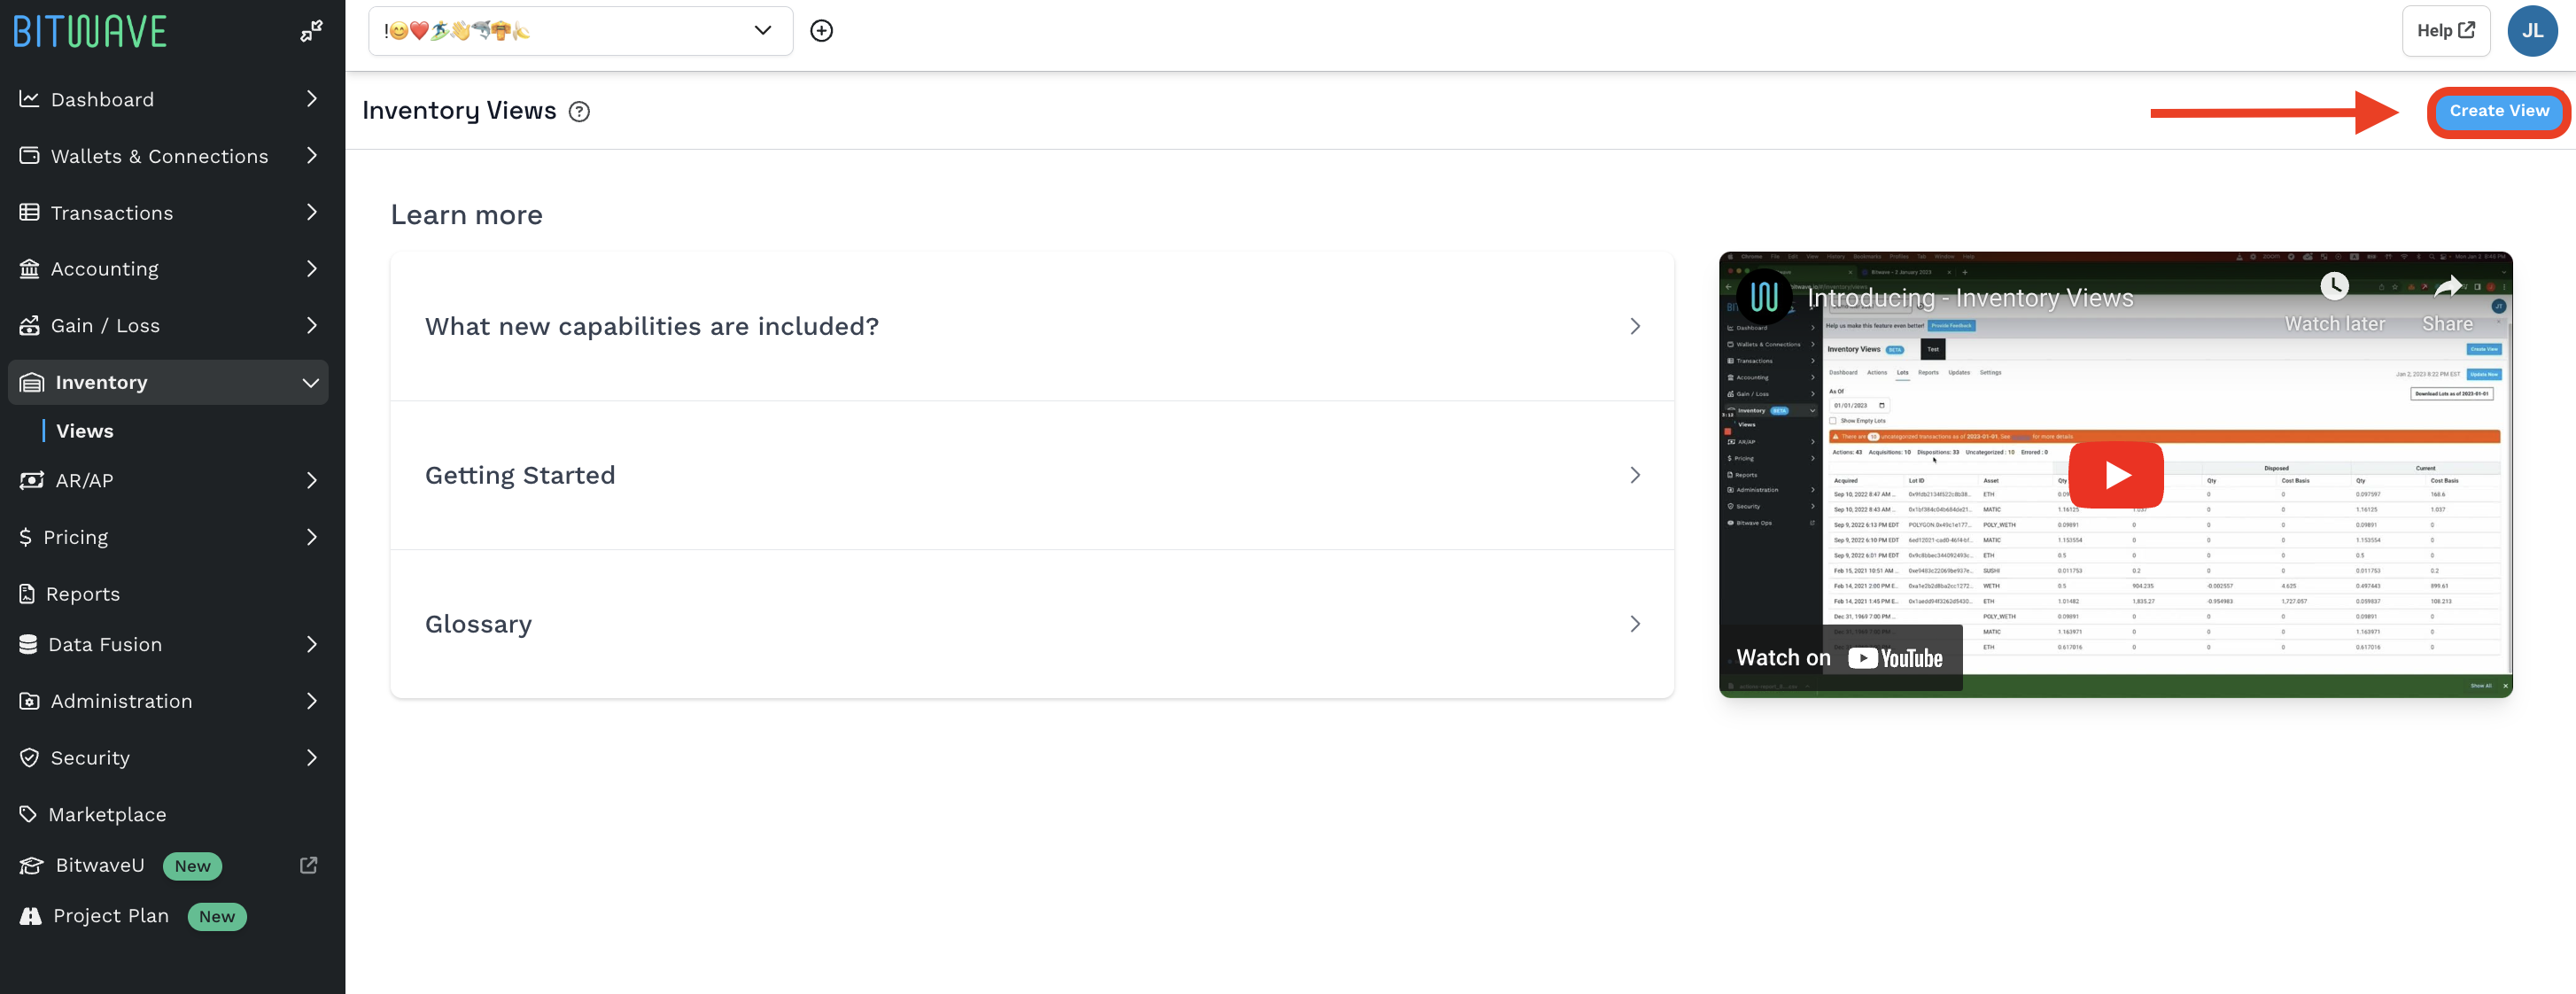
Note: All Bitwave licenses include the ability to create one view, additional views require the purchase of an upgraded license, contact [email protected] for more information on creating additional views.
-
Configure Settings According to Preferred Accounting Treatments
Available Configuration Settings
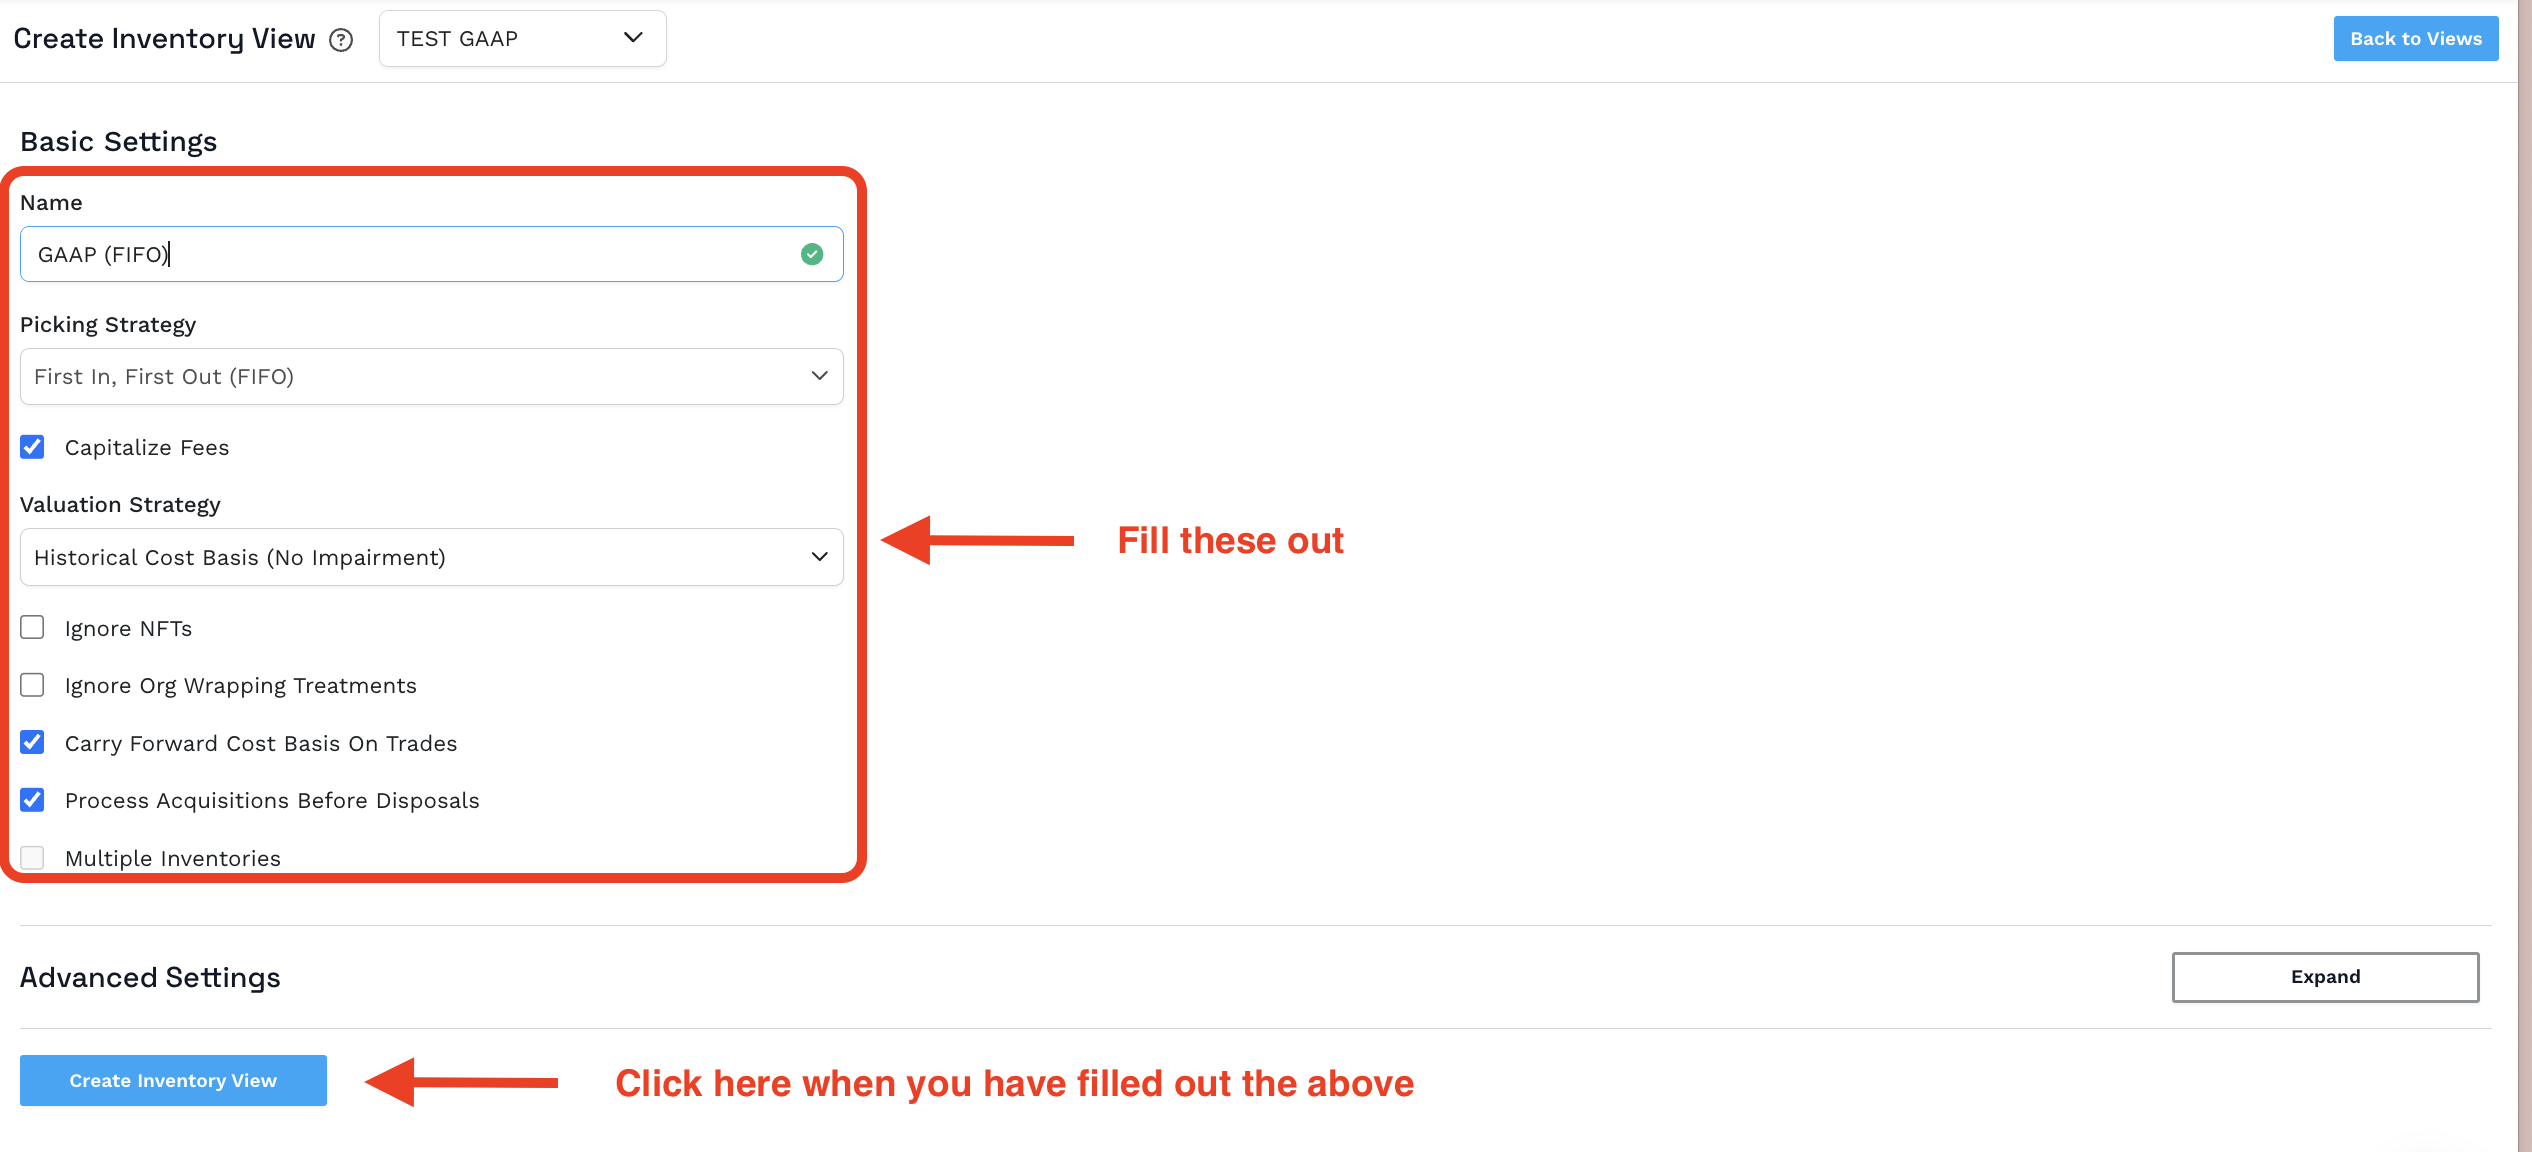
Once in the Create New View screen (with Advanced Settings expanded and v2.8 selected for maximum options), configure the following:
Name
Enter a descriptive name for your view (e.g., "GAAP Books", "IFRS Books", or "Tax Books"). This appears in the selection menu when choosing views. Minimum 3 characters required.
Picking Strategy
This determines how Bitwave selects lots for disposals. Options include:
-
FIFO (First In, First Out): Disposes the oldest lot first (based on acquisition date).
-
LIFO (Last In, First Out): Disposes the newest lot first.
-
Cost Average: Calculates an average cost basis across all lots of the asset, without tracking individual lots.
-
Specific Identification: Allows custom prioritization for outcomes like tax optimization. When selected, a "Priority and Spending Strategy" option appears:
-
Set priorities (e.g., Short-Term Loss first, then Long-Term Loss, Long-Term Gain, Short-Term Gain).
-
For each, choose to Maximize (e.g., largest loss) or Minimize (e.g., smallest gain).
-
This is similar to HIFO (Highest In, First Out) but with short/long-term layering.
- Balance Only: Limited mode for tracking quantities per wallet; not for gain/loss calculations. Use sparingly.
Note: In Engine Version v1.3, fewer options like Specific Identification and Balance Only may not be available. Switch to v2.8 for full access.
Subsidiaries
Select from available options in the dropdown to associate the view with specific subsidiaries (if applicable to your organization).
Capitalized Fees
Unchecked (Default): Expenses fees immediately (debit to expense account, credit to asset account).
Checked: Adds fee value to the acquired asset's cost basis (capitalizes it, deferring expense until disposal).
Note: This option appears in v2.8 configurations.
Valuation Strategy
Defines how asset values are adjusted:
-
Historical Cost Basis, No Impairment: Uses original cost basis only; no adjustments.
-
Mark to Market and F&B Rollback: Full fair value adjustments to match market prices (e.g., upward from $5,000 to $15,000).
-
GAAP Impairment: Writes down if value drops below cost; no recovery if price rises.
-
IFRS Impairment: Writes down with recovery allowed up to original cost basis.
-
IFRS Impairment Revalued: Like IFRS Impairment but allows adjustments above cost basis.
-
GAAP Fair Value: Tracks unrealized gains/losses without changing underlying cost basis for disposals.
Additional options:
-
Click to add asset-specific strategies (e.g., apply GAAP Impairment to one token while using GAAP Fair Value overall).
-
Frequency and Pricing: Choose daily, monthly, or yearly adjustments based on close, low, or open prices.
Note: This section is available in v2.8; it may not appear in v1.3 as shown in the screenshot.
Advanced Checkboxes
Fine-tune calculations with these options (visible in Basic Settings):
-
Ignore NFTs: Skips NFTs for faster processing (useful for high-volume users).
-
Ignore Org Wrapping Treatments: Bypasses pre-set asset pairs (e.g., treat wrapped assets as distinct, calculating gains/losses). "Org" refers to organization-level wrapping treatments set in Administration.
-
Use Acquired Asset Price To Value Trades: Prices trades using the incoming asset's fair market value (default: uses disposed asset).
-
Process Acquisitions Before Disposals When Multiple Transactions Share A Timestamp: Ensures inflows are handled first for same-timestamp transactions (default: checked; prevents errors like disposing non-existent lots).
-
Keep Original Acquisition Date For Cross Inventory Transfers: Preserves the original date when transferring between inventories (e.g., wallets).
-
Include Intra Inventory Group Internal Transfers: Includes transfers within the same inventory in reports (unchecked: excludes them).
-
Use View For Reallocation: For specific IRS RevProc use (reallocate cost basis as of 01/01/2025); consult Bitwave support. As of July 21, 2025, this is now applicable.
-
Multiple Inventories: Enables tracking by:
-
Per Wallet: Each wallet as a separate inventory.
-
Inventory Groups: Custom groups of wallets (set up in Administration menu; select from dropdown).
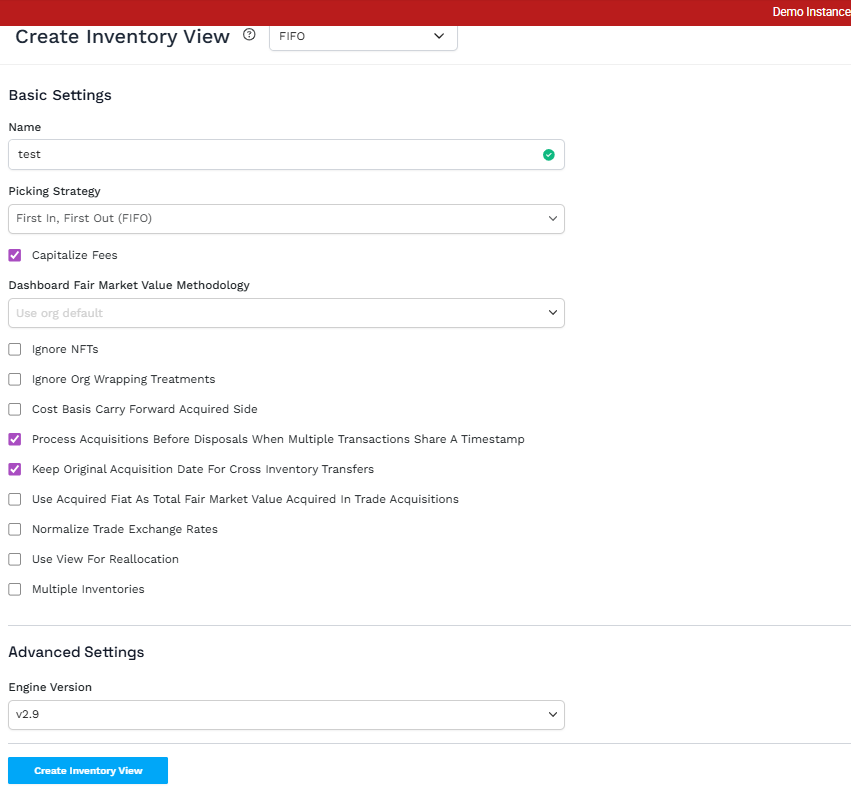
Advanced Settings - Engine Version
Version 2.9 or later must be selected when using multiple inventories, GAAP Fair Value, or any IFRS valuation methodologies.
Click Expand in the Advanced Setting to view/edit the Engine Version
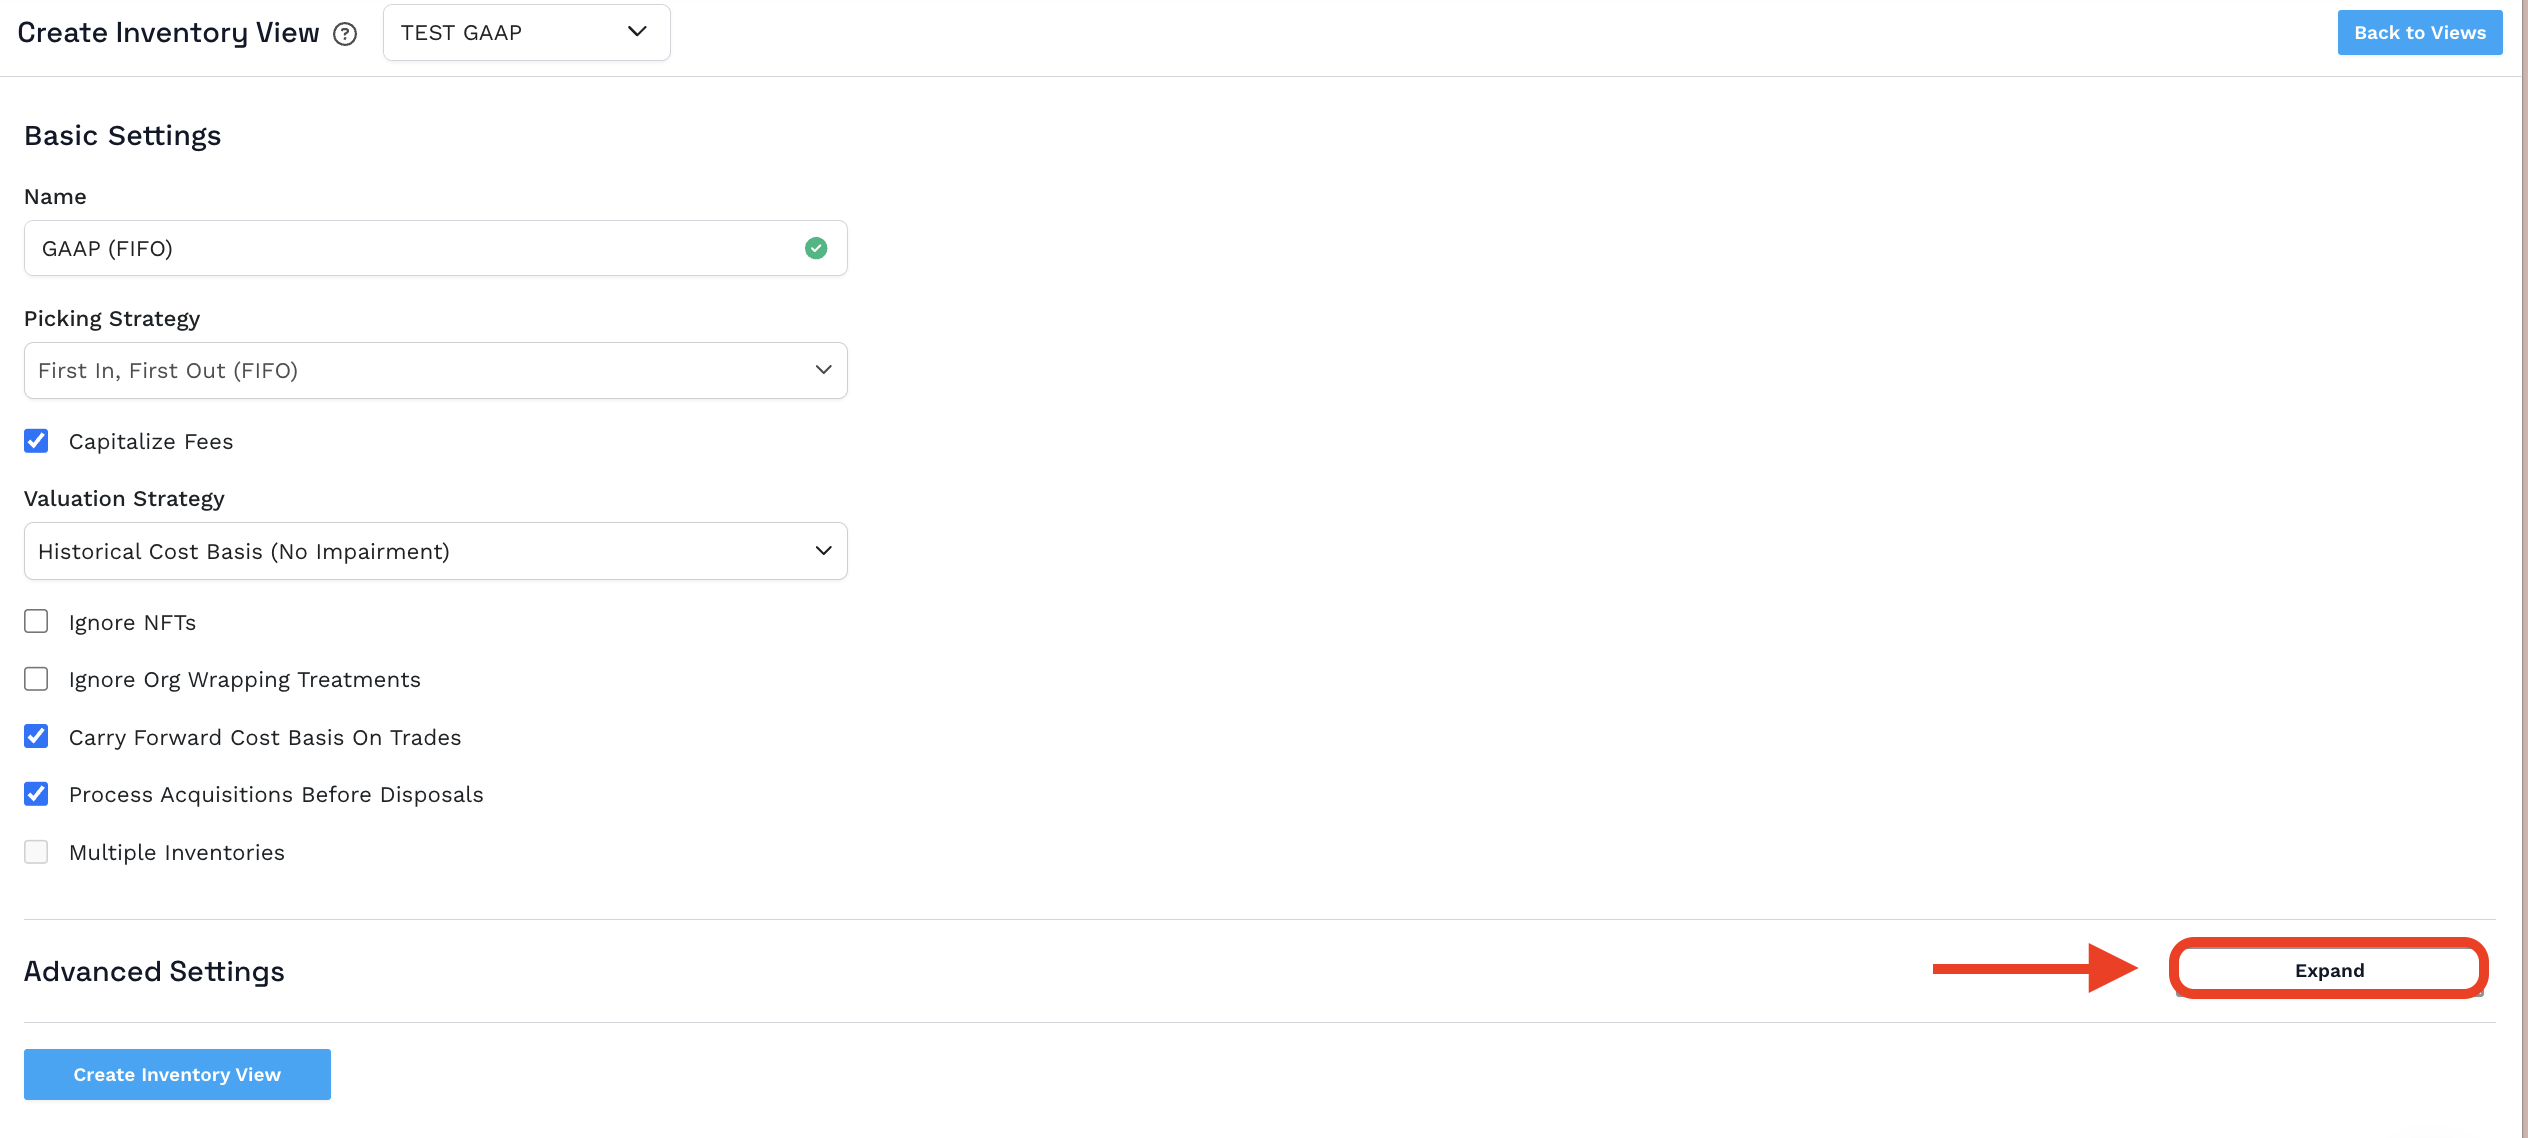
Choose the desired Engine Version in the dropdown menu and click collapse when finished.
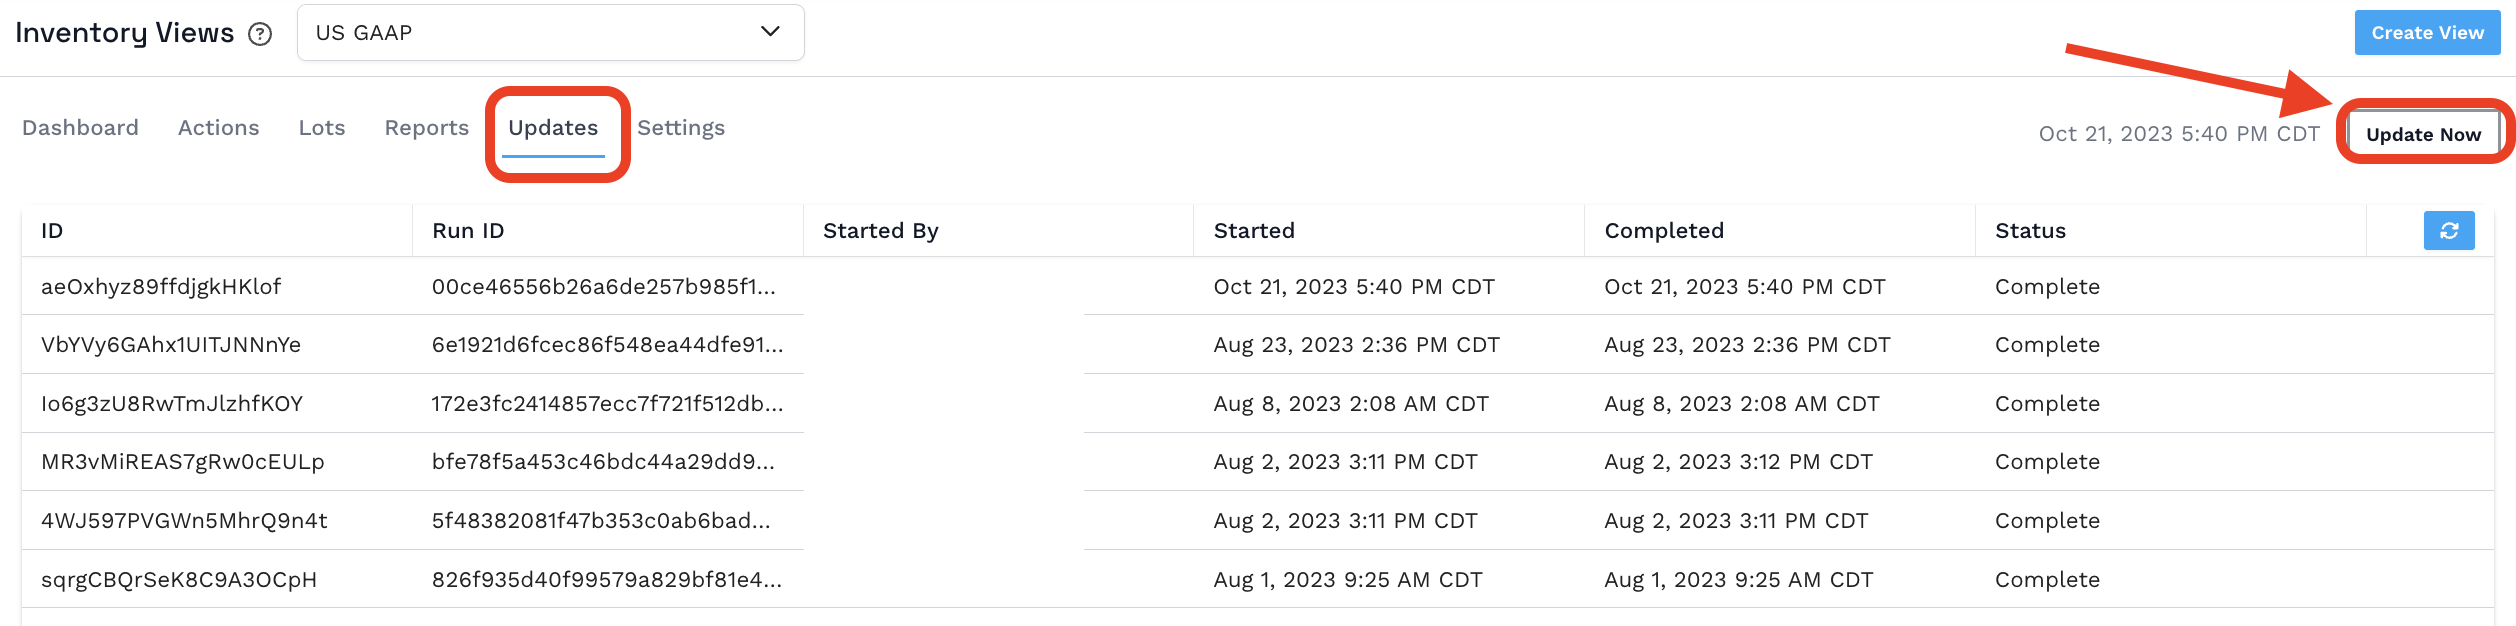
Running Updates
Once an inventory view has been created, you can use the “as of” option to view the inventory information as of a particular date, or bring the view to today’s date by clicking the “Update Now” button.
To run an update, go to the Updates tab within Inventory Views (Left Menu -> Inventory Views -> Update Tab) and click the Update Now button.
-
Start with v2.8 for maximum flexibility—refer to the screenshot for v1.3 layout and upgrade as needed.
-
Test views with sample data to verify gain/loss calculations.
-
For tax optimization, use Specific Identification with priorities like maximizing losses first.
-
If using multiple inventories, ensure wrapping treatments align with your needs.
-
Contact Bitwave support for complex setups like reallocation or inventory groups.
Note that an update must be run for Inventory Views reporting to reflect any changes to transactions or categorization since the last update.
Updated about 2 months ago